
Updated on September 21, 2026
How to access Ubyquo from a new computer
Connect a new computer to the server's shared folder and create a shortcut to UbyquoNet.exe.
To access Ubyquo from a new computer, you need to connect the computer to the server's shared folder and create a shortcut to UbyquoNet.exe.
Connect the computer to the server
Open File Explorer
Open Windows File Explorer from the taskbar or from any folder.

Go to the server address
In the File Explorer address bar, enter the address of the server where Ubyquo is installed.
For example:
\\SERVIDOR
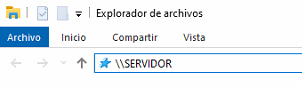
Press Enter to access the server's shared folders.
Map a network drive
To make access to the server easier:
- Right-click This PC in the left pane of File Explorer.
- Select Map network drive.
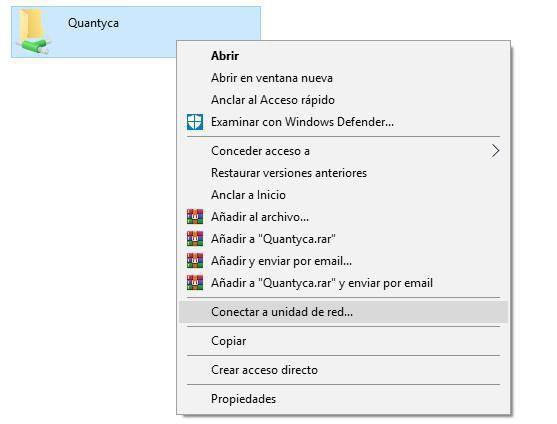
Select the drive and the Ubyquo folder
In the Map network drive window:
- Choose a letter for the network drive. We recommend using Q: or U:.
- Enter or select the server path.
- Go to the shared folders and select the Ubyquo folder.
- Confirm the connection.
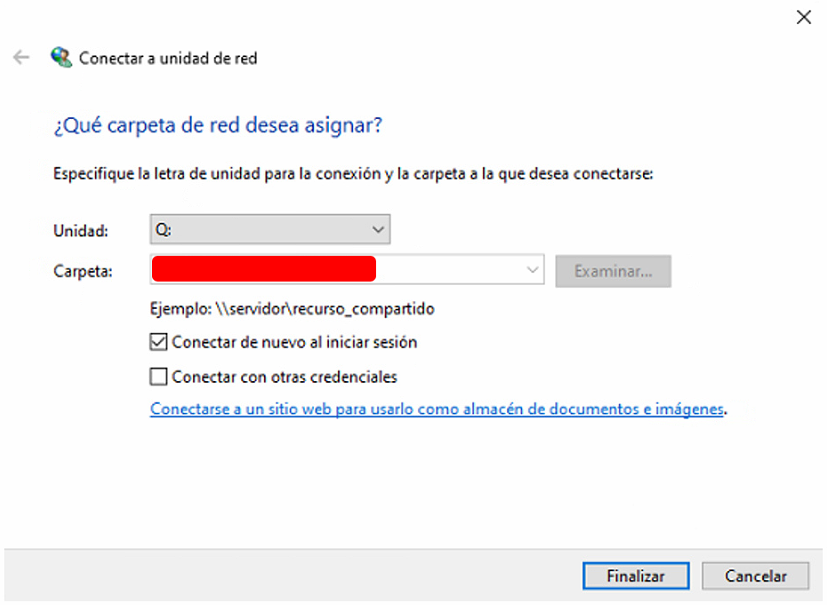
Create a shortcut to Ubyquo
Once the network drive is connected, you can create a shortcut to open Ubyquo directly from the desktop.
Create the UbyquoNet shortcut
- Open the Ubyquo folder from the network drive.
- Find the UbyquoNet.exe file.
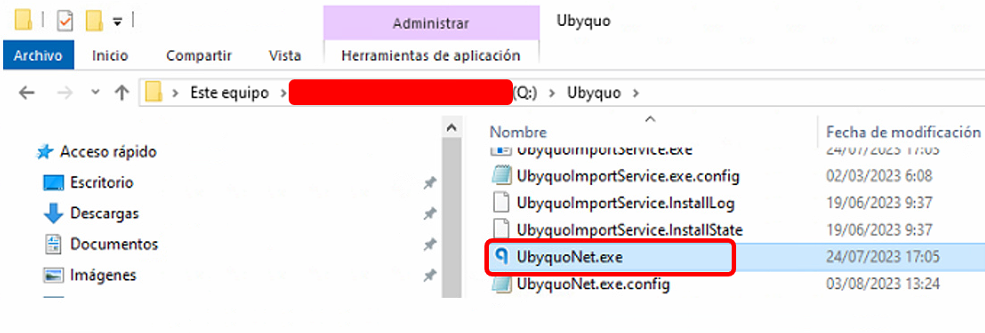
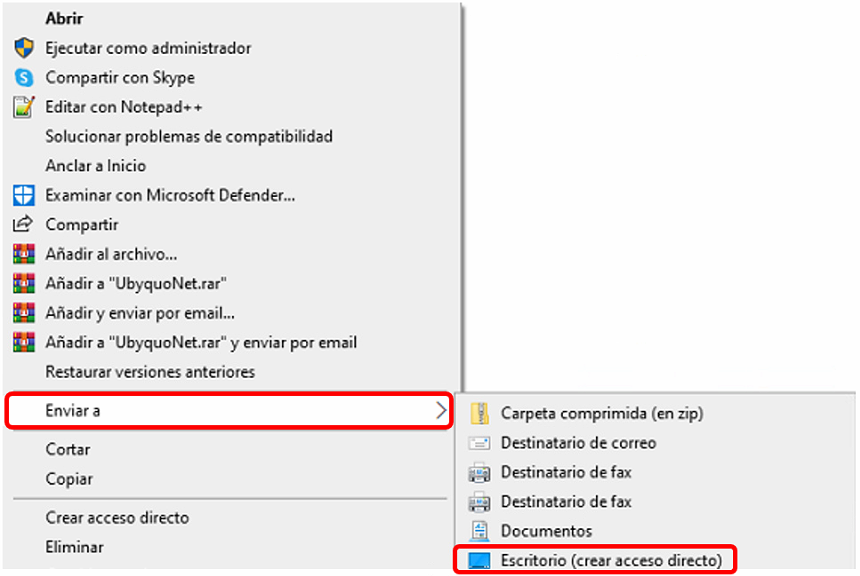
- Right-click UbyquoNet.exe.
- Select Send to > Desktop (create shortcut).
Open Ubyquo
Once the shortcut has been created, it will appear on the desktop with the name UbyquoNet.
Double-click UbyquoNet to start Ubyquo.
Important
Windows may ask for network credentials to access the server. In that case, enter the credentials provided by the system administrator.
If you cannot access the server or the shared Ubyquo folder, contact your network administrator before continuing with the installation.