
Updated on 24 September 2026
How to set up and use analytical allocation with A3
Split expense amounts across projects or departments and pass them to A3 when you export.
Analytical allocation in Ubyquo lets you distribute the amounts on an invoice's expense lines across different analytical codes defined in A3ECO/A3CON, such as projects or departments.
To use this feature, you need to enable analytics in A3, create the corresponding codes and synchronize them with Ubyquo. Once set up, you can assign analytical allocations to invoices and transfer them to A3 during the accounting export.
Step 1: Enable analytics in A3
Open A3ECO/A3CON and go to the company settings.
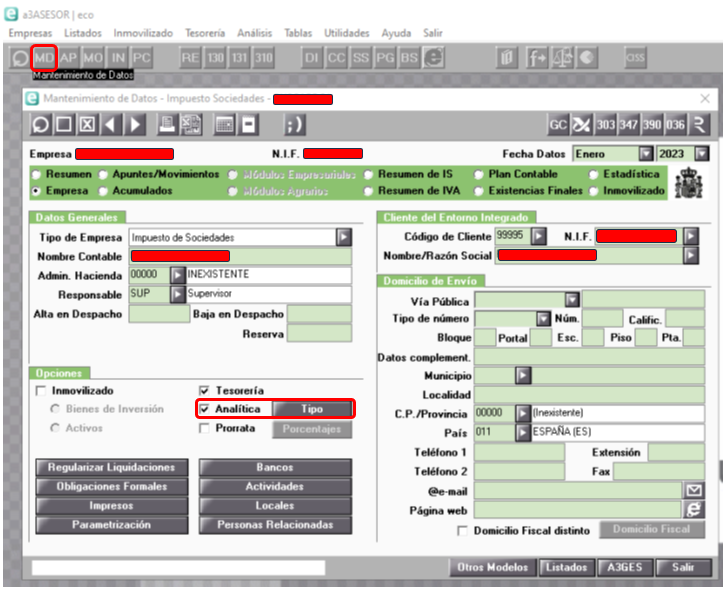
- Go to Mantenimiento de datos > Empresa (Data maintenance > Company).
- Tick the Analítica (Analytics) checkbox.
- Click the Tipo (Type) button next to the checkbox.
- In the pop-up window, select Analítica por niveles (Analytics by levels).
- Click Aceptar (OK).
- Save your changes and exit the settings.
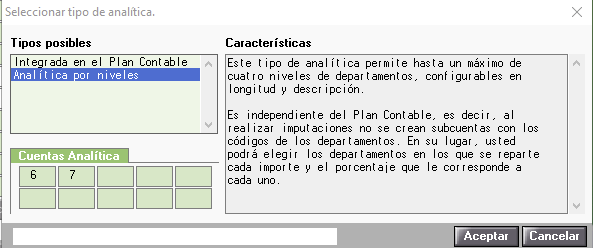
With this setup, the A3 company will have analytics by levels enabled.
Step 2: Create the analytical codes in A3
Once analytics is enabled, you need to create the codes that will be used to distribute the amounts.
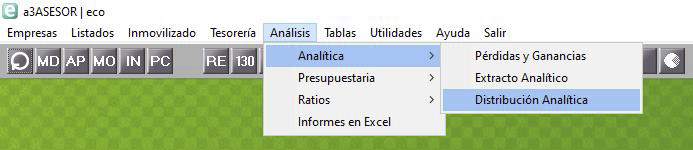
- Go to the Análisis > Analítica > Distribución analítica (Analysis > Analytics > Analytical distribution) tab.
- In the window that opens, create the analytical codes you need.
- Give each code its name and structure, according to the levels defined.
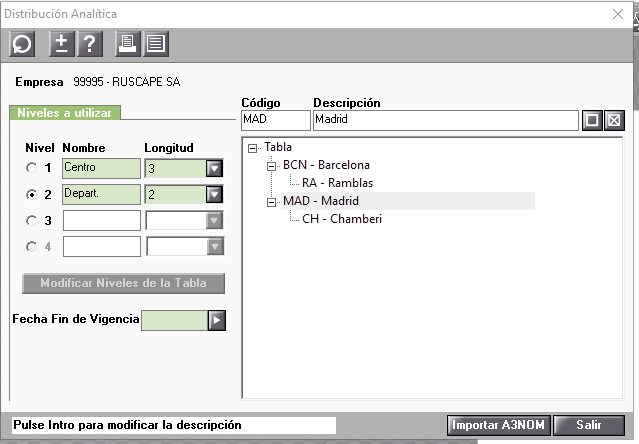
You can create codes for different concepts, such as projects, departments or other analytical categories your company uses.
Step 3: Synchronize the analytics in Ubyquo
Once the codes have been created in A3, you need to synchronize them with Ubyquo.
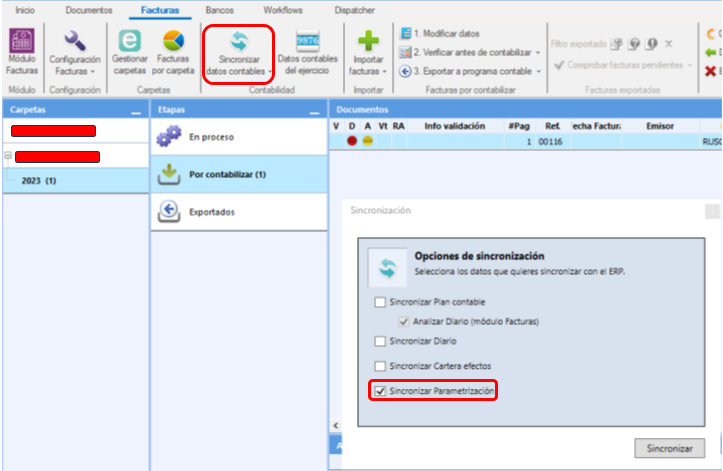
- Open Ubyquo.
- Go to the company connected to A3.
- Run a full setup synchronization.
This synchronization will import into Ubyquo the analytical codes defined in A3.
Once it completes, the journal entry type with analytical allocation will be enabled in the invoice editor.
Step 4: Assign the analytical allocation to an invoice
Once the codes are synchronized, you can set up the analytical allocation of an invoice.
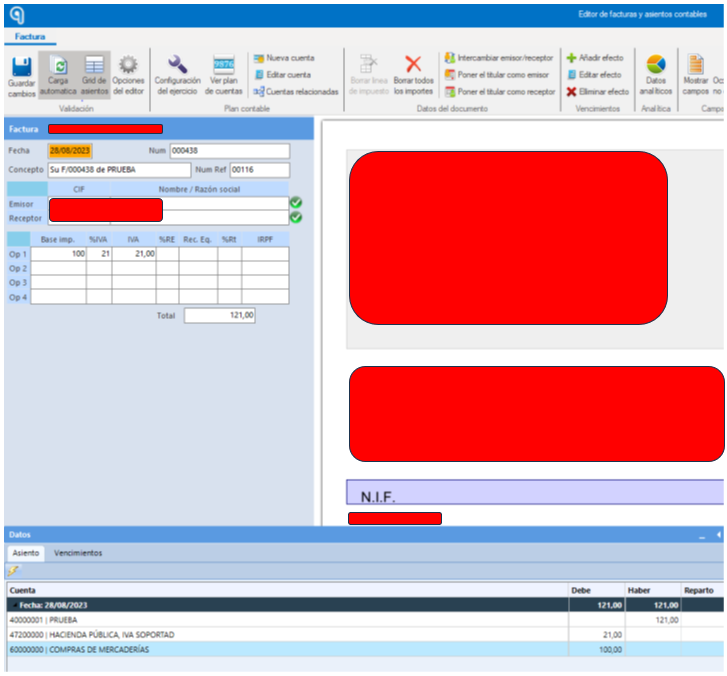
- Open the invoice from Ubyquo's Editor de facturas (Invoice editor).
- Find the Reparto (Allocation) column.
- Double-click the cell for the line you want to set up.
- The allocation setup window will open.
- Click Modificar Reparto (Edit allocation).
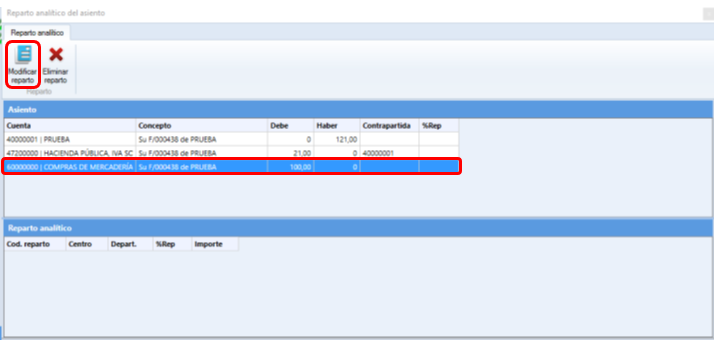
Important: analytical allocation can only be assigned to the invoice's expense lines.
Step 5: Break down the allocated amount
In the allocation edit window you can distribute the amount of a line across as many analytical lines as you need.
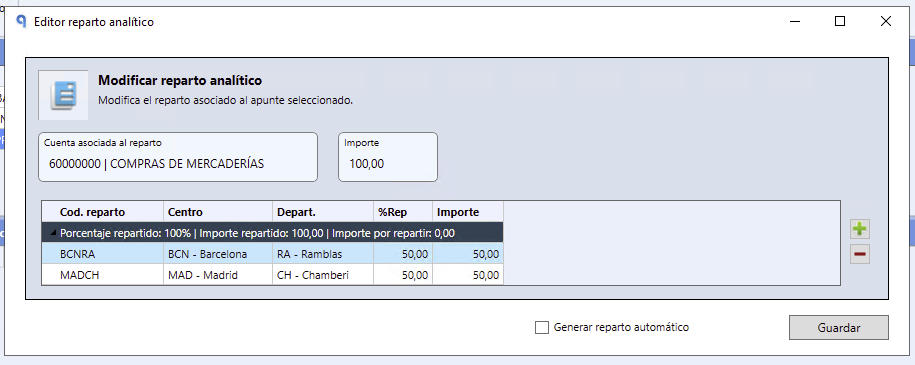
To set up the allocation:
- Add the analytical lines you need.
- Assign each line the exact percentage or amount that applies.
- Check how the amount is distributed.
- Click Guardar (Save).
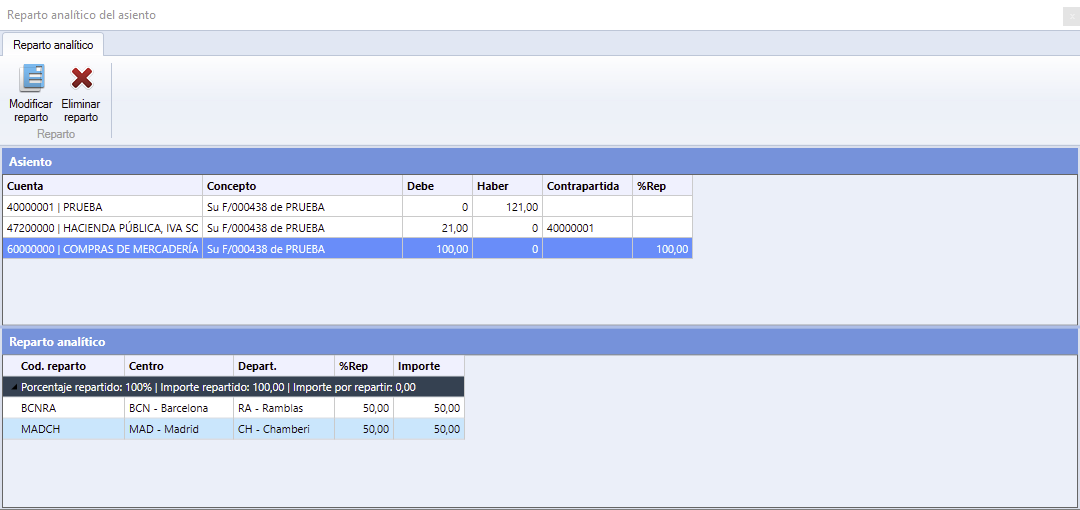
When you close the window, a summary of the analytical allocation applied will be shown on the corresponding invoice line.
Step 6: Export the invoice to A3
Once the analytical allocation is set up:
- Run the usual process of exporting invoices from Ubyquo to A3.
- The configured analytical allocation will be transferred along with the journal entries.
This way, the amounts on the expense lines will reach A3 with the analytical distribution defined in Ubyquo.