
Updated on 18 September 2026
CENTRAL eFACTURA manual: activating a company from CI Cloud
Learn how to activate an Ubyquo company in the Central eFactura invoicing tool from CI Cloud.
To activate a company in the invoicing tool of the Central eFactura module, the company must already be created in Ubyquo and the appropriate user rules must be set up. User rules
The steps below describe how to register the company Quantyca Software Solutions SL in the invoicing tool:
Accessing CI Cloud
- Go to CI Cloud
- Log in with an accounting user (with permissions) or an administrator user.
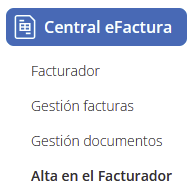
- Go to the Central eFactura module.

- Select the Alta en el Facturador (Register in the Invoicing Tool) option.
Activating the Company
- In the Alta en el Facturador window, all companies are shown, both active and deactivated.
- To add a new company, click the three dots to the right of its name.

- Select Activar (Activate) from the drop-down menu.
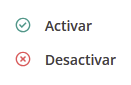
- You can do this with several companies at once by selecting more than one.
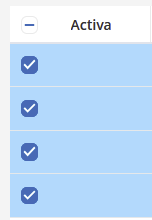
- After you activate it, the Activa (Active) column will show a green check icon.
With these steps, the company will be activated in the invoicing tool.
Setting Up Tax Details
After activating the company, we move on to setting up the tax details:
- Go to Central eFactura and choose Facturador (Invoicing tool).
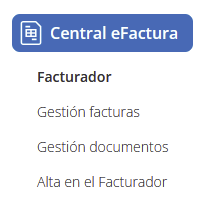
- Select the Empresa (Company) and Ejercicio (Fiscal year).

- Fill in the required fields marked in red under Datos empresa (Company details):
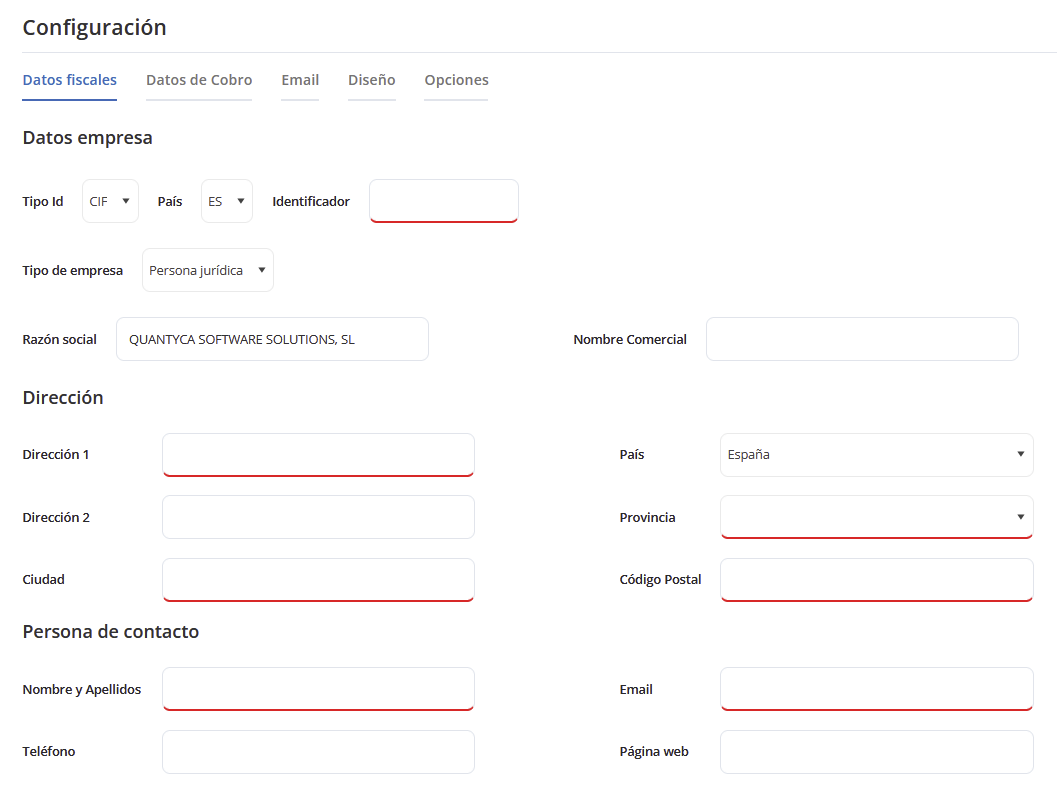
- — CIF/NIF.
- — Company type (individual or legal entity).
- — First and last name, or company name.
- — Address, postal code, city, and province.
- — Contact person and email.
- Set the tax parameters under Configuración fiscal (Tax settings):
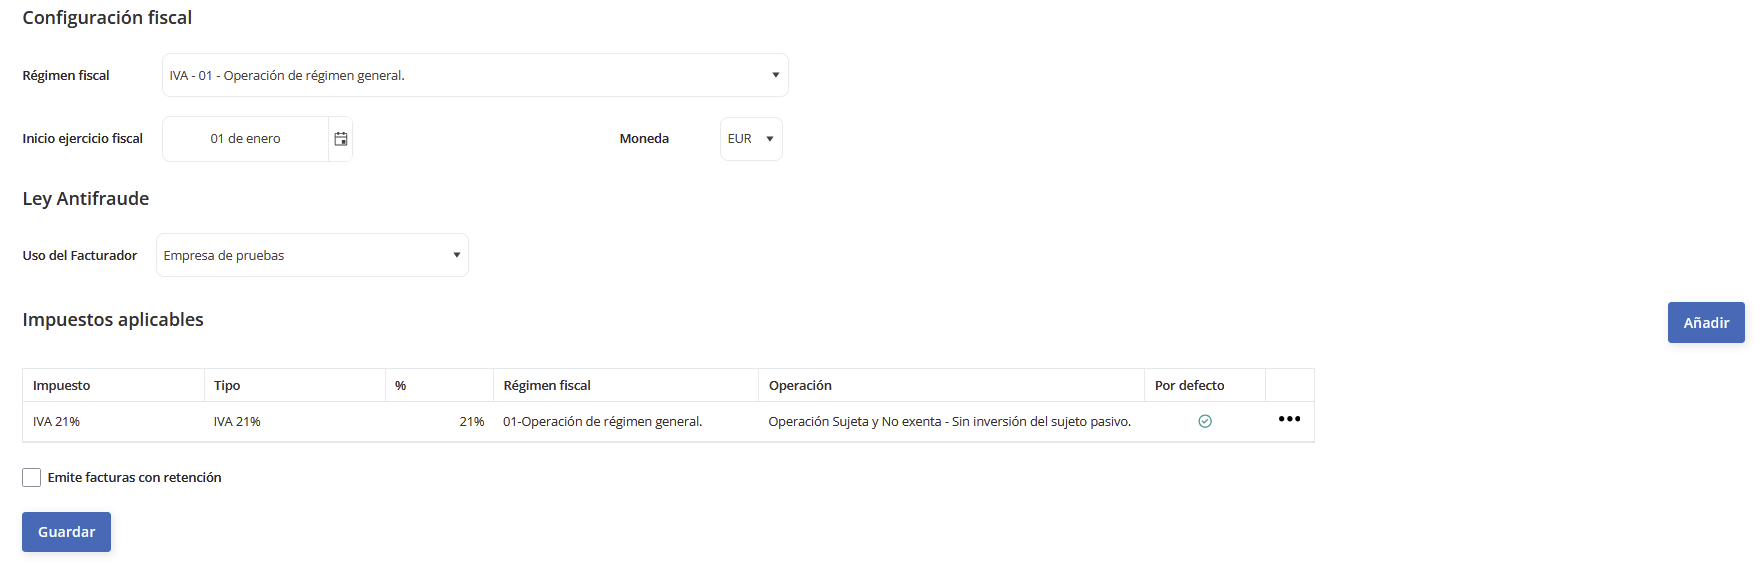
- — Indicate whether the company issues invoices with withholding.
- — Start date of the fiscal year.
- — Invoicing currency.
- — Applicable taxes (21% VAT (IVA), 10% VAT, IRPF (personal income tax), equivalence surcharge (recargo de equivalencia), etc.).
Setting Up Collection Details
- Enter at least one collection method (example: direct debit receipt at 30 and 60 days).

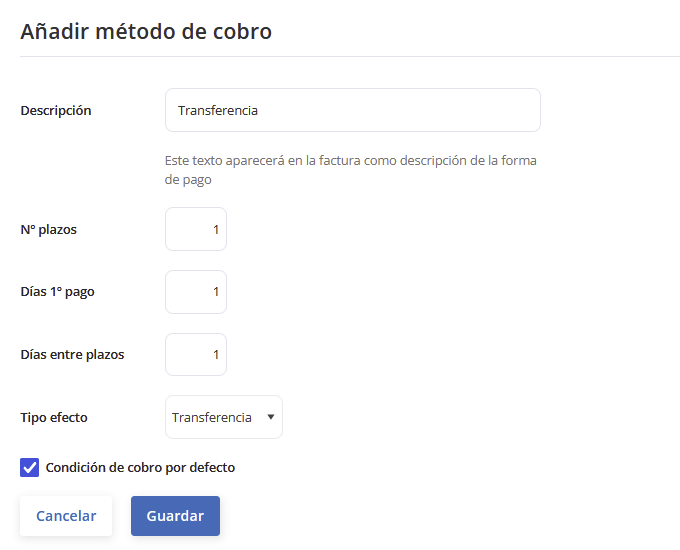
- — Number of installments.
- — Days until the first installment (example: 30 days).
- — Days between installments (example: 30 days).
- — Type of receivable (example: direct debit receipt).
- — Mark it as the default collection method and save the changes.
- Add a bank account:

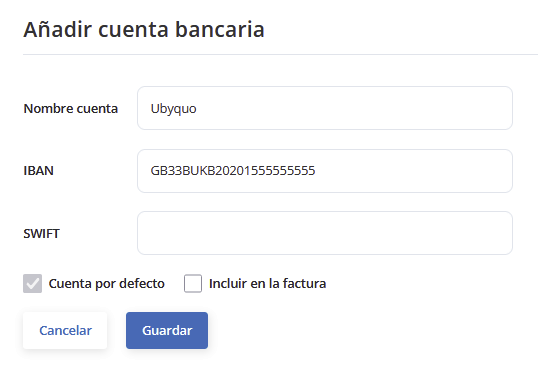
- — Bank name.
- — IBAN (it must be valid in order to save the changes).
- — SWIFT: International accounts.
- — Mark it as the default account.
Setting Up Email
- Go to the Email option.
- Enter the subject and the text that will appear in the email when you choose the Enviar por correo electrónico (Send by email) option.
- Save.
Setting Up Design
- Upload the company logo that will appear on the invoices.
Options
- Dates, delivery address, language, and e-invoice format:
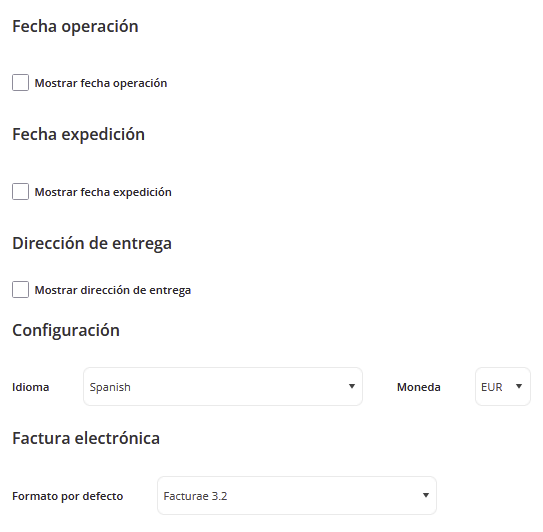
- — Show the operation date, issue date, or delivery address.
- — Language and currency settings.
- — Select the e-invoice format you want.
- — This setting only applies to the invoice image.
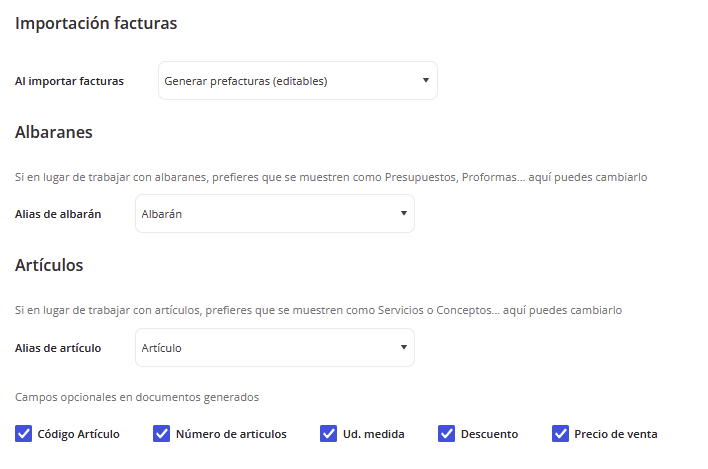
- Importing invoices, delivery notes, and items:
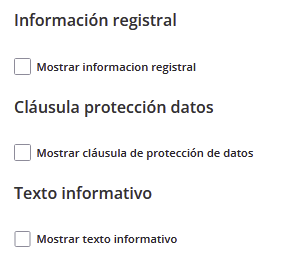
- Company registry information, data protection clause, and informational text:
- Save.

Creating Customers
To create customers in the Central eFactura module, you can follow these steps, depending on whether you want to do it in bulk or one at a time.
Steps to create customers in bulk (Sage)
- Go to the company: Enter the company you want to upload the customers from, through the Documentos (Documents) or Facturas (Invoices) tab.
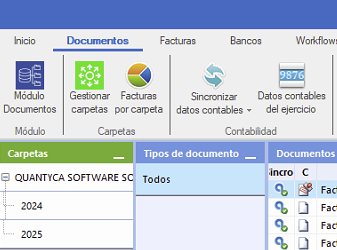
- Go to Accounting data: At the top, select Datos contables del ejercicio (Fiscal year accounting data).

- Go to the Customers/Suppliers tab: Go to the Cliente/Proveedores (Customers/Suppliers) tab.
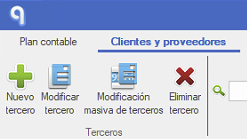
- Go to Central eFactura and choose Facturador (Invoicing tool).
- Select the Empresa (Company) and Ejercicio (Fiscal year).
- Export to the invoicing tool: At the top of the tab, click the Exportar al facturador (Export to the invoicing tool) icon (Excel symbol). If you use the Sage connector, any existing items will also be exported.

- Save the Excel file: Once exported, save the Excel file on your device.
- Go to the invoicing tool: Select the relevant company.
- Import the customers:
- — In the invoicing tool, go to the Clientes (Customers) tab.
- — On the right, select Importar (Import).

- Confirm the import: You will see a summary of the customers to be imported. If everything is correct, click Importar to load the customers in bulk.
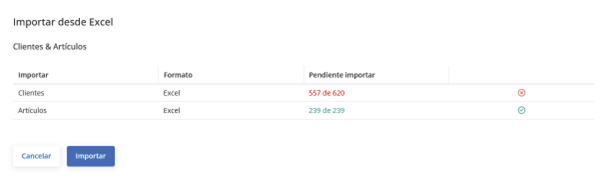
- Download the Excel template (optional): You can also download an Excel template from the Clientes tab in the invoicing tool. Fill in the template with your customers' information and then import it directly.
Steps to create a customer one at a time
- Go to Central eFactura and choose Facturador.
- Select the company and fiscal year:
- Go to the Clientes tab.

- Click the Nuevo Cliente (New Customer) icon to start the process.
- Fill in the customer's details:
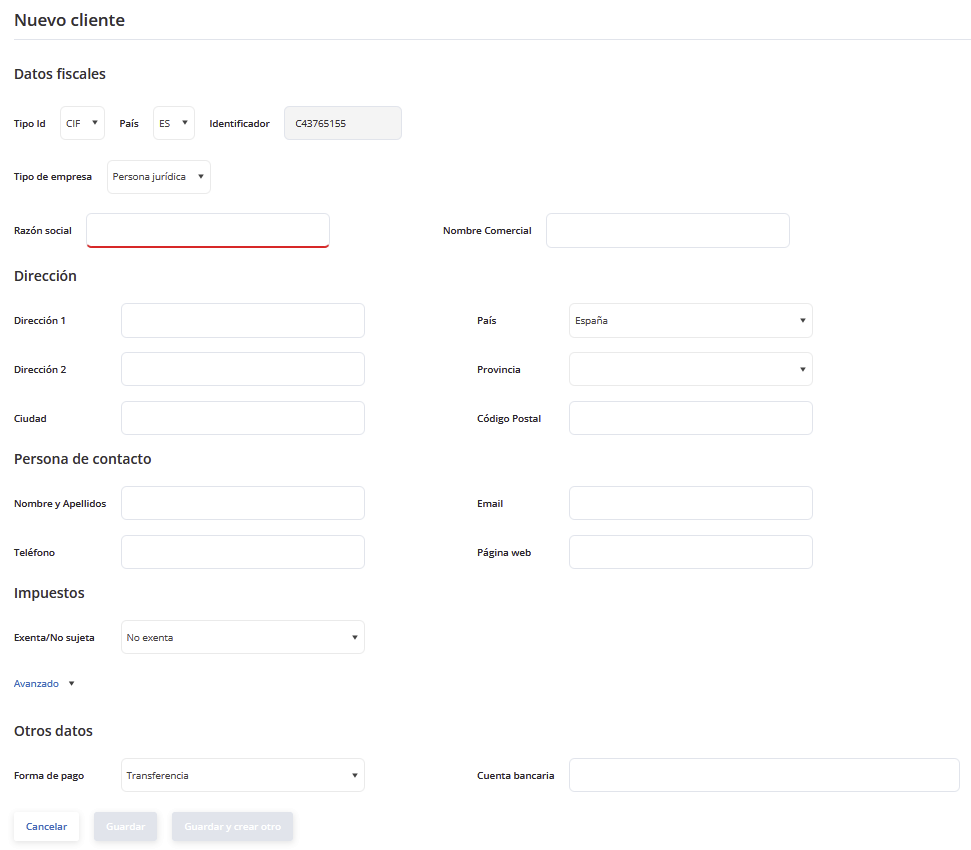
- — CIF/NIF: Enter the customer's tax identification number.
- — Datos fiscales (Tax details): Fill in the tax details that apply to the customer.
- — Dirección (Address): Add the customer's full address.
- — Persona de contacto (Contact person): Indicate who the customer's contact person will be.
- — Impuestos (Taxes): Set up the taxes that apply to the customer.
- — Avanzado (Advanced): Here you can add more detailed information if needed.
- — Régimen fiscal (Tax regime): Select the appropriate tax regime for the customer.
- — Operación (Operation): If needed, set the associated operation type.
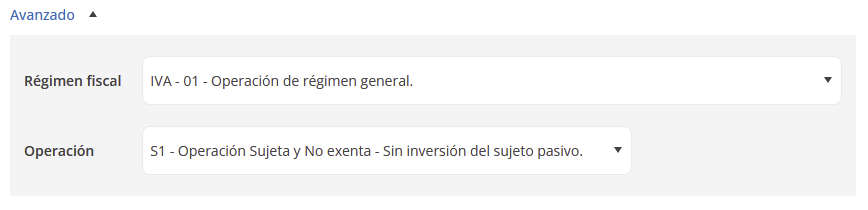
- — Forma de pago (Payment method): Select the payment method the customer will use (for example, bank transfer, card, etc.).
- — Cuenta bancaria (Bank account): If the payment method is direct debit (recibo domiciliado), you must add the customer's bank account.
- Save, or save and create another.

Steps to create customers with a template
- Go to Central eFactura and choose Facturador.
- Select the Company and Fiscal year:
- From the Clientes tab of the invoicing tool, download the Excel template.

- Fill in the template with the item data.
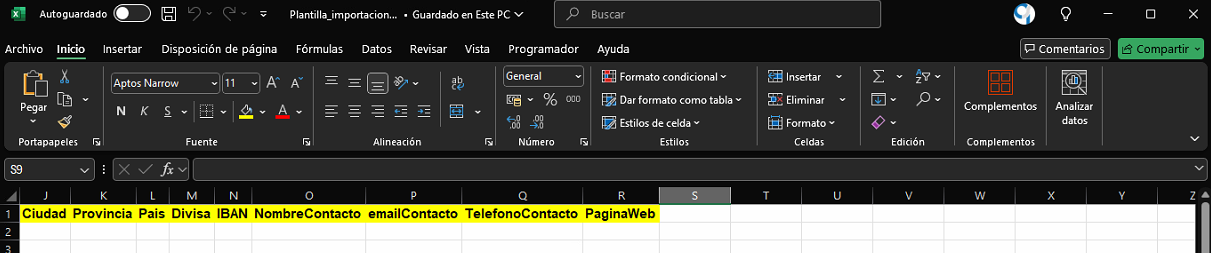
- Upload the template to the invoicing tool, which will create the items automatically.
If we use the Sage ERP, we can also download them directly from Ubyquo and then import them into the invoicing tool.
Creating Items
To create items in the Central eFactura module, you can follow these steps, depending on whether you want to do it in bulk or one at a time.
Steps to create items in bulk (Sage)
- Go to the company: Enter the company you want to upload the customers from, through the Documentos (Documents) or Facturas (Invoices) tab.
- Go to Accounting data: At the top, select Datos contables del ejercicio (Fiscal year accounting data).
- Go to the Customers/Suppliers tab: Go to the Cliente/Proveedores (Customers/Suppliers) tab.
- Go to Central eFactura and choose Facturador (Invoicing tool).
- Select the Empresa (Company) and Ejercicio (Fiscal year).
- Export to the invoicing tool: At the top of the tab, click the Exportar al facturador (Export to the invoicing tool) icon (Excel symbol). If you use the Sage connector, any existing items will also be exported.

- Save the Excel file: Once exported, save the Excel file on your device.
- Go to the invoicing tool: Select the relevant company.
- Import the customers:
- — In the invoicing tool, go to the Articulos (Items) tab.
- — On the right, select Importar (Import).
- Confirm the import: You will see a summary of the customers to be imported. If everything is correct, click Importar to load the customers in bulk.
Steps to create items one at a time
- Go to Central eFactura and choose Facturador (Invoicing tool).
- Select the Empresa (Company) and Ejercicio (Fiscal year).
- Go to the Artículos (Items) tab.

- Click Nuevo Artículo (New Item): Click the Nuevo Artículo button to start creating one.
- Fill in the following fields:
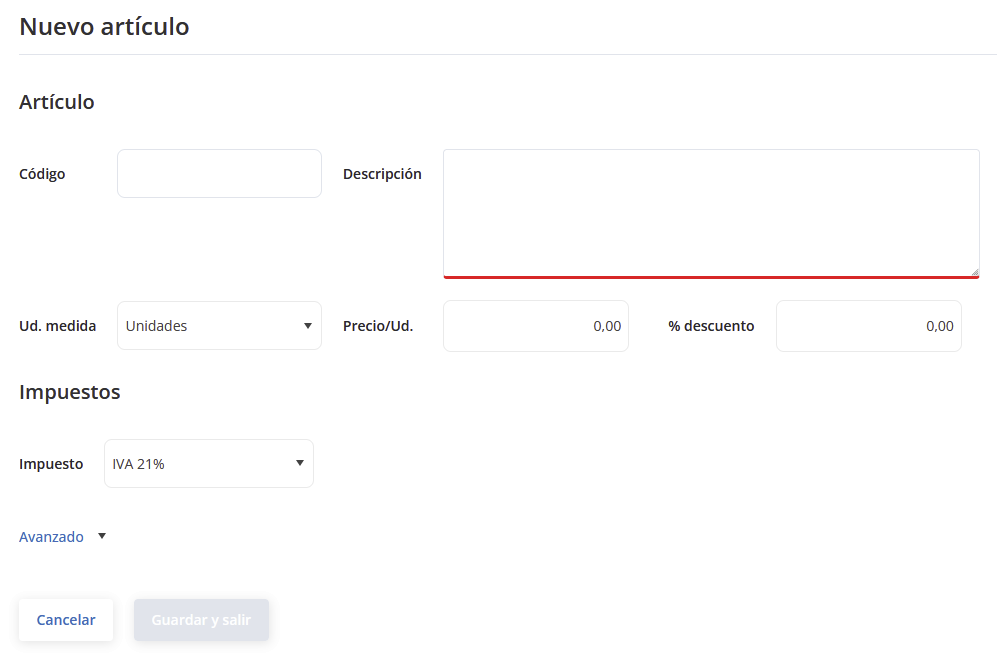
- — Código (Code) (optional): Unique identifier of the item.
- — Descripción (Description): Name or description of the item.
- — Unidad de medida (Unit of measure): Define whether it is sold by unit, weight, volume, etc.
- — Precio unitario (Unit price): Base price of the item.
- — Descuento aplicado (Applied discount) (if applicable): Indicate whether it has a predefined discount.
- — Tipo de IVA aplicable (Applicable VAT rate): Select the type of tax that applies.
- — Avanzado: Additional settings if needed.
- — Régimen fiscal: Assign the item's tax regime.
- — Operación: Specify the associated operation type.
- Save: Once the information is complete, click Guardar (Save) to finish creating the item.

Steps to create items with a template - — Go to Central eFactura and choose Facturador.
- — Select the Company and Fiscal year:
- — From the Artículos tab of the invoicing tool, download the Excel template.
- — Fill in the template with the item data.
- — Upload the template to the invoicing tool, which will create the items automatically.
Creating Delivery Notes
Since the Anti-Fraud Law does not allow invoices to be changed once issued, we will work first with delivery notes. As long as a delivery note has not been invoiced, it can be modified.
- Go to Central eFactura and choose Facturador (Invoicing tool).
- Select the Empresa (Company) and Ejercicio (Fiscal year).
- — In the eFactura section, choose the relevant company and fiscal year.
- — Make sure the customers and items are created before generating a delivery note.
- — Create Customers and Create Items.
- Go to the Albaranes (Delivery Notes) tab.

- — Go to the Albaranes tab in the invoicing tool.
- — Click Nuevo albarán (New delivery note).
- — Choose Estandar (Standard) or Simplificado (Simplified).
- Fill in the delivery note information.
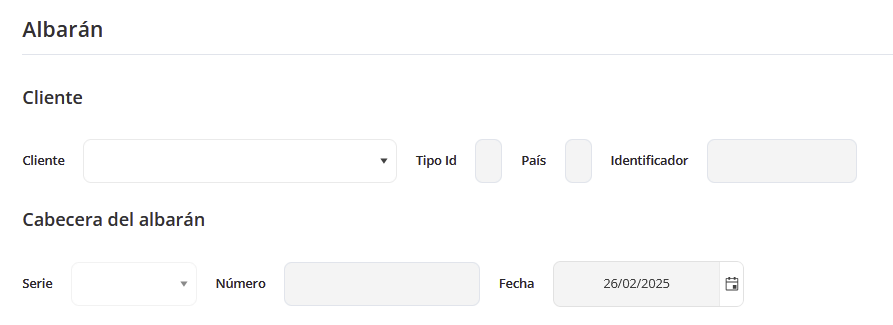
- — Select a customer from the drop-down (its information will be filled in automatically).
- — Series and creation date (the series is optional and the date defaults to today's date).
- Add item lines.

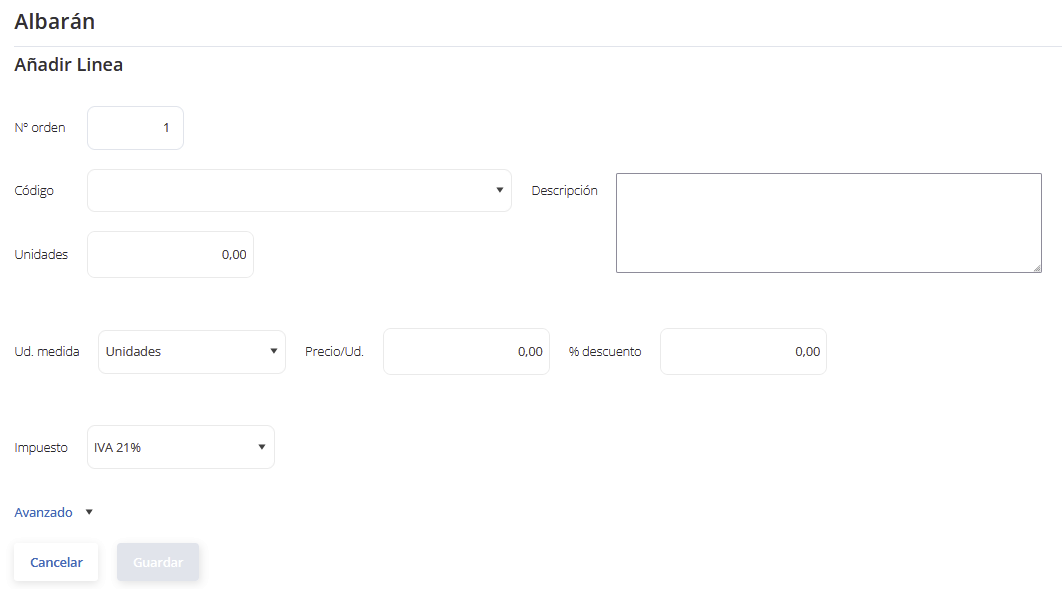
- — Click the "Añadir" (Add) button to include items in the delivery note.
- — Select the item from the drop-down.
- — Enter the number of units.
- — Enter the discount % if needed.
- — Specify the VAT type.
- — Advanced.
- — Tax regime.
- — Operation
- — Click "Guardar"
- — Repeat this process to add more items.
- Other amounts (optional)

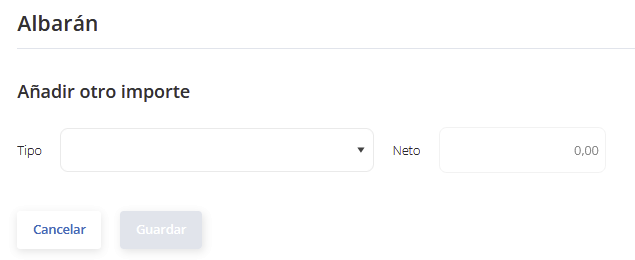
- — In the "Otros importes" (Other amounts) section, you can add extra charges.
- — Select the amount type and set it up as needed.
- Payment method.
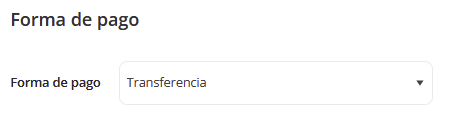
- — Add the payment method: by default, the one configured for the company.
- Additional information.

- — Legal text: Choose the appropriate template.
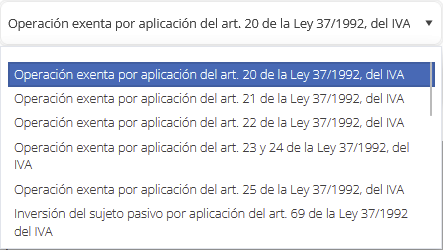
- — Comment: Optionally, we can add a comment.
- — Reference no.: Optionally, we can add a reference.
- Review and breakdown of the delivery note
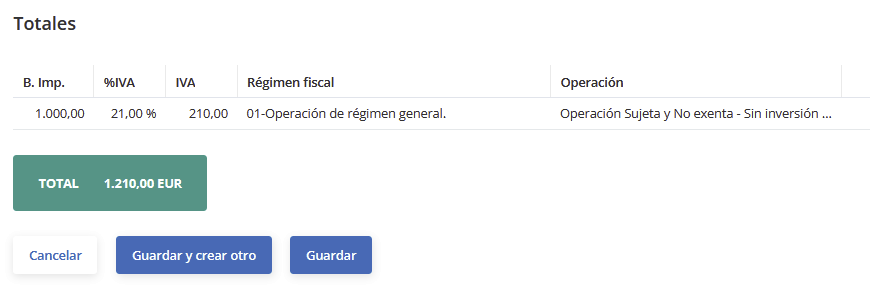
- — A full breakdown of the delivery note will be shown, separating the amounts with and without withholding.
- Save the delivery note
- — Click "Guardar" to return to the list of delivery notes.
- — Click "Guardar y crear otro" (Save and create another) to generate a new delivery note right away.
- Verification.

- — When you return to the Albaranes window, you will see the newly created delivery note with all its information.
- — To view the delivery note in PDF format, select it and click the
 icon.
icon.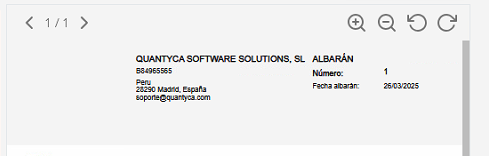
As long as the delivery note has not been invoiced, it can be modified.
Ready to Invoice
Once all the previous steps are completed (with a delivery note created), you can start issuing e-invoices with the Central eFactura module.
Issued invoices cannot be modified once generated; they can only be corrected.
Sending the delivery note to the customer
- Go to Central eFactura and choose Facturador.
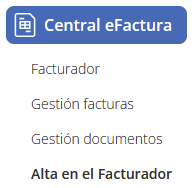
- Select the Company and Fiscal year.

- Go to the Albaranes tab.
- Click the email icon to send the delivery note to the customer.

- The system will automatically generate an email using the configured template.
- The customer will receive the email with the delivery note attached as a PDF.
Invoicing the delivery note once the customer approves it
- In the Albaranes list, select the delivery note to invoice.
- Click the three dots on the right.

- A drop-down menu will open:
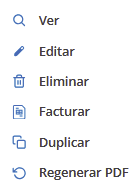
- — Ver (View)
- — Editar (Edit)
- — Eliminar (Delete)
- — Facturar (Invoice)
- — Duplicar (Duplicate)
- — Regenerar PDF (Regenerate PDF)
- — Confirm the delivery note to invoice.
- Choose the option Facturar.
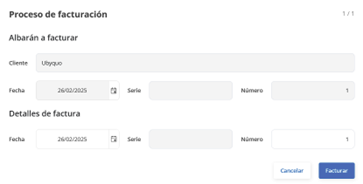
- — Choose the invoice date.
- — Set the invoice number (the system will suggest the next sequential number).
- Click Facturar.
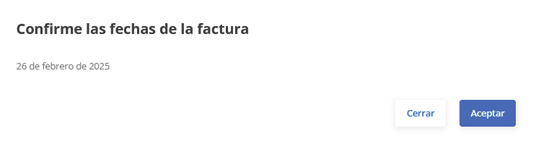
- Accept.
Viewing the issued invoice
- Go to the Facturas Emitidas (Issued Invoices) tab.
- The invoice will appear in the list and you can download the PDF by clicking the corresponding icon.

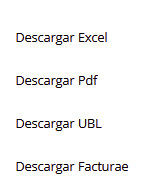
- To send it to the customer, click the email icon, just as with the delivery note.

Corrective invoices in case of a dispute
- If the customer opens a dispute, you can generate a corrective invoice.
- On the issued invoice, click the three dots and choose Rectificativa (Corrective) from the drop-down menu.

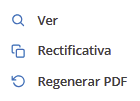
- The system will generate a new delivery note that, when invoiced, will automatically create the corrective invoice.
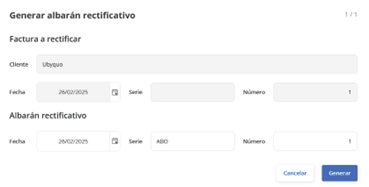
Important: If the accounting firm works with Ubyquo, there is no need to send the invoices manually, since they are received and processed automatically through the platform.