
Updated on October 9, 2026
Orders and Delivery Notes manual
Add invoices, allocate them against the delivery note, generate the ERP invoice and export it to Sage.
Part 1 Add the invoices
- 1
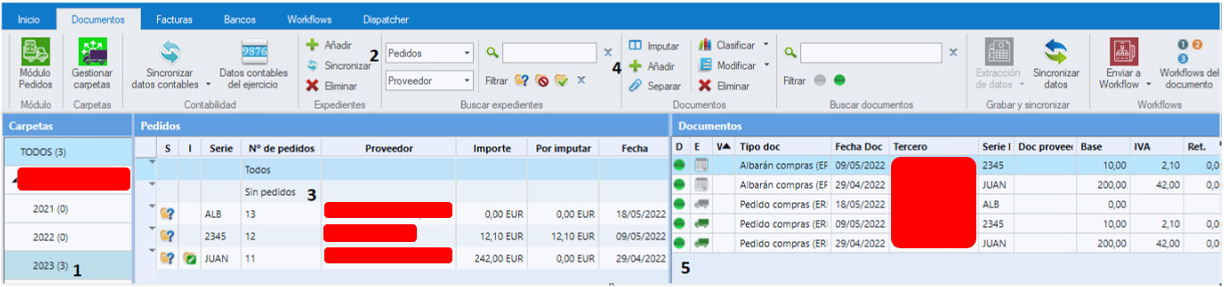
Open the Documents module
Go to the Documents module and select the company and fiscal year you are going to work in.
- 2
Choose the process
Select the process you are going to use: purchase order, delivery note or contract, as appropriate.
- 3
Click “Añadir Facturas”
Go to the sin pedido (no purchase order) line and click Añadir Facturas (Add Invoices), at the top of the documents area.
- 4
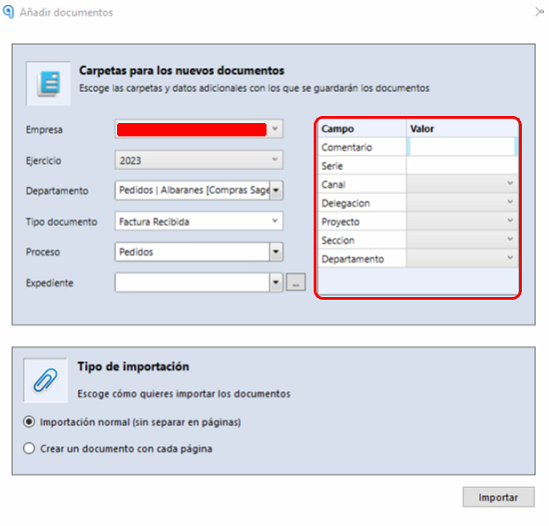
Fill in the window
In the pop-up window, enter:
Invoice typeAnalytics, if neededThe remaining fields are filled in automatically with the company's data.
- 5
Send them to automatic extraction
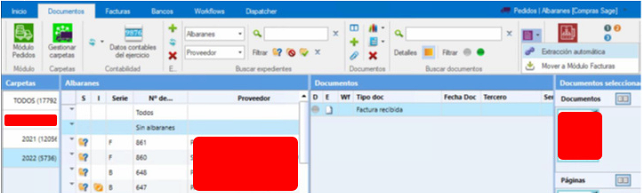
The invoice appears in the documents GRID (right-hand area). Select the invoices and click Procesar Facturas (Process Invoices) to send them to automatic extraction.
Part 2 Allocate against the delivery note and generate the journal entry
- 6
Go to “Por contabilizar”
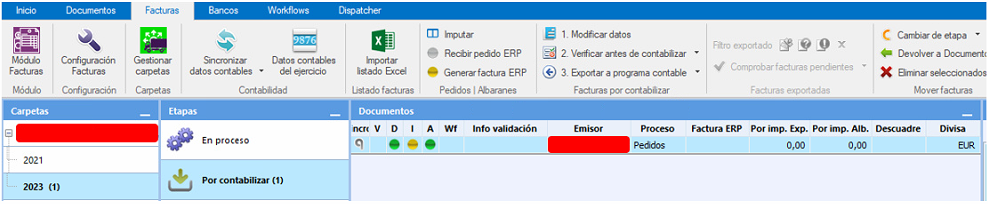
Once the invoices leave the En proceso (In process) area, go to the Invoices module, Por contabilizar (To be posted).
- 7
Check the data column (D)
If it is red or yellow, check Info Validación (Validation Info) to see the error.

- 8
Check the allocation column (I)
If it is red, it may be due to one of these cases:
There is no delivery note to allocate against (check the expedientes column)Several delivery notes from the same supplier with the same amountDifferences between the values on the delivery note and the invoice
- 9
Allocate manually
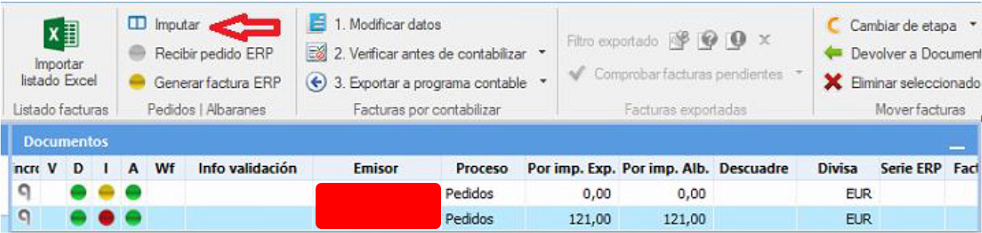
In any of these cases, click Imputar (Allocate), at the top, to manually allocate the invoice against its delivery note.
- 10
Generate the ERP invoice
When the dot in the Imputación column is yellow, click Generar Factura ERP (Generate ERP Invoice) to create a purchase invoice based on the delivery note. A journal entry is also proposed.
Allocation turns green
The Imputación dot turns green and the Factura ERP column shows the number of the purchase invoice generated.
- 11
Verify before posting
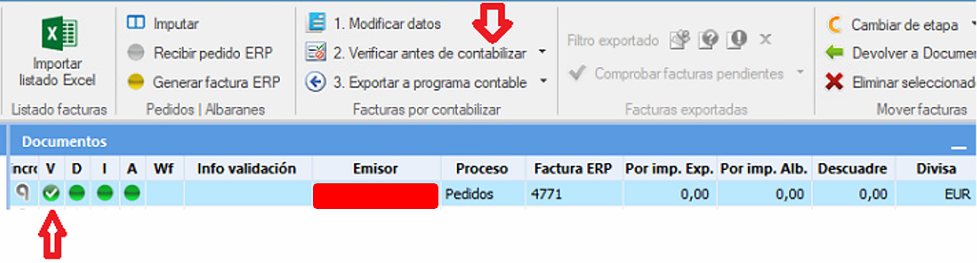
With the Datos (D) (Data), Imputación (I) (Allocation) and Asiento (A) (Journal entry) dots green, click Verificar antes de contabilizar (Verify before posting). The dot in the Verificación column also turns green.
If any of these three dots is not green, the invoice cannot be verified.
Part 3 Export the invoice
- 12
Click “Exportar”
When everything is green, click Exportar (Export): the purchase invoice and the delivery note are posted in Sage, where a journal entry is created.
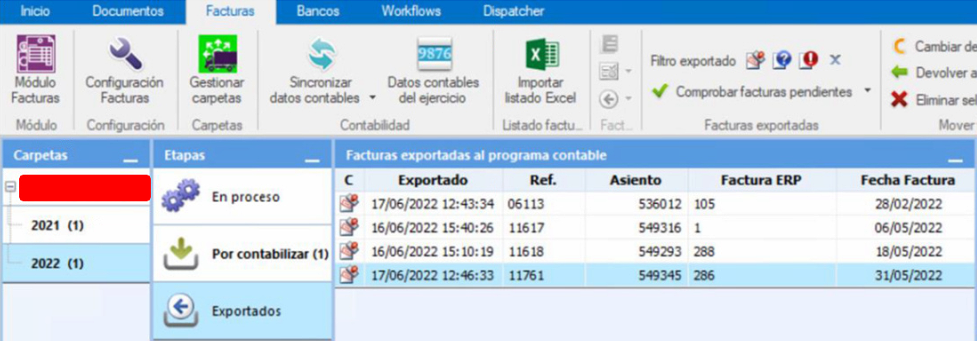
Done! A copy of the invoice and the journal entry is saved in Ubyquo's Contabilidad (Accounting) area.