
Updated on 18 September 2026
Orders and Delivery Notes manual
Learn how to add invoices in Orders & Delivery Notes and send them to automatic extraction.
How the Orders & Delivery Notes module works in Ubyquo
Adding Invoices
- Go to the Documents module.
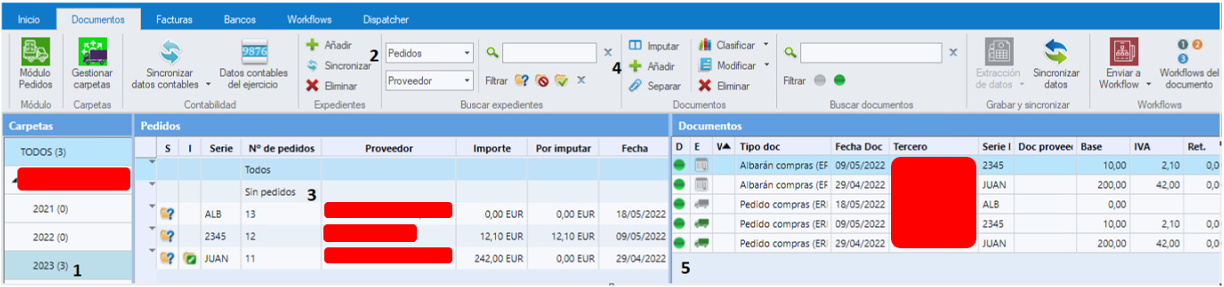
- Select the company and fiscal year you are going to work in.
- Select the process you are going to use: purchase order, delivery note or contract, as appropriate.
- Go to the “sin pedido” (no purchase order) line.
- Click “Añadir Facturas” (Add Invoices) (at the top of the documents area).
- In the pop-up window:
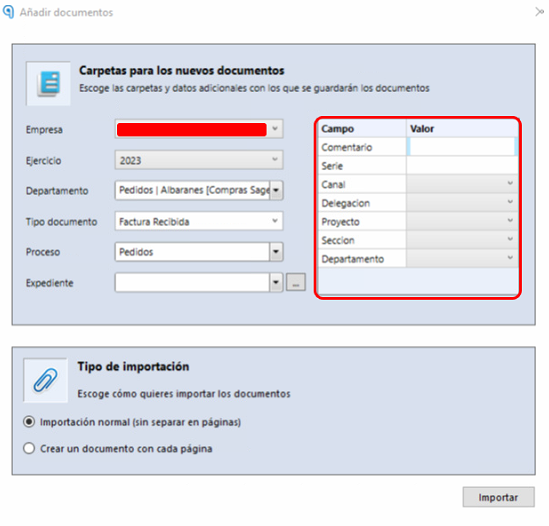
- — Select the invoice type.
- — Add the analytics if needed.
- — The remaining fields will be filled in automatically with the company's data.
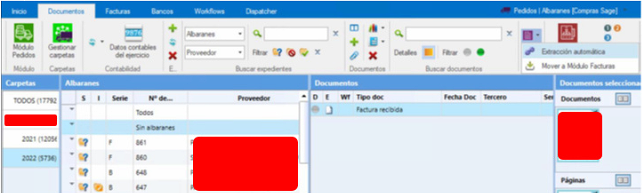
- The invoice will appear in the documents GRID (right-hand area).
- Select the invoices and click “Procesar Facturas” (Process Invoices) to send them to automatic extraction.
Allocating against a delivery note, generating the journal entry and posting
- Once the invoices leave the “En proceso” (In process) area, go to:
Invoices module “Por contabilizar” (To be posted)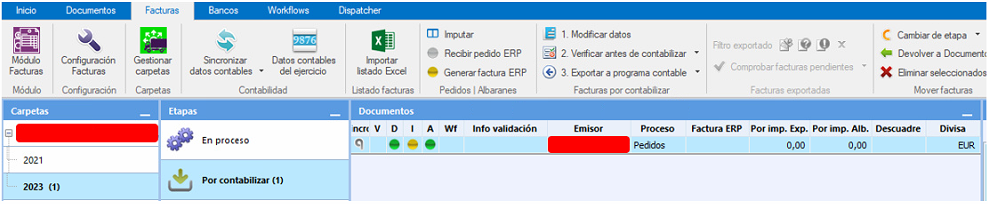
- Check the status of the columns:
- — If the data column (D) is red or yellow, check “Info Validación” (Validation Info) to see the error.

- — If the Imputación (Allocation) column (I) is red, several cases are possible:

- — There is no delivery note to allocate against. Check the expedientes (case files) column.
- — Several delivery notes from the same supplier with the same amount.
- — Differences between the values on the delivery note and the invoice.
- If any of the cases above occurs:
- — Click “Imputar” (Allocate) (at the top) to manually allocate the invoice against its delivery note.
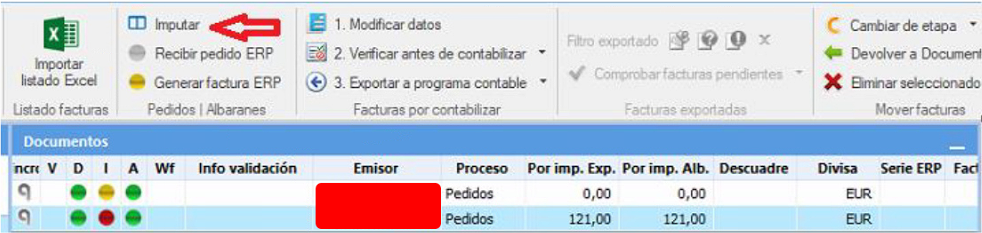
- When the dot in the Imputación column is yellow:
- — Click “Generar Factura ERP” (Generate ERP Invoice) to create a purchase invoice based on the delivery note.
- — A journal entry will also be proposed.
- When the ERP invoice is generated:
- — The Imputación dot will change to green.
- — The Factura ERP column will show the number of the purchase invoice generated.
- When the dots for:
- — Datos (D) (Data),
- — Imputación (I) (Allocation),
- — and Asiento (A) (Journal entry) are green
you can click “Verificar antes de contabilizar” (Verify before posting). - After verifying:
- — The dot in the Verificación column will also turn green.
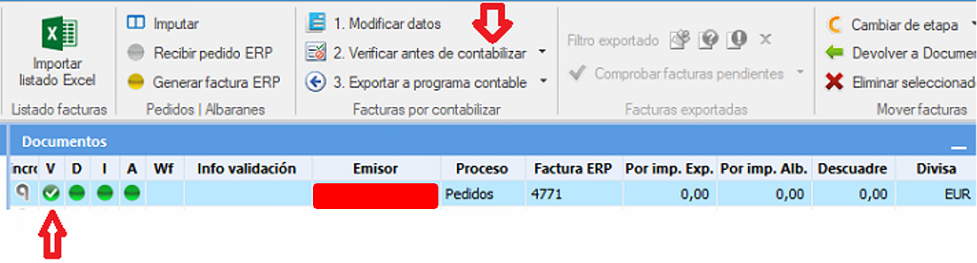
Note: If any of the 3 dots above is not green, the invoice cannot be verified.
Exporting the Invoice
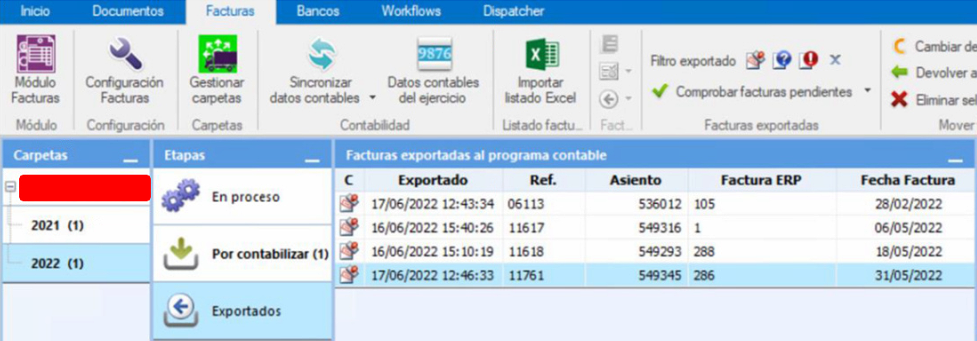
- When everything is green, click Exportar (Export):
- — The purchase invoice and the delivery note are posted in Sage.
- — A journal entry is created in Sage.
- — A copy of the invoice and the journal entry is saved in Ubyquo's Contabilidad (Accounting) area.