
Updated on 18 September 2026
Workflows module user manual
Learn how to use the Workflows module, starting with logging in to the application and changing your password.
Logging in
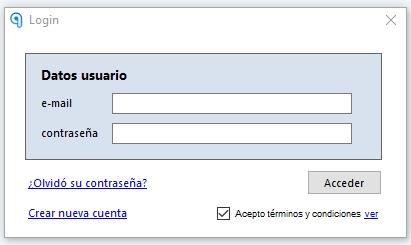
When you run the program, you will be asked for your user, which is the e-mail address provided during registration, and the password provided by the installer and/or trainer.
Changing your password
If you forget your password, you can click the "¿Olvidó su contraseña?" (Forgot your password?) option to receive a new password by e-mail.
To change your password, follow these steps:
- Go to Inicio (Home) > Administración de la cuenta (Account administration). (If it does not open, you can access it from here)
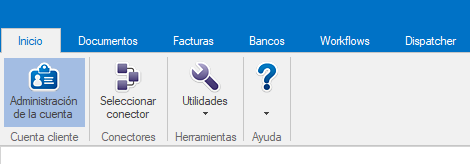
- Select the "Mis datos" (My details) option and click "Cambiar contraseña" (Change password).
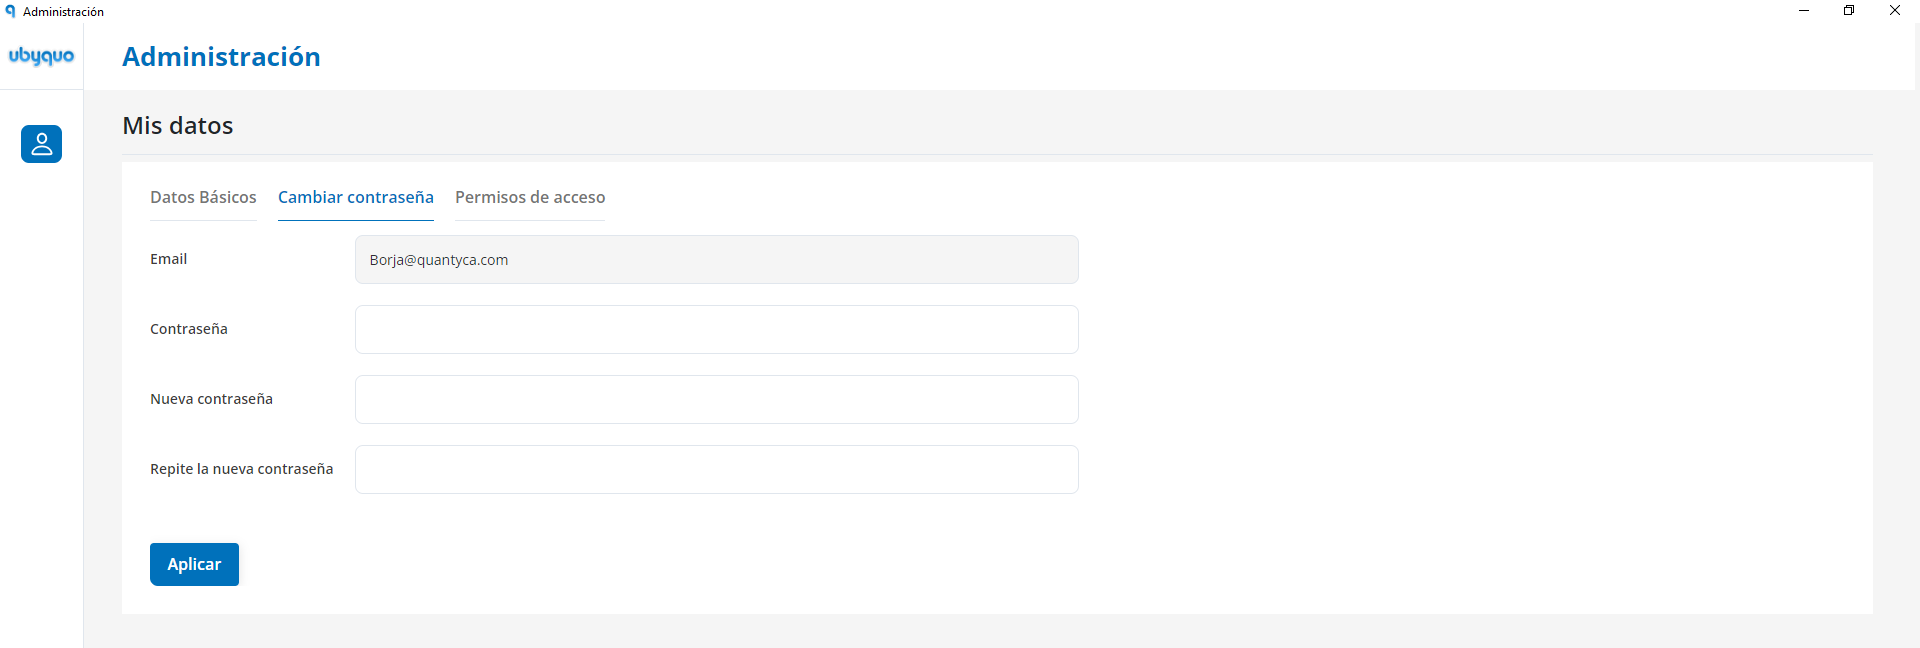
- The new password must be:
- — Alphanumeric
- — At least 8 characters
- — Include uppercase and lowercase letters
We recommend updating your password regularly for security reasons.
Accessing the Help Center

To get familiar with the features of the Workflows module, we recommend opening the Help Center from the corresponding icon in the module.
This section contains detailed articles and guides that make this feature easier to understand and use.
Workflows configuration
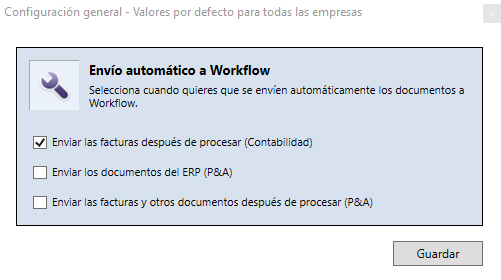
When you open this option, a window appears where you can configure automatic submissions to Workflows. This configuration lets you define automated behaviors that save time in document management.
Workflows management
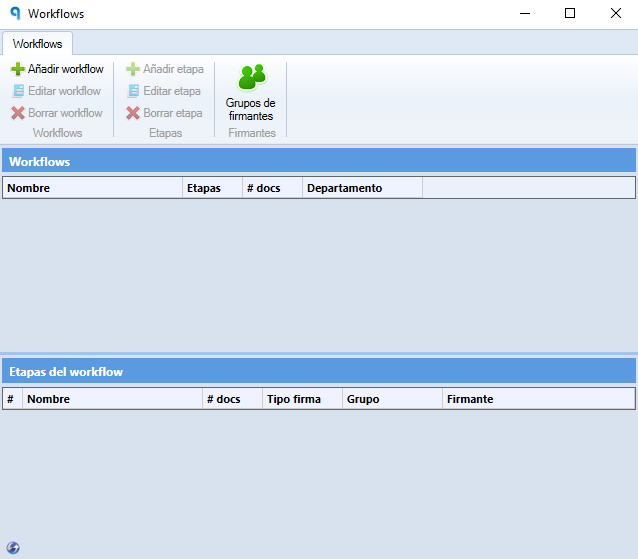
This section opens a window that lets you:
- Create different Workflows.
- Define stages within each one.
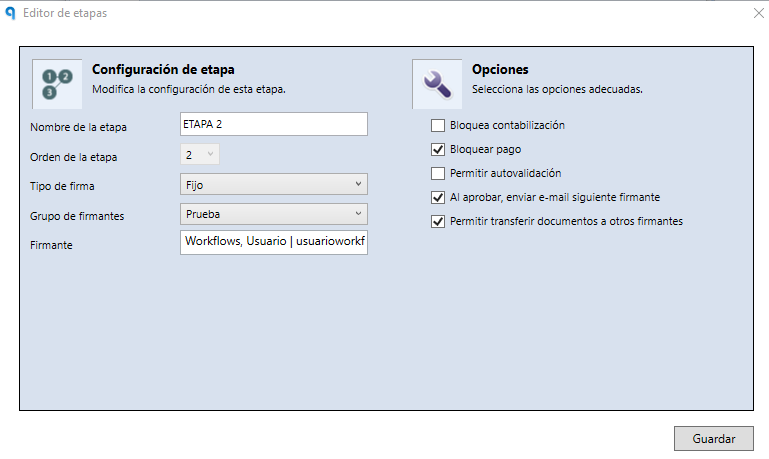
Before creating Workflows, you must create the signer groups.
We recommend that this initial configuration be done by a user with the Administrator role in Ubyquo.
Signer management
If the signers have not yet been set up in Ubyquo, follow these steps.
(If they have already been configured, you can skip this section.)
- Click the "Gestión de firmantes" (Signer management) icon in the Workflows tab.
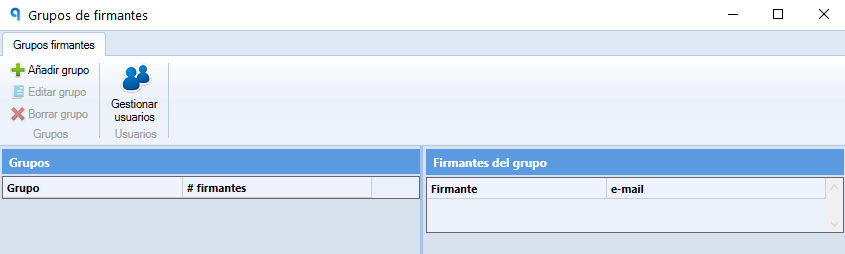
- A new window will open.
- Click "Añadir grupo" (Add group).
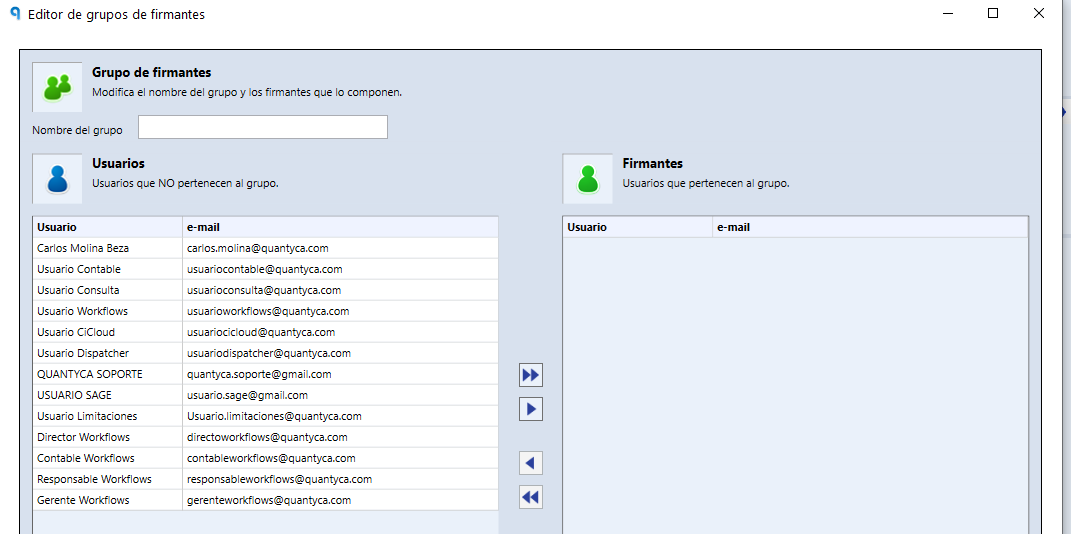
- A list of all the users registered in Ubyquo will appear.
- Create the signer groups by adding the corresponding users to each group.
- You can edit or delete groups according to your organization's needs.
User management
All the information about creating users, as well as assigning permissions and rules, is available at the following link:
Rule management
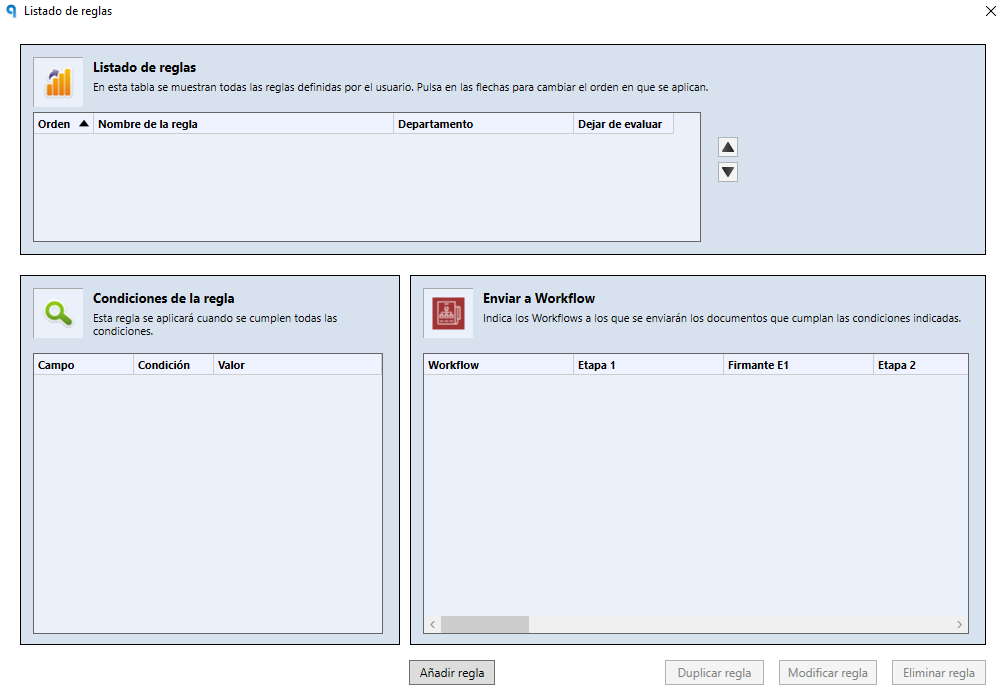
Rules determine how documents are automatically assigned to one or more Workflows.
These rules can:
- Allow automatic submission to a specific Workflow.
- Deny submission based on defined criteria.
Sending documents to Workflows
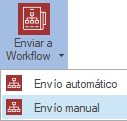
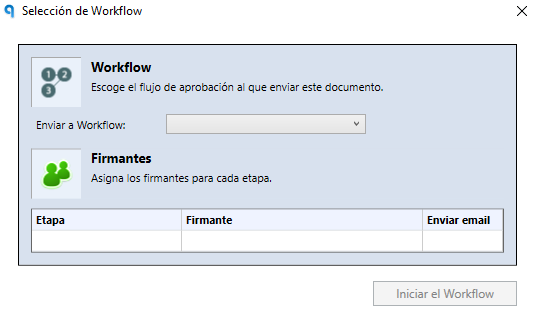
Documents can be sent to Workflows in two ways:
- Manual: From the Documentos (Documents) or Facturas (Invoices) tabs, users with the Administrator or Accountant role can select the document they want, choose the corresponding Workflow and assign the signers.
- Automatic: Through the rules previously configured in the system.
Restart the document's Workflow
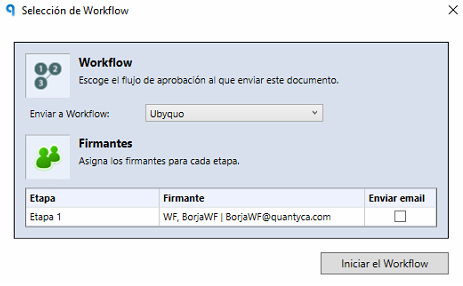
This feature lets you restart the signing process from the beginning.
The user can choose between:
- Selecting a new Workflow to send the document to.
- Restarting the current one, so that the signers sign again from the start.
Remove from the Workflow
This option removes the document from the Workflow in progress.
This means:
- The complete deletion of the history associated with that document within the signing process.
- The document can be added to another Workflow again if desired.
Transfer document
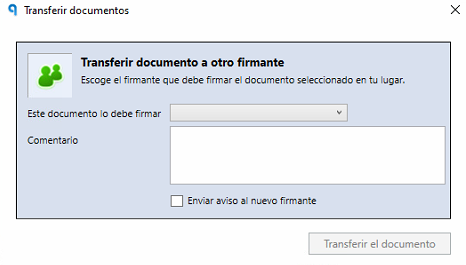
This feature lets you transfer the document to another signer.
You can also:
- Add a comment.
- Send a notice to the new signer, letting them know they have a document pending signature.
Payment blocking (Sage only) Payment blocking in Workflows
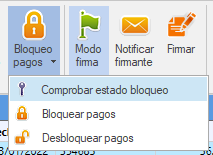
Payment blocking in Workflows
This option lets you manage the blocking or unblocking of payments on documents associated with accounting due items.
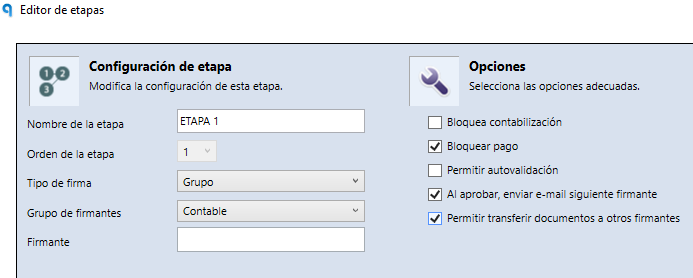
This type of blocking must be enabled beforehand in the corresponding Workflow stages.
- Within the configured stages, the "Bloquear pago" (Block payment) function is used.
- This function lets you control the payment of due items directly in Sage.
- The blocking status is shown in the "B" and "C" columns in the Workflows Module Control section.
Notify signer
This feature lets you send an e-mail to the signer using a predefined template, letting them know they have documents pending signature.
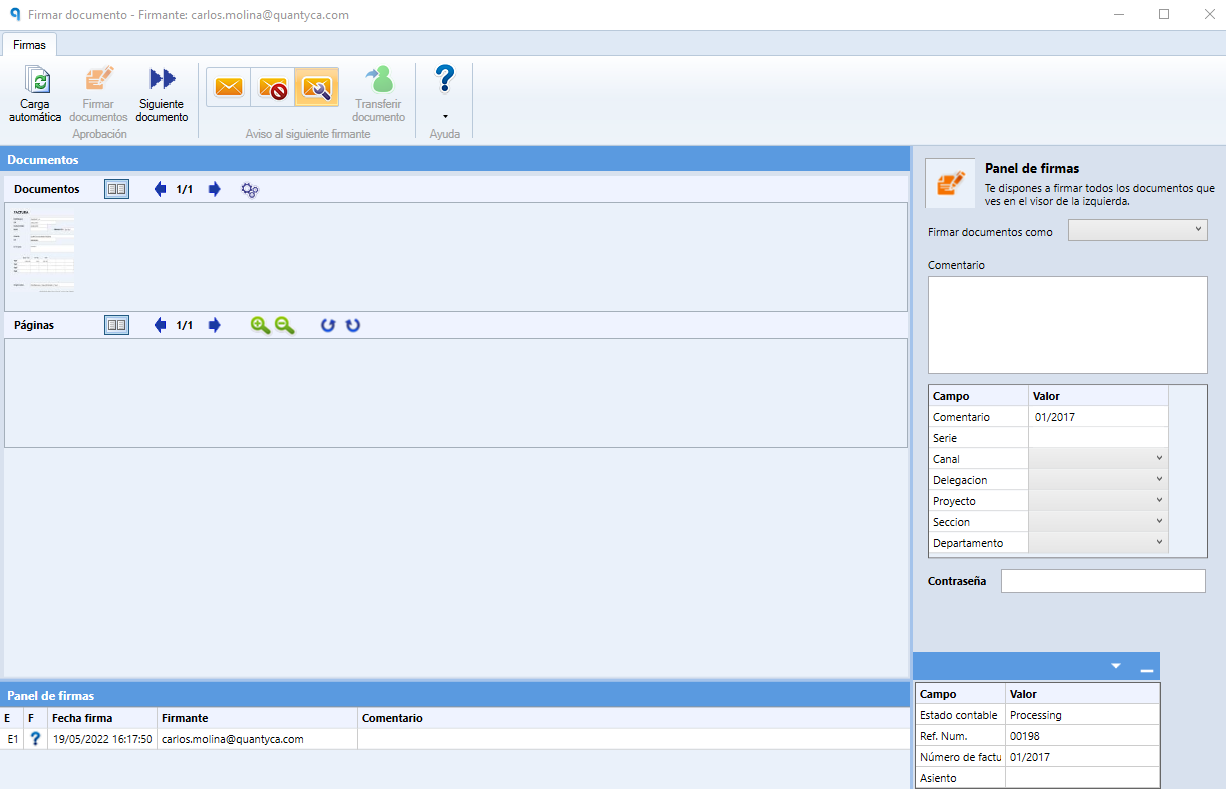
Sign (Workflows module)
Users with the Administrator or Accountant role, and with the necessary permissions, can sign documents within the Ubyquo Workflows module.
To do so:
- Select the document from the corresponding tab.
- Choose the assigned Workflow.
- Follow the signing, approval or rejection flow as appropriate.
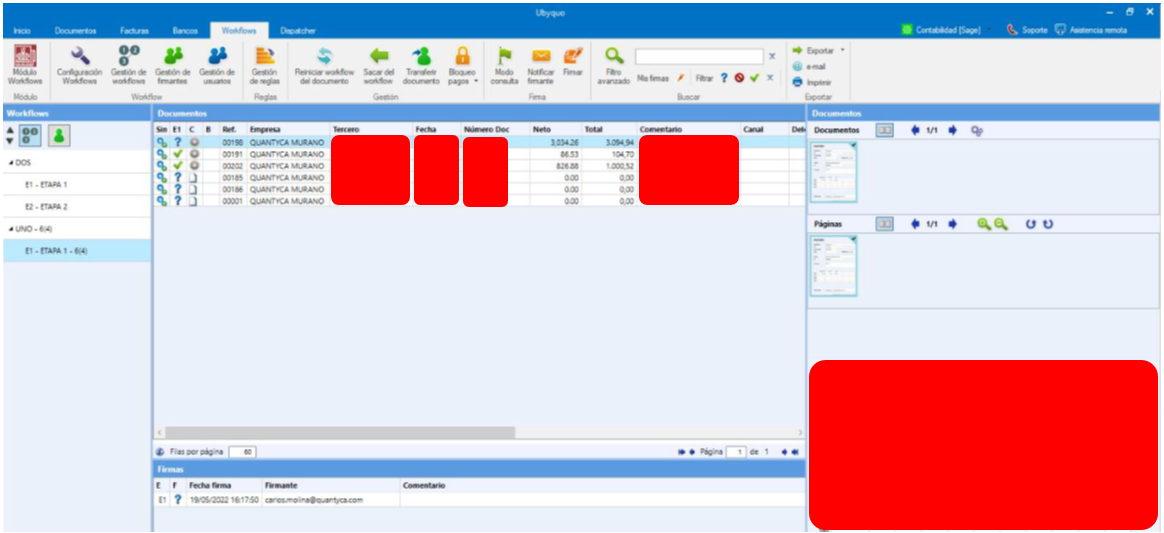
View all Workflows
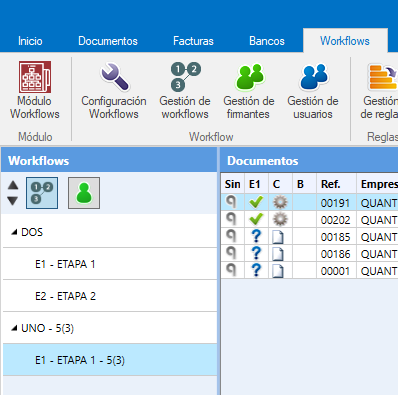
This view shows all the Workflows that exist in the system, even those that have no pending documents.
It is an overview, useful for getting a full picture of the status of the available Workflows.
View stages
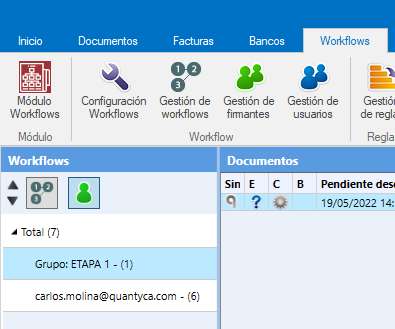
This view focuses only on the active stages that contain documents pending signature.
It allows more precise and focused management, showing only the sections that require immediate action.
Sign (from Workflows CI Cloud)
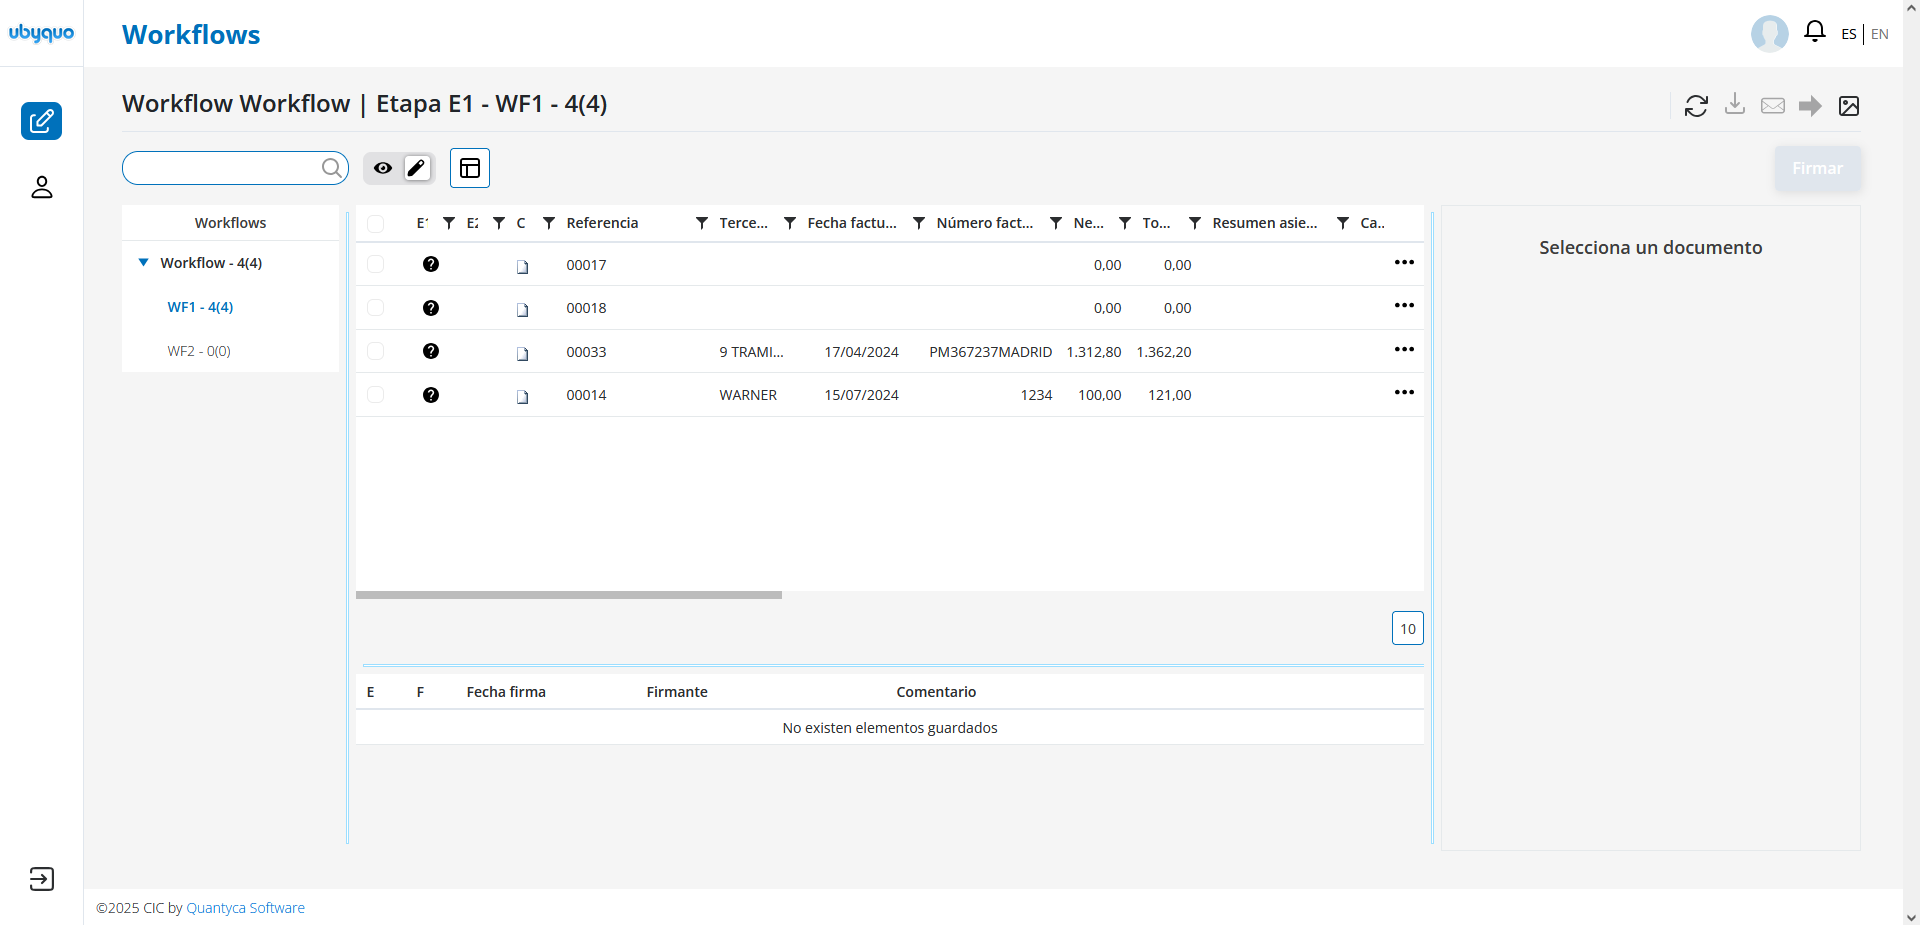
Users can sign documents from any device with an internet connection.
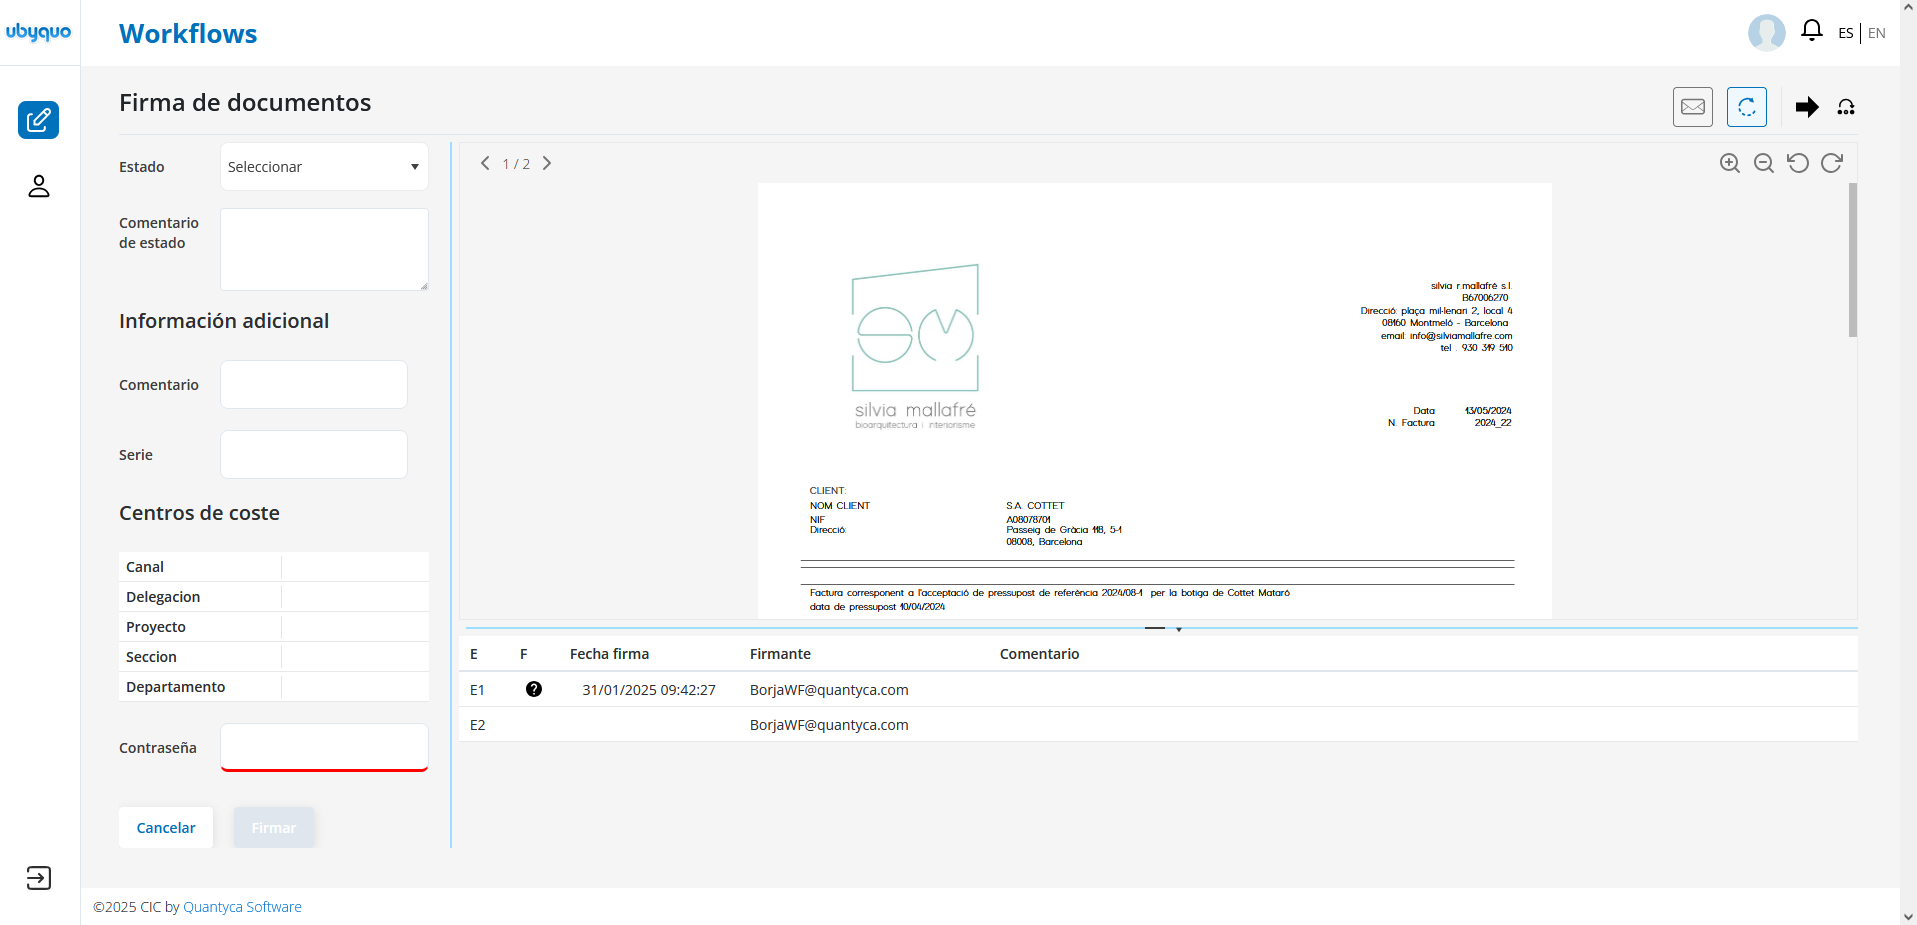
Access:
- Through the Ubyquo website. Web.
- Or by using the custom URL you have been given.
The system lets you:
- Sign documents.
- Check their status, according to the permissions assigned to each user.
Workflows Module Control
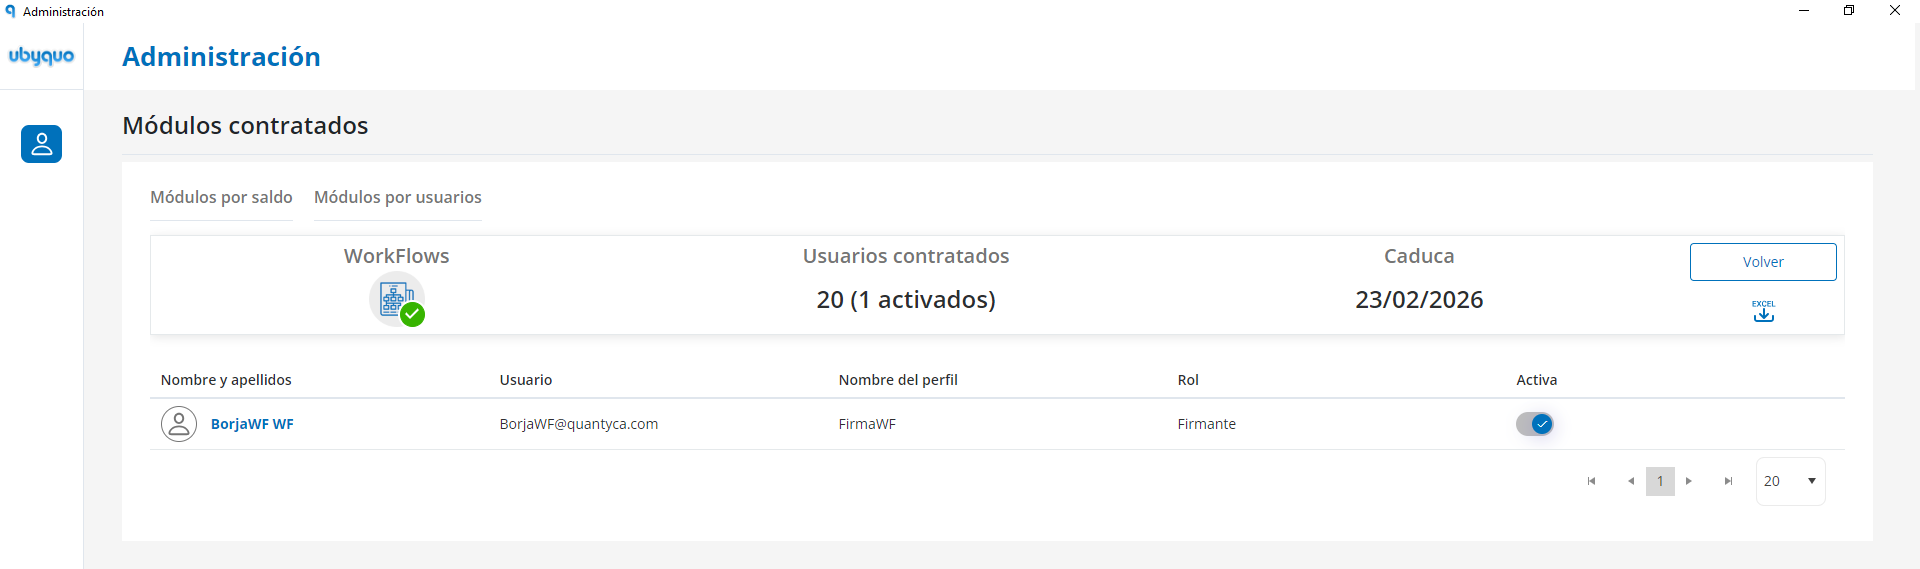
This section is available only to users with the Administrator role, and is located in the "Administración de la cuenta" (Account administration) tab.
From here you can view and manage:
- The number of licensed users.
- The service status.
- The expiry date of the module license.
Documentation
For more information about the Workflows module, you can access the additional documentation available at:
- The Ubyquo website (Web).
- The following direct link:
Workflows module and CI Cloud signing video
There you will find:
- Up-to-date guides.
- Tutorial videos.
- Practical examples of use.