
Updated on October 9, 2026
Ubyquo CSV connector for Sage SEOS
Work with Ubyquo without a local installation by exchanging Excel and CSV files with Sage SEOS.
The Ubyquo CSV connector for Sage SEOS and Cloud environments lets you work with Ubyquo when a local installation is not possible on the server or environment where Sage runs. Information is exchanged through Excel and CSV files generated from Sage: this is how you import accounting information into Ubyquo and export journal entries from Ubyquo to Sage.
Compatible modules
Documents, Invoices, Banks (except settling bills), WF (Workflow), Dispatcher and CIC.
What it does
Import and export using Sage Excel files, get the companies’ chart of accounts, third parties and journals, import Ubyquo journal entries into Sage and view the invoices linked to the entries directly from Sage.
Part 1 Export companies and fiscal years from Sage
- 1
Open the list of companies
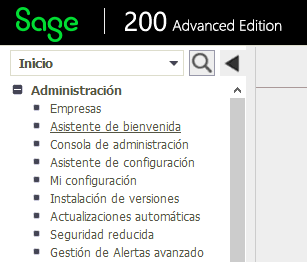
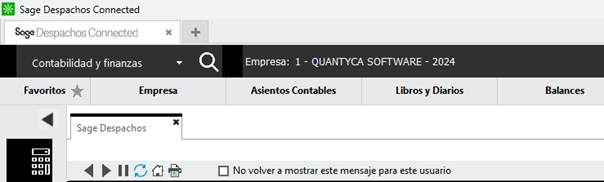
In Sage 200: Menú desplegable > Inicio > Empresas (Drop-down menu > Home > Companies). In Sage Despachos: Contabilidad y Finanzas > Empresas (Accounting and Finance > Companies).
- 2
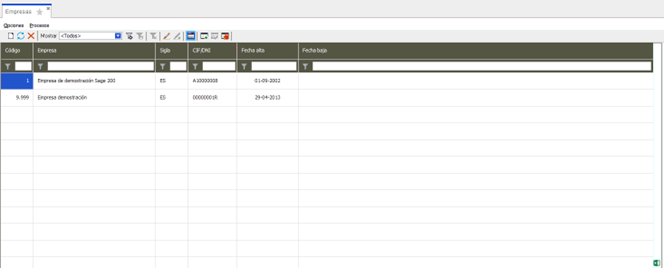
Click the Excel icon
It is at the bottom right.
- 3
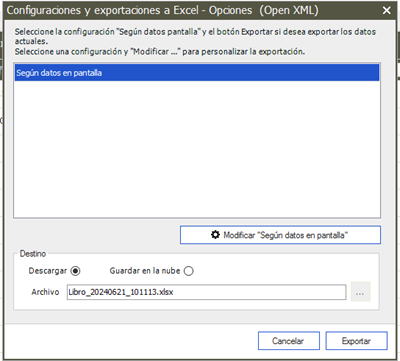
Choose “Según datos en pantalla”
Select Según datos en pantalla (According to on-screen data).
- 4
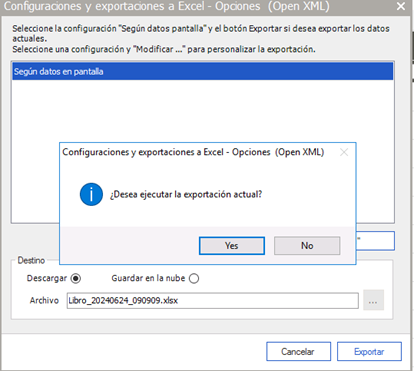
Download the file
Enter the file name, select Descargar (Download) and, when Sage asks whether you want to run the export, choose Sí (Yes). The file is saved in the Downloads folder.
- 5
Edit the Excel file
Open the file and, in the last column, rename Fecha de Baja (Deregistration date) to Ejercicio (Fiscal year) and enter the year for each record. You will use this file later to create the companies and fiscal years in Ubyquo.

Part 2 Export the chart of accounts and the journal
- 6
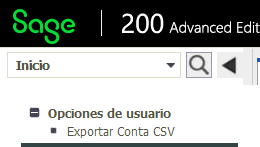
Open “Exportar Conta CSV”
In Sage 200: Inicio > Exportar Conta CSV (Home > Export accounting CSV). In Sage Despachos: Opciones > Exportar Conta CSV (Options > Export accounting CSV).

- 7
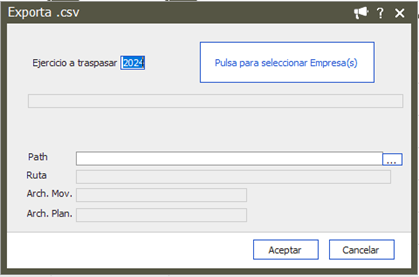
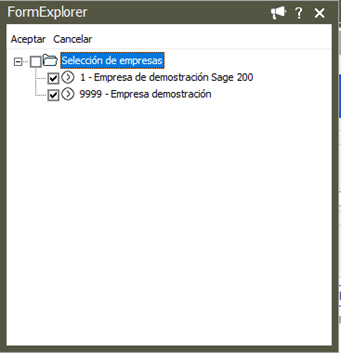
Select the companies
Click Seleccionar Empresa(s) (Select company/companies), tick the companies you want to export and click Aceptar (OK).
- 8
Generate the files
Set
K:\as the export path. Sage generates three files:Chart of accountsJournal.bat file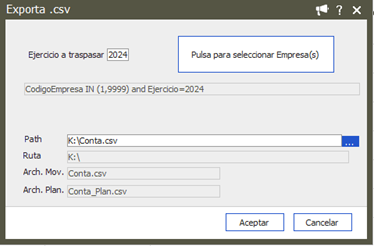
- 9
Download them
Open the folder where they were generated (in Sage 200, at the top right; in Sage Despachos, on the left side, with the folder icon), select the three files and click Abrir (Open) to download them to your computer.

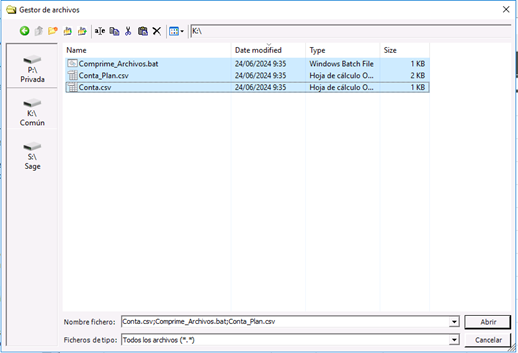
- 10
Create the Conta.zip file
Double-click Comprime_Archivos.bat: it generates the
Conta.zipfile, which is the one you will import into Ubyquo.
- 11
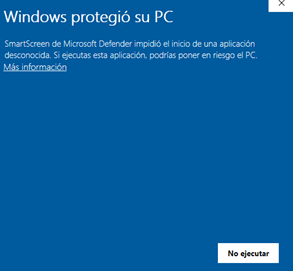
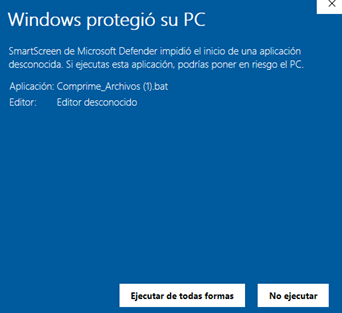
If Windows warns you, run it anyway
If a Windows security warning appears, choose More info > Run anyway (Más información > Ejecutar de todas formas).
Part 3 Create the companies in Ubyquo
- 12
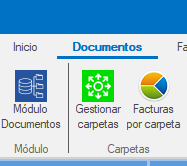
Open “Gestionar Carpetas”
With the Sage files ready, open Ubyquo and go to Gestionar Carpetas (Manage folders).

- 13
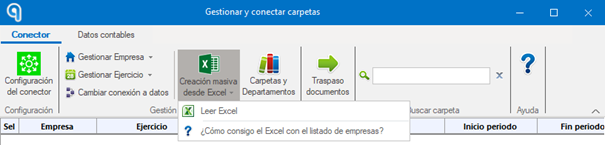
Read the Excel file
Select Creación masiva desde Excel > Leer Excel (Bulk creation from Excel > Read Excel), choose the Excel file with the companies and tick the ones you want to create.
- 14
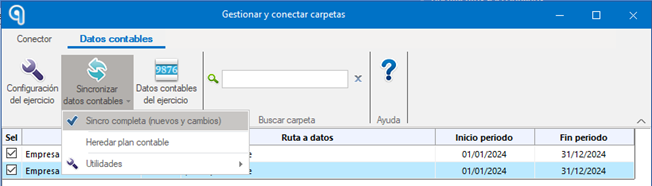
Synchronize the accounting data
Go to Datos contables > Sincronizar datos contables (Accounting data > Synchronize accounting data) and choose Sincronización completa (Full synchronization).
- 15
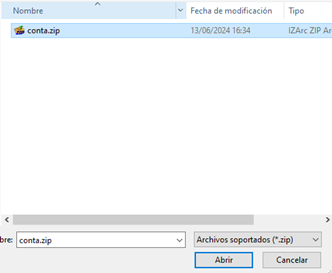
Choose Conta.zip
Select the Conta.zip file and click Abrir (Open). When the synchronization finishes, the companies are ready to work with in Ubyquo.
Part 4 Export the journal entries from Ubyquo
- 16
Export from Ubyquo
Verify the invoices in Ubyquo and run the export. Save the generated Excel file in the Downloads folder.

There are two ways to send the file to the Sage SEOS environment:
Option 1 Drag the file to the SEOS computer
- 1
Drag the file
Drag the Excel file to the SEOS computer and, when Sage asks for the path, choose
K:\.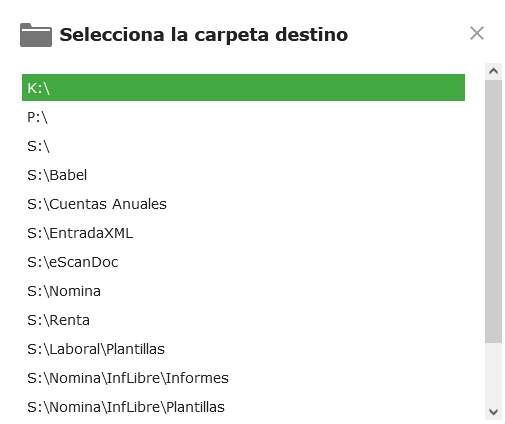
Option 2 Upload it from the Sage icon
- 1
Find the Sage icon
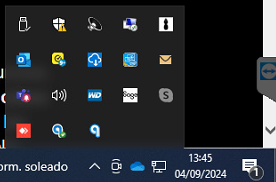
In the hidden icons, next to the Windows clock, look for the white Sage icon.
If it isn't there, open the Sage window and find the cloud icon
 at the top.
- 2
Choose “Subir archivos”
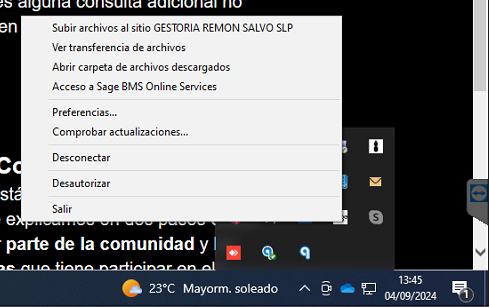
Right-click the Sage icon and select Subir archivos (Upload files).
- 3
Choose the file and the destination
Find and select the Excel file generated from Ubyquo and, under Destino (Destination), choose drive K: as the upload path.
Part 5 Import the journal entries into Sage
- 4
Click “Importar”
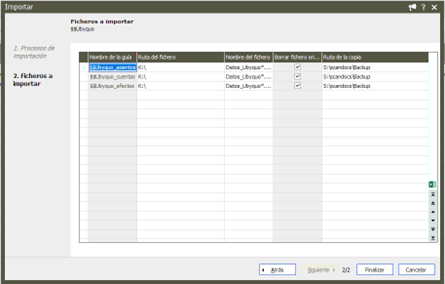
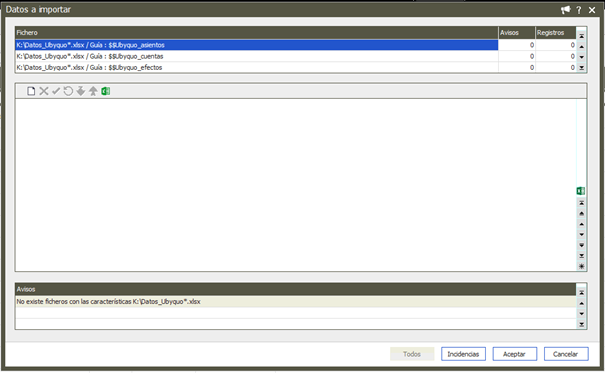
With the file now in Sage SEOS, select the Importar (Import) option in Sage.
- 5
Finish the import
Click Siguiente (Next) and Finalizar (Finish), review the import summary and click Aceptar (OK). The Ubyquo journal entries are now imported into Sage.
Part 6 View the invoices from Sage
- 6
Open the linked invoice
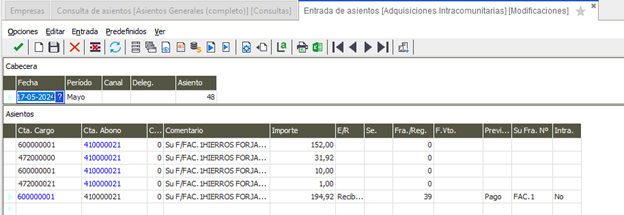
Open the generated journal entry, select Ver factura asociada (View linked invoice) and click Ver documento (View document).
- 7
Sign in to the viewer
A browser tab opens with the Ubyquo CIC viewer: enter your Ubyquo email and password. Once signed in, you will see the document linked to the journal entry in the Ubyquo CIC Viewer.
To view the invoices properly, you must have an open Ubyquo CI session.