Updated on 18 September 2026
Manual for importing invoices from Excel
Import invoice lists from Excel with reusable templates, even with several VAT rates.
To add a list of invoices in Excel so they can be posted in Ubyquo, follow these steps:
- Go to the "Facturas" (Invoices) tab in Ubyquo.
- Select the Company and Fiscal Year that correspond to the invoices you want to import from Excel.
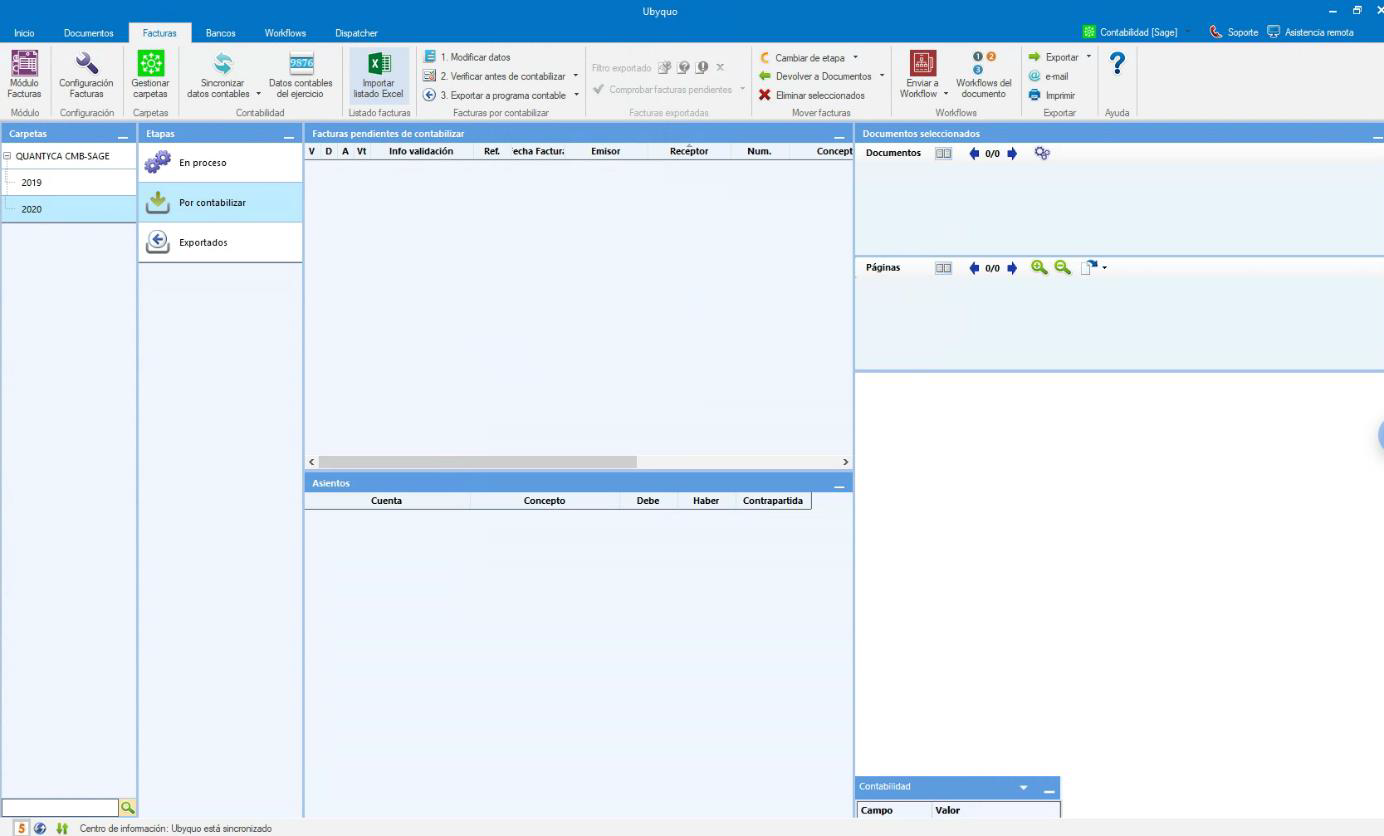
- Click the "Importar listado Excel" (Import Excel list) button.
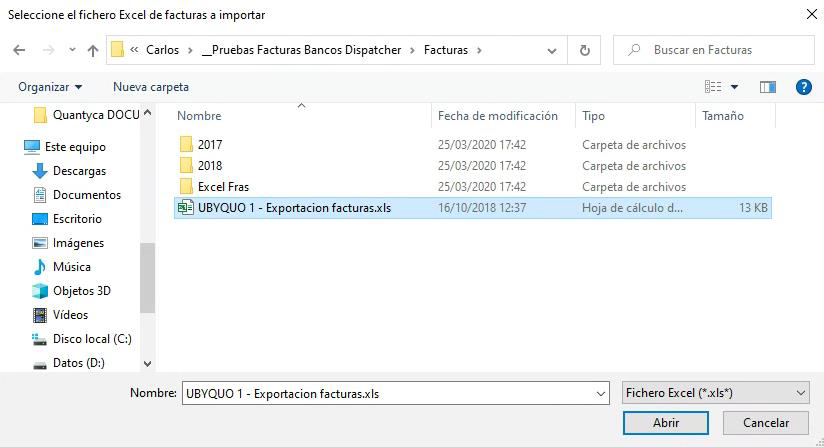
- Select the Excel file you want to import from the Windows file window and click "Abrir" (Open).
This process lets you import a list of invoices from Excel right away. No specific column format is required, because you can create templates and reuse them. Each row of the Excel file represents one invoice, and there are options for compound invoices spanning up to four rows (four VAT rates). After importing, you will see the result in the "Por Contabilizar" (To Post) folder.
To import invoices from Excel, we need to create templates in Ubyquo. Follow these steps:
- After clicking "Importar listado Excel", the "Gestión de plantillas" (Template management) window will appear. If this is your first time, you will need to create your template. If you already have templates, select the one you want.
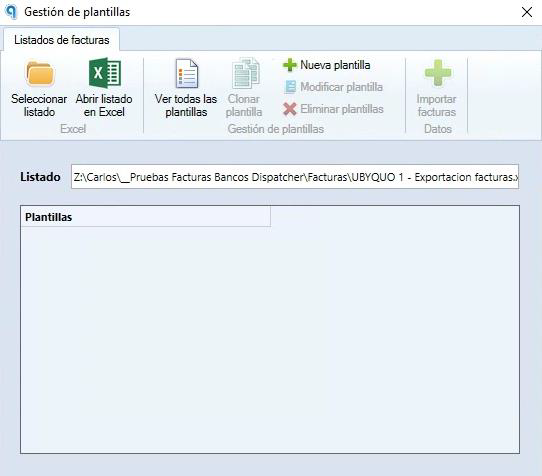
- To create a new template, click "Nueva plantilla" (New template). This will open the "Editor de plantillas" (Template editor).
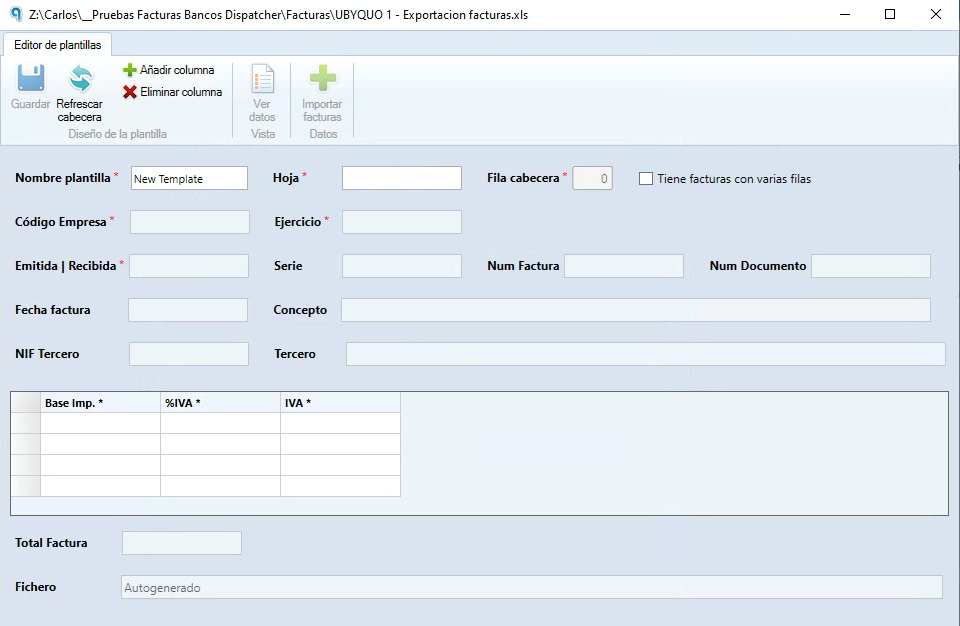
- Make the necessary changes in the "Editor de plantillas" and save them.
- Refresh the template data according to the header of the Excel file you are importing.
- Add or remove columns as needed.
- You can switch between viewing the fields in Edit mode and Data view, according to your preferences.
- Once the changes are complete, import the invoices into Ubyquo.
These steps will let you manage the templates for importing invoices from Excel into Ubyquo.
When creating templates to import invoices from Excel into Ubyquo, there are two types of fields to consider:
- Text fields: you enter the value manually.
- Combo fields: they use windows with drop-down lists.
The three fields present in the template creation process are described below:
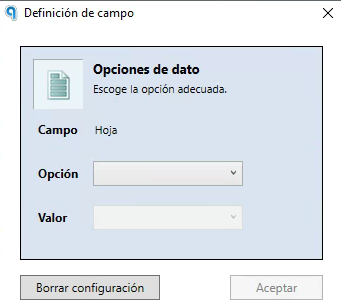
- — Campo (Field): Tells you which field you are going to fill in.
- — Opción (Option): Drop-down list where you choose the option you want.
- — Valor (Value): Its nature depends on the option chosen. It can be a text field or a drop-down list with several options.
The fields to fill in are described below; some of them are mandatory (marked with an asterisk):
- Nombre de plantilla (Template name): Enter a descriptive name that identifies the types of invoices and the company.
- Hoja (Sheet): Window with three options:
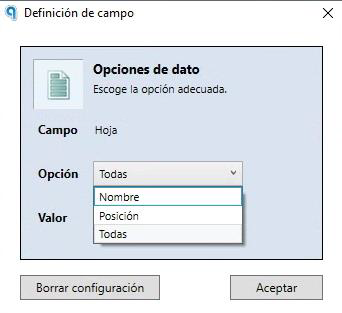
- — Nombre (Name): Choose according to the sheet name in the Excel workbook (it will appear in the drop-down list of the Valor option).
- — Posición (Position): Choose according to the position in the Excel workbook (it will appear in the drop-down list of the Valor option).
- — Todas (All): Selects all the sheets in the Excel workbook.
- Fila cabecera (Header row): Enter the row number that indicates which row contains the header.
Note that when you enter the row number, the system will try to fill in the rest of the fields automatically. You can change them and add any that are missing as needed.
When creating templates in Ubyquo to import invoices from Excel, there are more fields to consider:
- Tiene facturas con varias filas (Has invoices with several rows): Check this option if the Excel file has invoices with more than one line.
- Código Empresa (Company code): Window with three options to indicate the company the invoices belong to:
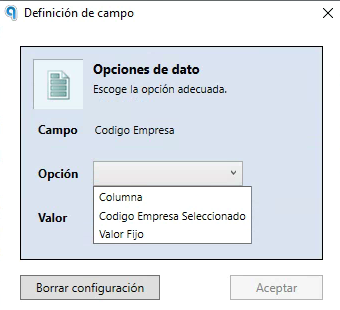
- — Columna (Column): Choose according to the column name in the Excel file (it will appear in the drop-down list of the Valor option).
- — Código Empresa Seleccionado (Selected company code): Takes the company you are currently on in Ubyquo (recommended).
- — Valor Fijo (Fixed value): Type the company name in the Valor option.
- Ejercicio (Fiscal year): Window with three options to indicate the fiscal year the invoices belong to:
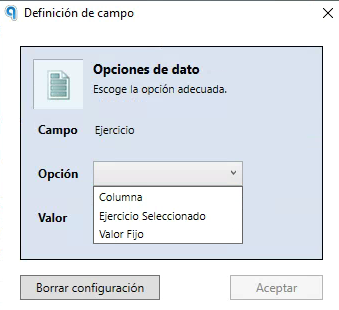
- — Columna: Choose according to the column name in the Excel file (it will appear in the drop-down list of the Valor option).
- — Ejercicio Seleccionado (Selected fiscal year): Takes the fiscal year you are currently on in Ubyquo (recommended).
- — Valor Fijo: Type the fiscal year in the Valor option.
- Emitida | Recibida (Issued | Received): Window with two options to indicate the type of the invoices.
- — Columna: Choose according to the column name in the Excel file (it will appear in the drop-down list of the Valor option).
- — Valor Fijo: To choose (Emitida or Recibida) in the combo of the Valor option.
- Serie (Series): Window with two options to indicate the series of the invoices.
- — Columna: Choose according to the column name in the Excel file (it will appear in the drop-down list of the Valor option).
- — Valor Fijo: Type the series for the invoices in the Valor option.
- Número de factura (Invoice number): Window with two options to indicate the invoice number of the invoices.
- — Columna: Choose according to the column name in the Excel file (it will appear in the drop-down list of the Valor option).
- — Valor Fijo: Type the invoice number for the invoices in the Valor option.
- Num Documento (Document no.): Window with two options to indicate the document number of the invoices.
- — Columna: Choose according to the column name in the Excel file (it will appear in the drop-down list of the Valor option).
- — Valor Fijo: Type the document number for the invoices in the Valor option.
- Fecha Factura (Invoice date): Window with two options to indicate the date of the invoices.
- — Columna: Choose according to the column name in the Excel file (it will appear in the drop-down list of the Valor option).
- — Valor Fijo: Type the date for the invoices in the Valor option.
- Concepto (Description): Window with two options to indicate a description for the invoices.
- — Columna: Choose according to the column name in the Excel file (it will appear in the drop-down list of the Valor option).
- — Valor Fijo: Type a description for the invoices in the Valor option.
- NIF Tercero (Third-party NIF): Window with two options to indicate the NIF of the third party on the invoices.
- — Columna: Choose according to the column name in the Excel file (it will appear in the drop-down list of the Valor option).
- — Valor Fijo: Type the NIF of the third party for the invoices in the Valor option.
- Tercero (Third party): Window with two options to indicate the third party on the invoices.
- — Columna: Choose according to the column name in the Excel file (it will appear in the drop-down list of the Valor option).
- — Valor Fijo: Type the NIF of the third party for the invoices in the Valor option.
- Base Imp. (Taxable base): Window with two options to indicate the taxable base of the invoices.
- — Columna: Choose according to the column name in the Excel file (it will appear in the drop-down list of the Valor option).
- — Calculado (Calculated): Calculates the value from the values of the "%IVA" and "IVA" fields.
- %IVA (VAT %): Window with three options to indicate the VAT percentage of the invoices.
- — Columna: Choose according to the column name in the Excel file (it will appear in the drop-down list of the Valor option).
- — Calculado: Calculates the value from the values of the "Base" and "IVA" fields.
- — Valor Fijo: To choose the VAT percentage in the combo of the Valor option.
- IVA (VAT): Window with two options to indicate the VAT of the invoices.
- — Columna: Choose according to the column name in the Excel file (it will appear in the drop-down list of the Valor option).
- — Calculado: Calculates the value from the values of the "Base" and "%IVA" fields.
- %R. Eq. (Equivalence surcharge %): Window with three options to indicate the equivalence surcharge (recargo de equivalencia) percentage of the invoices.
- — Columna: Choose according to the column name in the Excel file (it will appear in the drop-down list of the Valor option).
- — Calculado: Calculates the value of the "R. Equivalencia" field.
- — Valor Fijo: To choose the equivalence surcharge percentage in the combo of the Valor option.
- R. Equiv. (Equivalence surcharge): Window with two options to indicate the equivalence surcharge of the invoices.
- — Columna: Choose according to the column name in the Excel file (it will appear in the drop-down list of the Valor option).
- — Calculado: Calculates the value of the "% Recargo Equivalencia" field.
- %Ret. (Withholding %): Window with three options to indicate the withholding (retención) percentage of the invoices.
- — Columna: Choose according to the column name in the Excel file (it will appear in the drop-down list of the Valor option).
- — Calculado: Calculates the value of the "Retención" field.
- — Valor Fijo: To choose the withholding percentage in the combo of the Valor option.
- R. Equiv. (Withholding): Window with two options to indicate the withholding of the invoices.
- — Columna: Choose according to the column name in the Excel file (it will appear in the drop-down list of the Valor option).
- — Calculado: Calculates the value of the "% Retención" field.
- Total Factura (Invoice total): Window with two options to indicate the total of the invoices.
- — Columna: Choose by the column name in the Excel file (recommended for better checking).
- — Calculado: Calculates the value from the previous accounting fields. Not recommended, because it does not allow the correctness of the values to be checked when entering data in Ubyquo. We suggest choosing the column option for better verification.
- Fichero (File): Window with two options to indicate where the invoice image is located.
- — Columna: Choose according to the name of the column in the Excel file that contains the invoice image (folder path/file_name containing the image of each invoice).
- — Autogenerado (Auto-generated): Generates a generic image of the invoice.
These fields let you customize the import to your needs, indicating the company and fiscal year that the invoices in the Excel file correspond to. The "Valor Fijo" option lets you enter the required information directly.
Let's look at the result. The mandatory fields are Taxable Base, %IVA and IVA. The rest appear if they come in the Excel file, but we can turn them on or remove them using two options at the top:

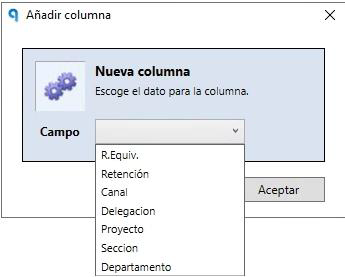
- Añadir columnas (Add columns): Choose the one we need.
- — Recargo Equivalencia (Equivalence Surcharge)
- — Retención (Withholding)
- — Canal (Channel)
- — Delegación (Branch)
- — Proyecto Analítica (Analytical Project)
- — Sección (Section)
- — Departamento (Department)
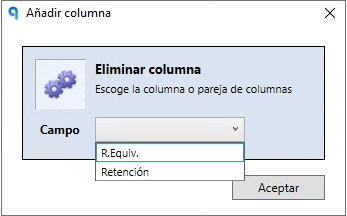
- Eliminar columnas (Remove columns): Choose the one we do not need. Only the ones we have added appear.
- Ver Datos (View Data): Button that shows how the invoices in the Excel file will be handled. It changes to "Ver edición" (View edit) to go back to the template if you want to change any field.
- Ver edición (View edit): Icon that lets you go back to the template to make changes to the fields.
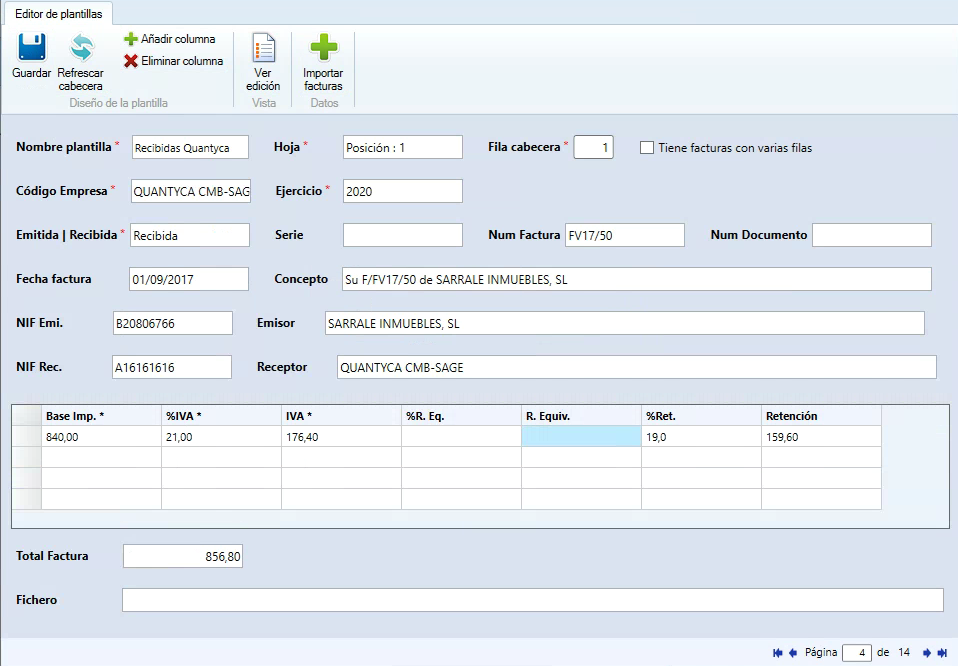
At the bottom right, there are options to navigate through the invoices and review a specific one.
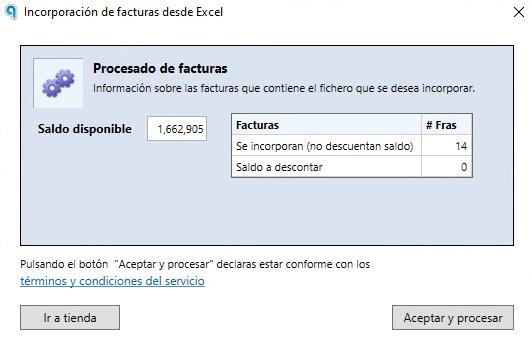
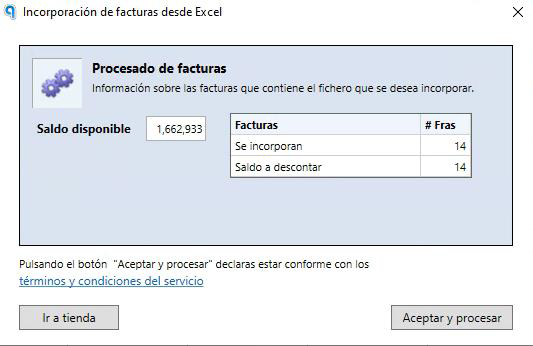
If everything is correct, you can proceed with the import by clicking the "Importar Facturas" (Import Invoices) button. This will open a window with information about the available balance, the invoices that will be added and the balance to be deducted.
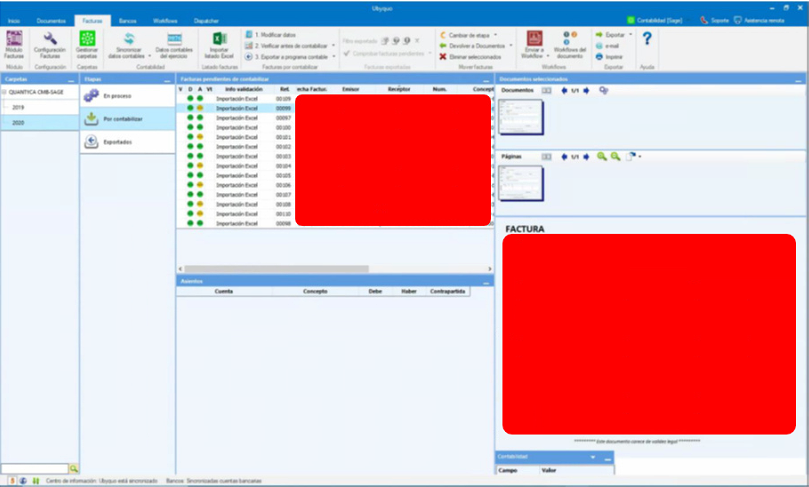
After importing the invoices and once they appear in the "Por Contabilizar" folder, we will handle them the same way as regular invoices. This includes the Edit, Verify and Export stages. If errors appear, there may have been a problem with the template used, so it is essential to check the "Ver Datos" option to see how the fields will be filled in.
It is crucial to use the same Excel file to modify the template or any field in the Excel file. When the Excel file is processed for the first time, two columns are added at the end in case you need to run the Excel file again to modify the invoices in Ubyquo at no extra cost.

If you process this Excel file again, you will be told that no balance will be deducted and any changes will be reflected in Ubyquo.