
Updated on October 9, 2026
Invoices module manual
The whole module step by step: access, settings, companies and fiscal years, synchronization and the invoice journey through to export.
Logging in
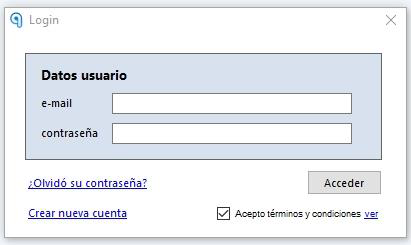
When you open the program, enter your user (the e-mail address you provided when registering) and the password given to you by the installer or trainer.
Change your password
If you forget it, click ¿Olvidó su contraseña? (Forgot your password?) and you will receive a new one by e-mail.
- 1
Open account administration
Go to Inicio (Home) › Administración de la cuenta (Account administration). If it does not open, access it from here.
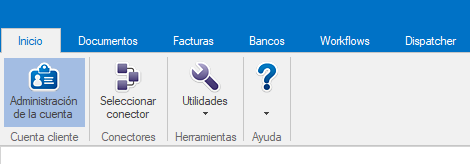
- 2
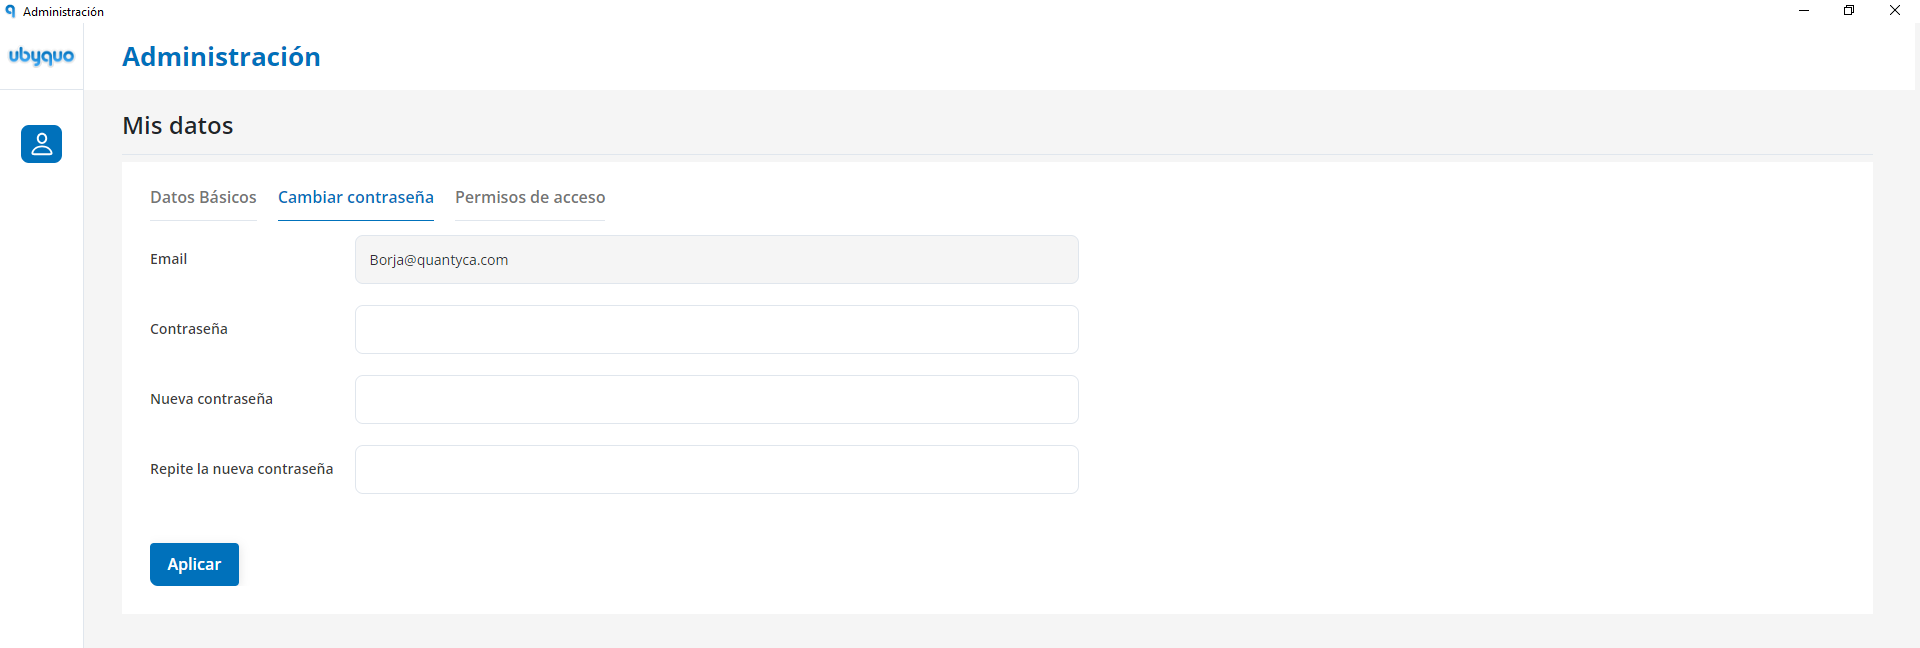
Change the password
In Mis datos (My details), click Cambiar contraseña (Change password). The new password must be:
AlphanumericAt least 8 charactersWith uppercase and lowercase lettersFor security reasons, it is a good idea to change it regularly.
Help Center
From the module icon or the Help icon you can open the Help Center, with detailed articles and guides to resolve common questions and get the most out of the tool.


Invoices settings
This is where you set up the company data and the automatic sending of invoice batches.
- 3
Review the company data
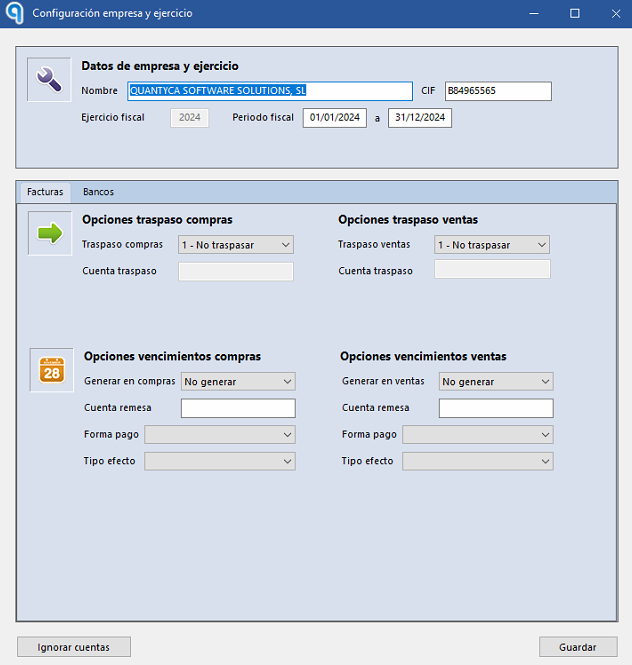
In Configuración de Empresa (Company settings) you can change the main data (Nombre (Name), CIF and Periodo Fiscal (Fiscal period)) and set the general parameters for invoice management.
- 4
Set up transfers and due items
This tab is where you set up:
Purchase or sales transfer: rules for transferring documentsDue item generation: automatic for purchases or sales, globally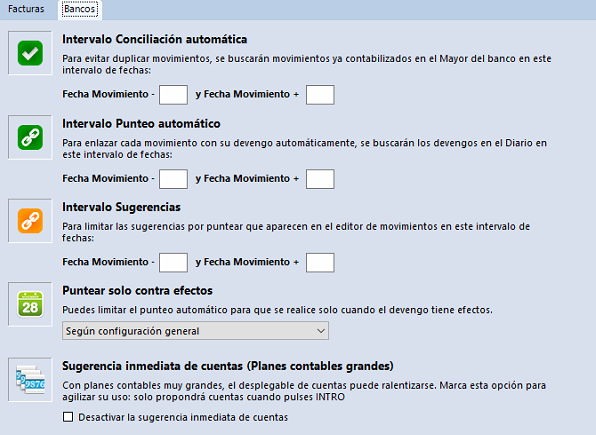
- 5
Adjust bank reconciliation
Set the interval of days for reconciliation, matching and suggestions and, if you want, turn on “Puntear automáticamente solo contra efectos” (Auto-match only against receivables/payables).
With large charts of accounts, turn on “Desactivar la sugerencia inmediata” (Disable immediate suggestion): it improves performance because it uses fewer resources.
- 6
Set up automatic sending
In Configuración de Envío Automático (Automatic sending settings), add the fiscal years included in the automatic sending of invoice batches and choose how they are processed:
Document typeMulti-page documentsWhich page to process - 7
Turn on automatic sending
Turn on “Envío automático” (Automatic sending) and make sure the selected fiscal years will be processed according to the settings.
Create companies and fiscal years (Gestionar carpetas)
There are two ways to create companies and fiscal years: bulk creation and manual creation.
If you use Sage Seos, see the specific guide: SAGE - CSV Connector.
Option 1 Bulk creation
- 1
Open Gestionar Carpetas
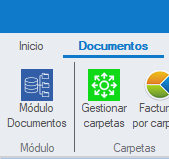
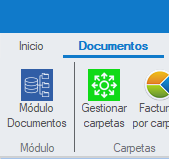
In the Documentos (Documents) tab, select Gestionar Carpetas (Manage folders).
- 2
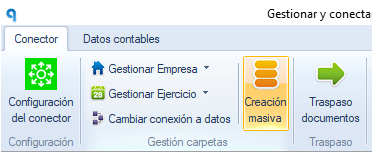
Click “Creación masiva”
Click Creación masiva (Bulk creation).
- 3
Choose companies and fiscal years
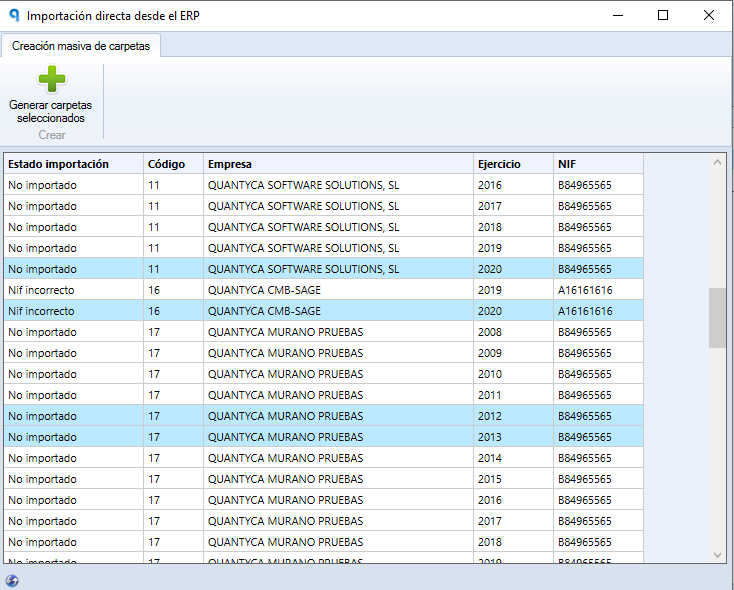
The window shows the companies and fiscal years in the ERP or accounting software. Select the ones you want and click Generar carpetas seleccionadas (Generate selected folders).
Check the import
The Estado importación (Import status) column must show Importación correcta (Import successful): they have been created correctly.
- 4
Grant yourself permissions
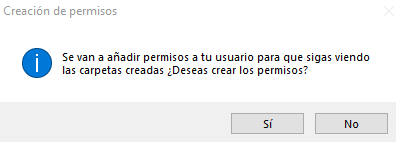
If you do not have the administrator profile, a window opens to grant permissions to your user: choose Sí (Yes) and close the windows to return to the main Documents view.
Option 2 Manual creation
- 1
Open Gestionar Carpetas
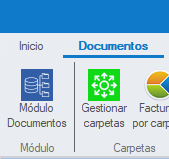
In the Documentos tab, select Gestionar Carpetas.
- 2
Create the company
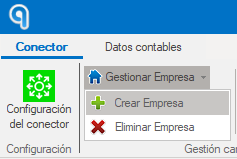
Click Gestionar Empresa (Manage company) and select Crear Empresa (Create company).
- 3
Fill in its details
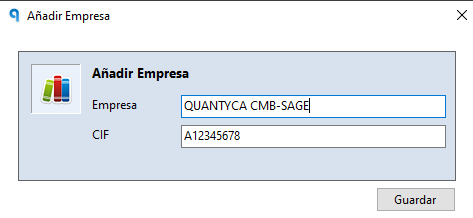
Enter the company name and CIF and click Guardar (Save).
- 4
Create the fiscal year
Select Gestionar Ejercicio (Manage fiscal year) › Crear Ejercicio (Create fiscal year), enter the year and click Guardar.
- 5
Synchronize the chart of accounts
Finally, synchronize the Plan Contable (Chart of accounts). You can see how to do it here.
Delete a fiscal year or a company
Only administrator users should do this. Before deleting, the company or fiscal year must not contain any documents in posted status.
- 6
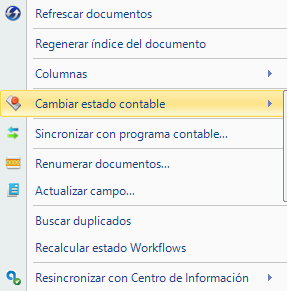
Change the accounting status
In the Documentos tab, go to the documents of the fiscal year, right-click and choose Cambiar estado contable (Change accounting status).
- 7
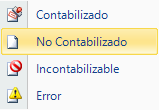
Set them to Not posted
Select No contabilizado (Not posted).
- 8
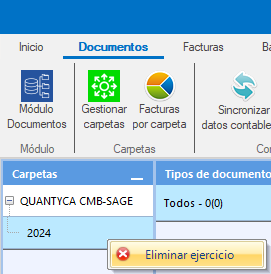
Delete the fiscal year
Go to the fiscal year, right-click and choose Eliminar ejercicio (Delete fiscal year).
- 9
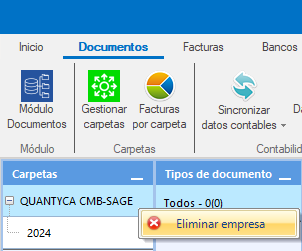
Delete the company
To delete the company, go to it, right-click and select Eliminar empresa (Delete company).
Invoices by folder

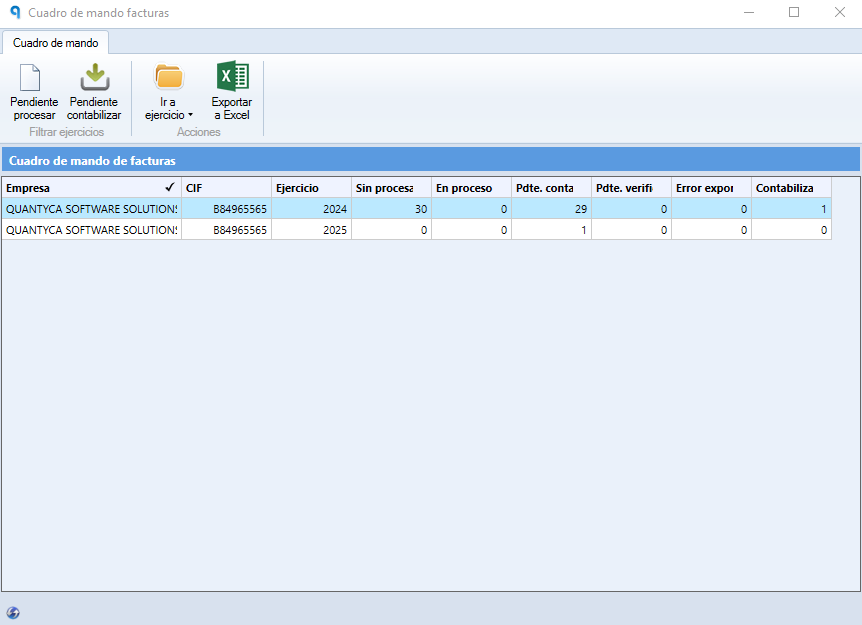
When you open this section you will see a dashboard with a complete overview of all unposted documents.
Synchronize accounting data
If you use Sage Seos, see the specific guide: SAGE - CSV Connector.
You can synchronize only the fiscal year you are currently on:

Or synchronize all the fiscal years you select:
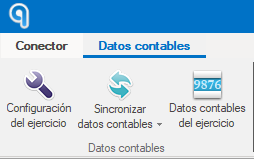
Sincro Rápida (solo nuevos) (Quick sync, new items only) and Smart Sync (nuevos y cambios desde la última sincro) (new items and changes since the last sync) download only the new or modified accounts since the last synchronization. They are ideal for frequent synchronizations or one-off reviews.
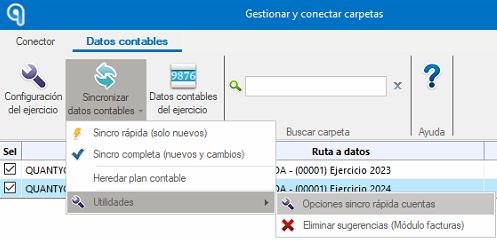
To adjust the quick account sync:
- 10
Open Datos Contables
In the Documentos tab, select Gestionar Carpetas and open the Datos Contables (Accounting data) tab.
- 11
Click “Sincro Rápida (solo nuevos)”
It downloads the new accounts since the last synchronization.
- 12
Adjust the options
In Opciones sincro rápida cuentas (Quick account sync options) you can add account ranges or remove accounts if necessary.
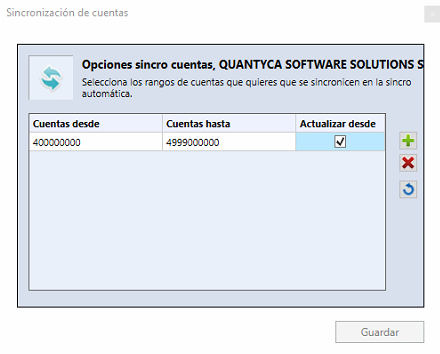
Sincro Completa (nuevos y cambios) (Full sync, new items and changes) downloads the complete Plan Contable (Chart of accounts), the Diario (Journal) and the Cartera de Efectos (Receivables/payables portfolio). It is recommended for new companies or when starting a fiscal year.
In all these options you can specify a value or range (accounts, journal entries, receivables/payables) to synchronize.
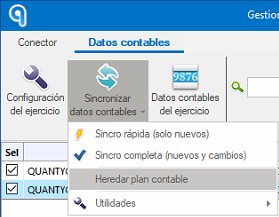
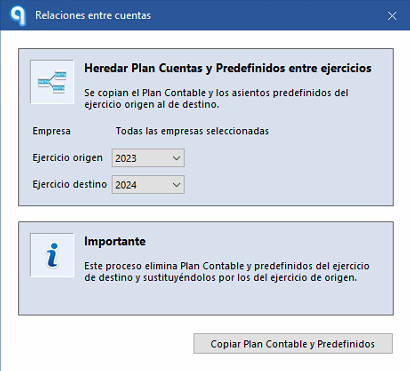
To inherit the Chart of accounts, Journal and Receivables/payables portfolio from one year to the next, making accounting continuity between fiscal years easier, use the option you will find only in Gestionar Carpetas › Datos Contables tab.
Fiscal year accounting data
In the Documents, Invoices and Banks tabs you will find the Datos contables del ejercicio (Fiscal year accounting data) button.
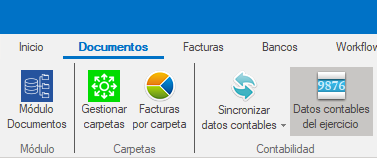
From there you can:
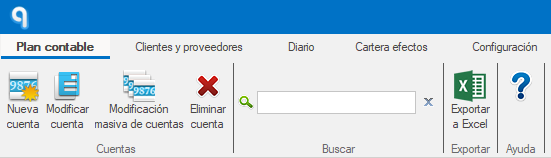
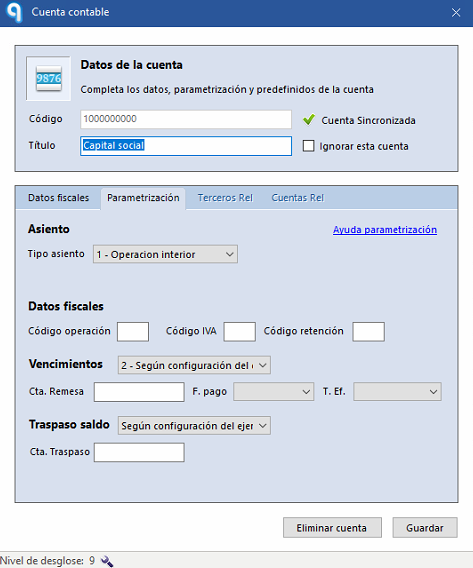
- Modificar cuenta (Edit account): journal entry type, taxable bases with 0% VAT, transaction, VAT and withholding codes (mandatory if applicable), due items and balance transfers.
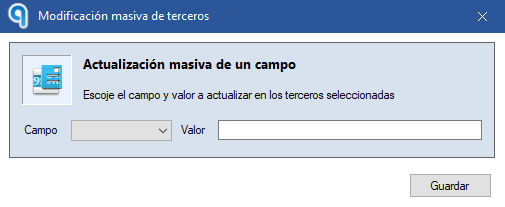
- Modificación masiva (Bulk edit): set the same fields on several accounts, one field at a time.
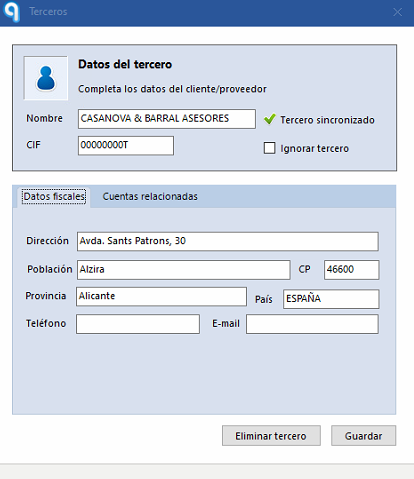
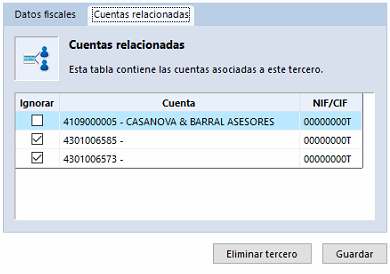
- Modificar tercero (Edit third party): name, CIF and tax data.
- Option to ignore accounts no longer in use. If only one account is related, Ubyquo chooses it automatically.
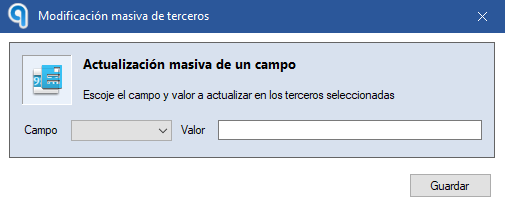
- Modificación masiva de terceros (Bulk edit of third parties): apply changes to several records at once.
- View all synchronized journal entries (they cannot be changed from here).
- View all synchronized receivables/payables. By right-clicking an item you can synchronize the selected values, remove it from suggestions, recalculate the amount by matching or change its status.
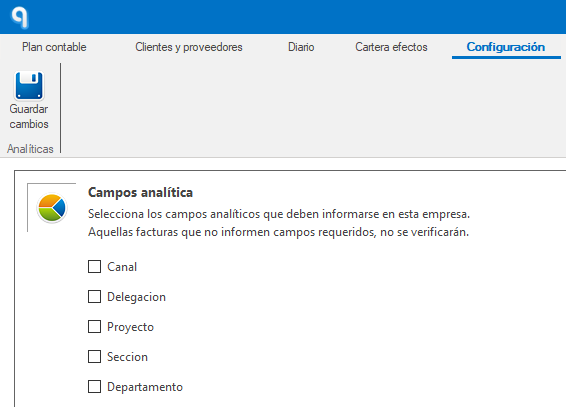
- Define the mandatory analytical fields: if they are empty, the document cannot be verified.
Import invoices
From the Facturas (Invoices) tab you can import documents in Excel or as an e-invoice.
To import from Excel, you first need a template with the right format. You can see how to create it here.
Por contabilizar (To post) stage
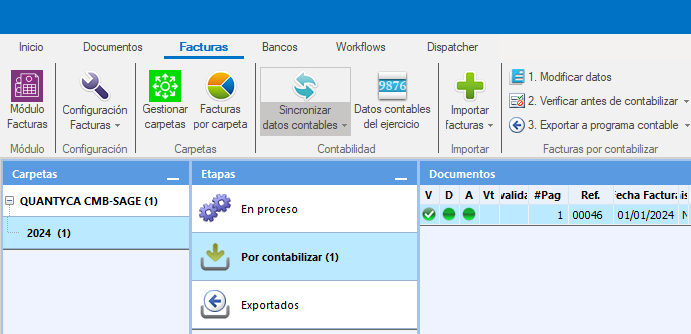
When you review invoices in the Por contabilizar stage, pay attention to these columns:
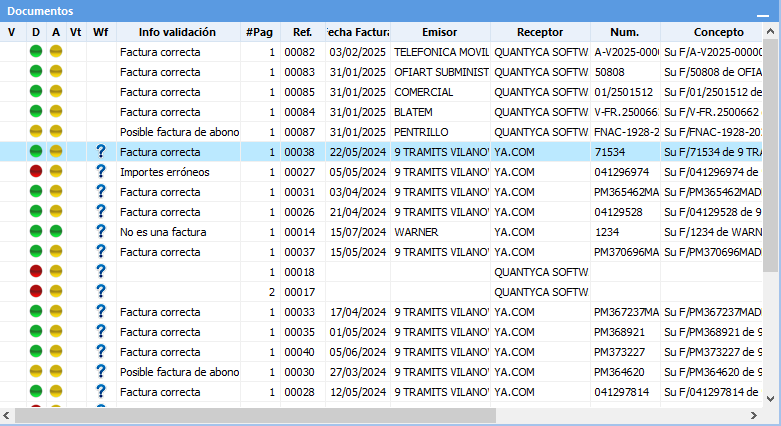
| Column | What it shows |
|---|---|
| V | Verification of the invoice's journal entry (see “Verify the invoices”). |
| D | Invoice data. |
| A | Journal entry generated for the invoice. |
| Vt | Whether the invoice has due items. |
| Info Validación (Validation info) | What happened during the pass through the OCR server. |
The colors show the status of the invoice:
- Green: everything is in order.
- Yellow: there are updates to the accounts.
- Red: there were difficulties in the process.
Invoices with the Datos and Asientos columns in green have the journal entry proposed and are ready to be exported to the ERP or accounting software.
Edit and complete the invoices
- 13
Open the invoice
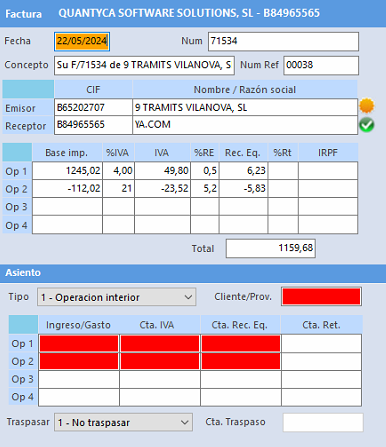
Double-click the invoice or click 1. Modificar datos (1. Edit data) to see its detailed information.
- 14
See whether it is complete
You will see one of these statuses:
Complete invoice: Ubyquo has filled in all the data and proposes the journal entryInvoice to complete: it could not complete the data and does not propose the journal entryAn invoice is left to complete when, for example, Ubyquo does not find the supplier or customer account, amounts are missing or several income/expense accounts are associated.
- 15
Fill in what is missing
Fill in the empty fields or change the invoice accounts before posting it.
Create a customer or supplier
- 16
Click “Nueva Cuenta”
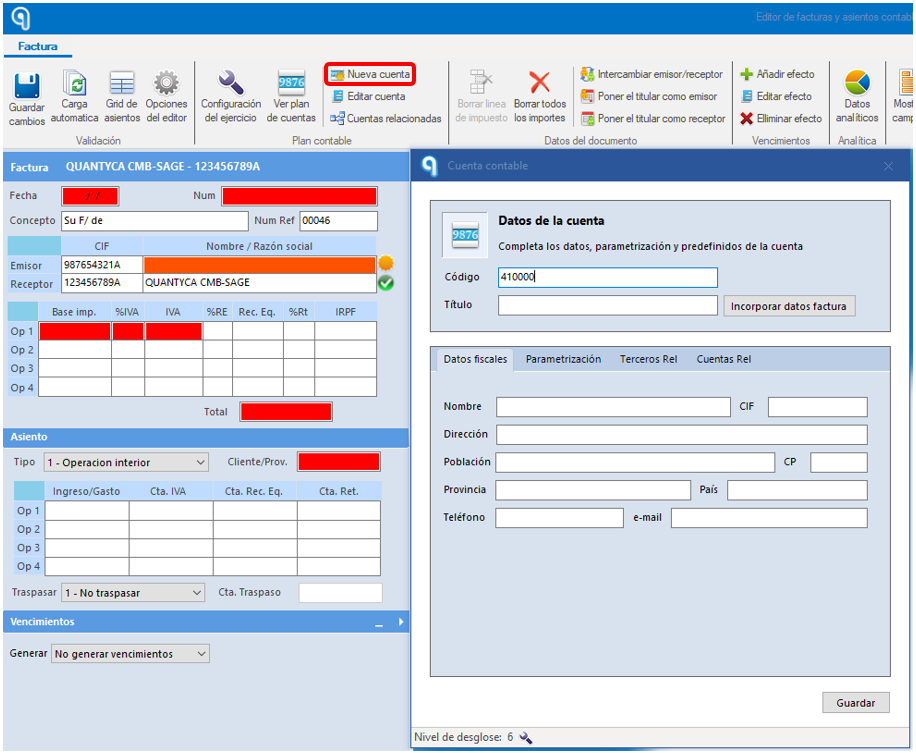
If the Emisor (Issuer) or Receptor (Recipient) field shows a yellow sun, the account needs to be created: click Nueva Cuenta (New account), at the top.

- 17
Type the start of the account
In the Cuenta Contable (Ledger account) window, type the first 3 or 4 digits of the account and press the <TAB> key: Ubyquo fills in the available account number in the chart of accounts.
- 18
Add the invoice data
Click Incorporar datos factura (Add invoice data) to fill in the name and CIF, and then Guardar (Save).
- 19
Complete the accounts and save
Complete the Expense/Income and VAT accounts as appropriate and click Guardar Cambios (Save changes).
Everything in green
When all the invoices have their columns in green, you can verify and export them.
Verify the invoices
- 20
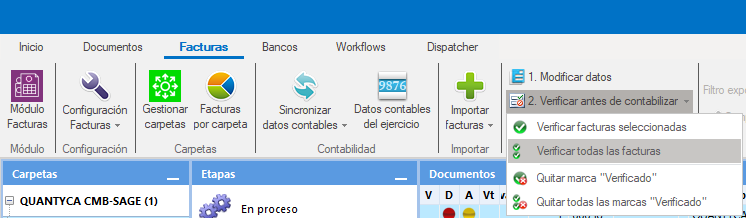
Click “2. Verificar antes de contabilizar”
Choose Verificar todas las facturas (Verify all invoices) or, if you only want some, Verificar facturas seleccionadas (Verify selected invoices).
- 21
Check the period
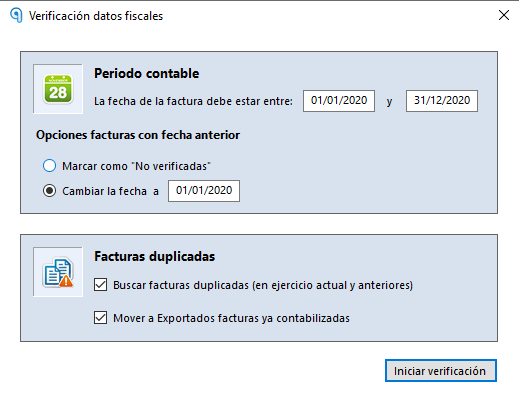
On the next screen, confirm that the invoices belong to the correct accounting period and, if necessary, adjust the posting date.
- 22
Prevent duplicates
At the bottom, turn on the option to prevent duplicate invoices.
- 23
Click “Iniciar verificación”
Click the Iniciar verificación (Start verification) button.
Approval
When it finishes, the approval (check mark) icon appears in the validation column: the invoices are ready to be exported to the ERP or accounting software.
Export the invoices
- 24
Click “Exportar a programa contable”
To post them, click Exportar a programa contable (Export to accounting software) and choose an option:
Exportar seleccionados (Export selected): only the selected ones with a check mark in the V columnExportar todos (Export all): all the ones with a check mark in the V column
Specific exports
- SAGE: Direct export or Export using the import manager
- A3ECO & A3CON: A3ECO & A3CON - Export using SUENLACE
- Altai: Export using Excel
- CONTASOL: Direct export
For more details on exporting or importing, see your ERP's manual.
Change stage
There are two options for changing the stage of invoices:
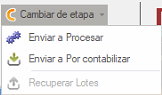
- Enviar a procesar (Send to process): sends the invoices back to the system to extract the data.
- Enviar a por contabilizar (Send to To post): useful when the invoices are in the exported stage and you want to post one or several of them again.
Return to documents
There are two options for returning invoices to the Documents tab:
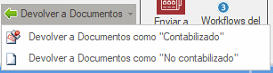
- Devolver a Documentos como "Contabilizado" (Return to Documents as "Posted"): moves them to the Documents tab with the Contabilizado (Posted) status.
- Devolver a Documentos como "No Contabilizado" (Return to Documents as "Not posted"): moves them to the Documents tab with the No Contabilizado (Not posted) status.
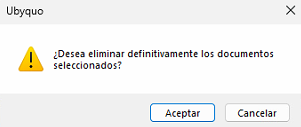
Delete selected
Deletes the invoices that have not been posted.
Important: it cannot be undone.
Send to Workflow
Sends the documents to the Workflows module for approval. There are two ways:
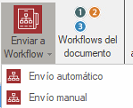
- Envío automático (Automatic sending): sends the document to its corresponding workflow. It only works if you have the Workflows rules set up. It is best used after sending to automatic posting, from the Invoices tab.
- Envío manual (Manual sending): sends the document to the workflow you choose.
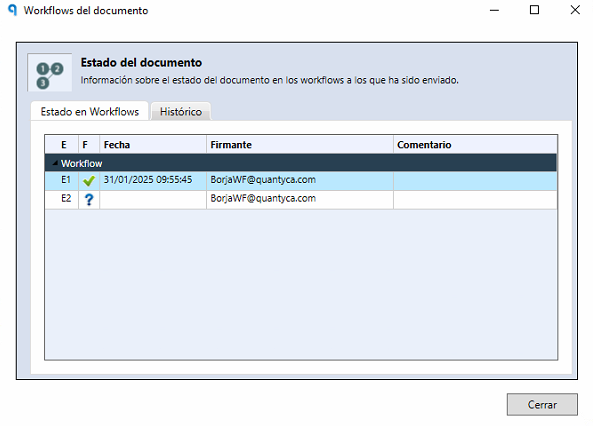
Document workflow
This icon shows the workflow status and its history: which stage it is pending at, whether it has been withdrawn or who has rejected it.
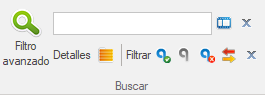
Advanced filter
Here you have various filters for searching documents.
Notify changes
Sends an e-mail to the users who have the company and fiscal year in their rules, to let them know there have been changes to the documents.

Export
There are three options:
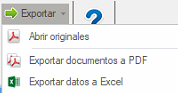
- Abrir originales (Open originals): opens the selected document or documents.
- Exportar documentos a PDF (Export documents to PDF): opens a window to choose how and where to save it.
- Exportar datos a Excel (Export data to Excel): opens a window to choose where to save the file.
In addition:
- Email
 : opens the default e-mail client and attaches the selected document or documents.
- Imprimir (Print)
 : sends the documents to the default printer.