
Updated on September 18, 2026
Dispatcher configuration manual for administrators
As an administrator, adapt how documents are sent and stored, as well as automation and access.
Introduction
This document explains how to configure the Dispatcher module and is aimed at Ubyquo Administrator users. Dispatcher lets you adapt the system to each company's specific needs regarding document sending and storage, process automation and access configuration.
Accessing the configuration
To begin, open the Dispatcher module and select the option: “Configuración” (Settings) > “Abrir configuración” (Open settings).
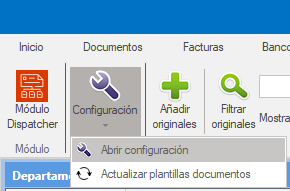
Doing so opens the "Parámetros de configuración" (Configuration parameters) window, which is divided into four tabs:

- Nombre fichero y ruta (File name and path): Lets you adapt Dispatcher to our folder tree, replicating our PDF naming policy and specifying what information we want to add to the body of the e-mail when sending by e-mail.
- E-mail y destinatarios (E-mail and recipients): Lets you set the sender e-mail addresses, include our signature in the e-mail and determine who will receive the documents.
- Automatización de envíos (Sending automation): Here you can customize the automatic sending of the documentation processed by Dispatcher, whether by e-mail, to folders or to the Documents module.
- Permisos de acceso (Access permissions): Lets you restrict access to documents for specific users.
Tab: Nombre fichero y ruta (File name and path)
This section is essential for adapting the Dispatcher module to the company's file structure and document sending. It gives you the flexibility to configure how documents are saved, where they are stored and what information is included in the body of the e-mail when it is sent. For each type of document, such as payslips or tax forms, you can customize the following elements:
- Árbol de Carpetas (Folder tree): Defines the folder structure in which the documents will be saved.
- Nombre del PDF (PDF name): Configures how the PDF file is named when it is saved or sent.
- Información del Documento (Document information): Determines what document information will be included in the body of the e-mail.
PDF name configuration
This section sets the structure of the PDF file name. You can build the file name using fixed values and document-specific data. To do so, select the value type in the corresponding column:
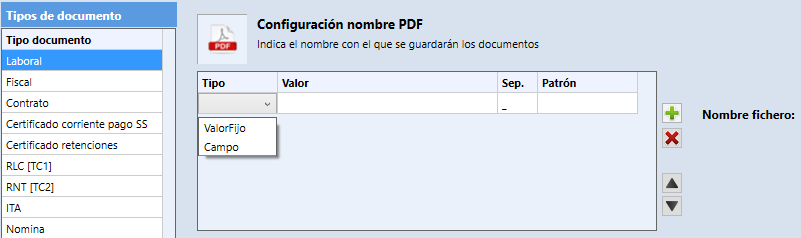
- Valor Fijo (Fixed value): Text that you type directly.
- Campo (Field): A variable that represents the document's metadata, visible in the "Valor" (Value) column.
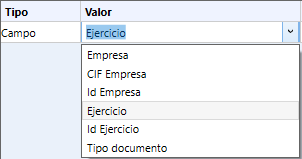
The "Nombre Fichero" (File name) column shows how the file name structure is built. The following options are available to adjust the configuration:
- Añadir o Eliminar Información (Add or remove information): Adds or removes fields as needed.
- Subir o Bajar Línea (Move line up or down): Changes the order of the fields.
- Carácter Separador (Separator character): Defines the character that separates the fields (it must be allowed in file names).
- Year: yy [25] | yyyy [2025]
- Month: M [4] | MM [04] | MMM [abr] | MMMM [abril] (month names are generated in Spanish)
- Day: d [1] | dd [01]
- Number of digits: 00000 Generates a 5-digit number padded with zeros on the left (e.g. 00123, 02376).
- Currency: #,###.## Format with a thousands separator and two decimal places.
This configuration allows complete customization of how the documents generated by Ubyquo Dispatcher are filed and named.
Folder configuration
This section lets you set the path where documents will be saved when you select the option:
"Enviar documentos" (Send documents) > "Enviar a carpeta" (Send to folder).
Correct folder configuration is essential for organizing and filing the generated documents, respecting each company's internal folder structure. The available options are detailed below:
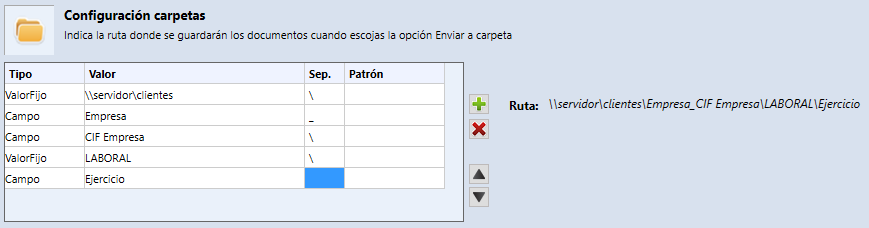
- Ruta (Path): Specifies the folder structure in which the documents will be stored. You can build this path using the same principles applied in the PDF name configuration: fixed fields, variable fields and custom ordering.
- Separadores (Separators): Separators determine how folder sublevels are generated.
- — If you use the backslash
\, a new folder level will be created. - — Any other character will be concatenated to the next field within the same level.
- Important considerations:
- — We recommend avoiding special characters not supported by the file system.
- — The path should clearly and consistently reflect the desired filing structure.
- — Make sure to use only characters that are allowed in folder names.
E-mail sending configuration
The e-mail configuration lets you define how documents will be sent by e-mail. This feature is essential for ensuring efficient and personalized communication with recipients.
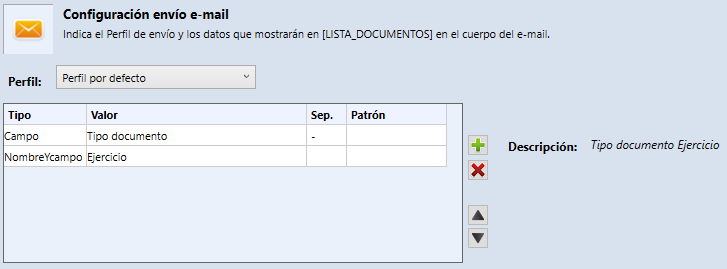
- Datos del Cuerpo (Body data) – [LISTA_DOCUMENTOS]: This variable lets you automatically include a list of the documents sent in the body of the message. You can also add other fixed or dynamic fields (document fields) to enrich the content of the e-mail.
- Nombre y Campo (Name and Field) (data type): A variant of the "Campo" (Field) type that shows the field name followed by its value to make the content easier to understand.
E-mail sending profile
- Perfil (Profile): Lets you associate a specific sending profile with the selected document type. This includes information such as the sender e-mail account, signature, predefined subject, etc.
- Uso del perfil por defecto (Using the default profile): If no specific profile is selected, the default sending profile will be applied automatically.
This feature provides complete flexibility to adapt sending to the needs of each document or customer, while maintaining a professional and consistent presentation.
Recommended configuration
A consistent, well-structured configuration is essential to avoid errors, duplicates and wasted time in document management. A suggested configuration is described below:
- Select the general department the document belongs to (for example: Labor, Tax, etc.).
- Define default values for all documents in that department.
Example: If all documents in the Laboral (Labor) department are stored in the same root folder, configure that folder at department level instead of repeating it for each document.
- Select a specific document type (for example, RLC[TC1], Payslip, Form 111, etc.).
- Adjust or add fields specific to that document, such as the PDF name, path or e-mail body.
Example: If all RLC[TC1] documents must include the month and year in the PDF name, add the field Ini periodo liquidación (Settlement period start) with the pattern yyMM.
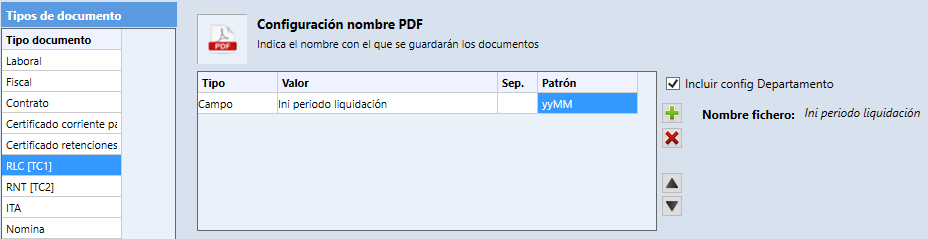
Using the “Incluir Config Departamento” (Include Department Config) option
- Check this option on the documents that should inherit the department's general configuration.
- Documents with this option enabled will automatically take the parameters defined in their department.
- This allows an efficient, uniform configuration without needlessly repeating data.
Other configuration options
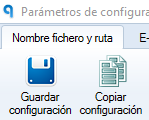
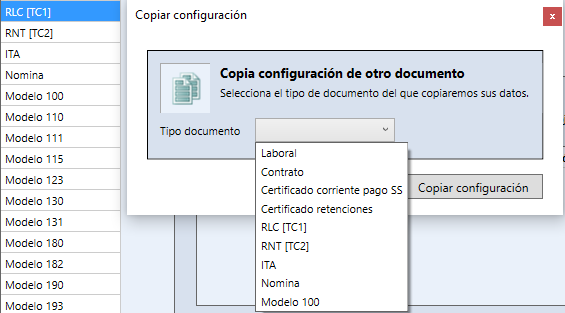
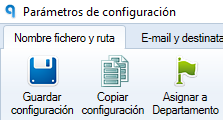
- Description: Lets you copy the entire configuration of an existing document to another document.
- Use: Ideal when working with similar documents and you want to avoid repeating the configuration manually.
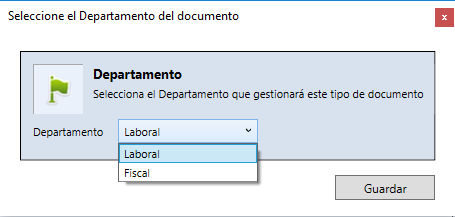
- Description: Lets you change the department a document belongs to.
- Use: Useful when the document classification is reorganized.
Example: Moving the Form 111 document from Laboral (Labor) management to Fiscal (Tax) management.
Configuring e-mail and recipients
The e-mail and recipient configuration in Ubyquo Dispatcher is essential for ensuring the effective delivery of the generated documents. This feature lets you customize both the content of the e-mails and the recipients, adapting to the needs of each area or company.
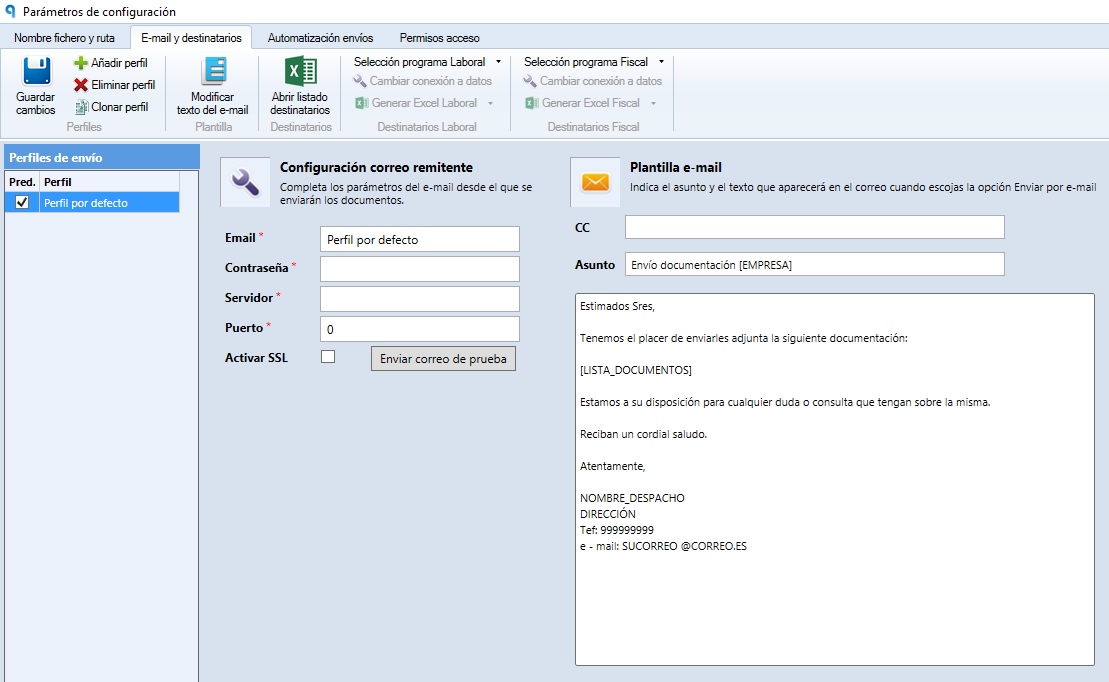
To access this section:
- Open the Dispatcher module.
- Select the option “Configuración” (Settings) > “Abrir Configuración” (Open settings).
- Go to the “E-mail y destinatarios” (E-mail and recipients) tab.
Each e-mail address used to send documents must be associated with a sending profile. These profiles contain all the technical information required for sending via SMTP and the base content of the e-mail.
Add a profile
To add a new profile:
- Click "Añadir perfil" (Add profile).
- Fill in the following fields:
- Email: The address from which the documents will be sent. This field also serves as the profile identifier.
- Contraseña (Password): The password associated with the e-mail account.
- Servidor (Server): The address of the SMTP server of the e-mail provider.
- Puerto (Port): The SMTP port to be used.
- Activar SSL (Enable SSL): Check it if a secure connection is required.
- Enviar correo de prueba (Send test e-mail): Checks that the data entered is correct and the server responds.
Each profile lets you customize the content of the message that recipients will receive:
- CC: E-mails in copy (optional).
- Asunto (Subject): It can include the variable
[EMPRESA]. - Cuerpo del e-mail (E-mail body): You can include the variable
[LISTA_DOCUMENTO]to indicate the description configured in the Nombre fichero y ruta tab.
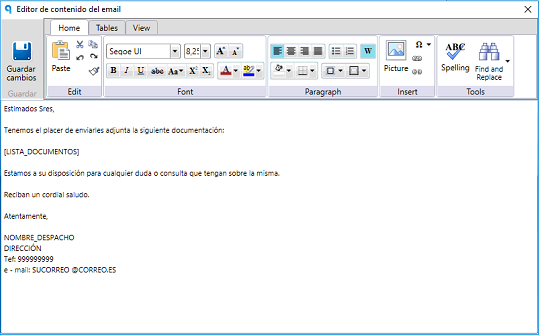
To customize the body of the e-mail:
- Click Modificar texto del e-mail (Edit e-mail text).
- An editor will open where you can adjust the text and the signature.
Available tools:
- Añadir Perfil (Add profile): Creates a new sending profile.
- Eliminar Perfil (Delete profile): Deletes the selected profile.
- Clonar Perfil (Clone profile): Copies an existing profile, useful for reusing similar configurations.
Correct recipient management lets you distribute documents to the right contacts at each company. The information is managed through the Listado Destinatarios (Recipients list) Excel file, which must contain:
- ID_Empresa_Laboral / Fiscal: Company codes in the Labor and Tax programs.
- CIF_Empresa: The company's NIF.
- Empresa: The name that Dispatcher will use to register and classify.
- Email_Laboral01-05 and Email_Fiscal01-05: Up to 5 e-mails per type.
- Perfil_Laboral / Fiscal: Assignment of a specific profile for each type of sending.
- From Dispatcher, go to:
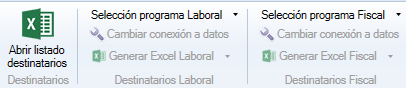
- — Selección programa Laboral (Labor program selection).
- — Selección programa Fiscal (Tax program selection).
- Choose:
- — Contabilidad [Sage] (Accounting [Sage])
- — Contabilidad [A3ECO] (Accounting [A3ECO]). A3ECO & A3CON Connect Ubyquo
- Configure the database connection if necessary.
- Select:
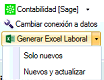

- — Solo Nuevos (New only): Only new records are created.
- — Nuevos y actualizar (New and update): Be careful with this option, as it could overwrite data.
Important:
- A3ECO and A3CON do not bring in e-mails automatically, only the basic identifiers.
- We recommend making backups of the Excel file with Guardar como (Save as) every time it is edited.
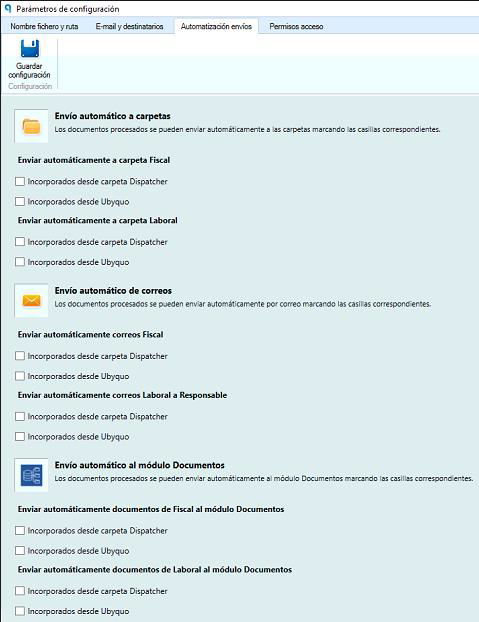
Ubyquo Dispatcher lets you automate document sending processes:
- From the Dispatcher folder: When documents are placed directly in a specific folder.
- From Ubyquo (Dispatcher tab): Through the system interface.
- Each type of sending can be automated by department and method of intake.
- Previously configured rules are applied.
Efficiency: Reduces time and manual work.
Consistency: Ensures compliance with predefined rules.
Speed: Speeds up the delivery process.
Fewer errors: Less human intervention means a lower risk of mistakes.
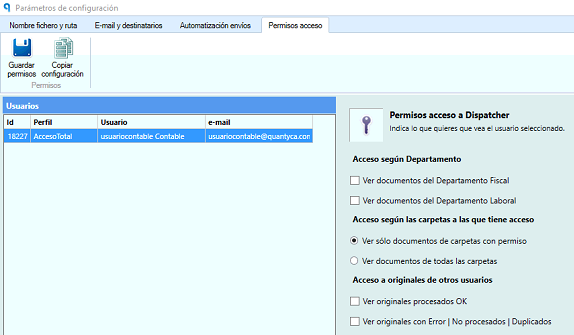
Dispatcher lets you set visibility levels for each user.
- By department: Only Labor or Tax.
- By folder: The Ver solo documentos de carpetas con permisos (View only documents from folders with permissions) option is enabled.
- Access to other users' originals: Lets you see documents uploaded by others.
Configuration:
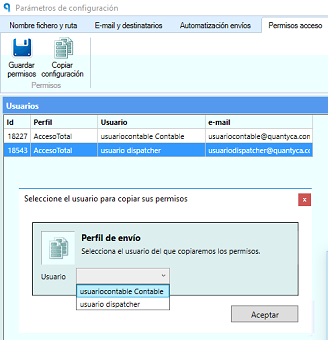
- Permissions can be copied from one profile to another to make administration easier.
- Lets you define which users can see what information depending on the context.
Benefits:
Security: Restricts information to what is relevant to the user.
Compliance: Meets internal and external policies.
Control: Granular access management.
Productivity: Improves workflow by reducing information noise.