
Updated on September 18, 2026
Banks Module User Manual
See the usage guide for the Banks module, starting with signing in and changing your password.
Signing in
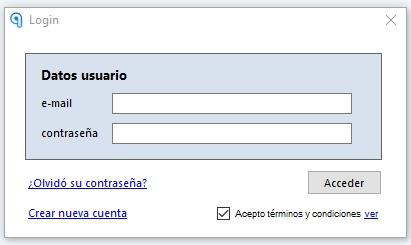
When you run the program, it will ask for your user, which is the e-mail address provided during registration, and the password provided by the installer and/or trainer.
Changing your password
If you forget your password, you can click the "¿Olvidó su contraseña?" (Forgot your password?) option to receive a new password by e-mail.
To change your password, follow these steps:
- Go to Inicio (Home) > Administración de la cuenta (Account administration). (If it does not open, you can access it from here)
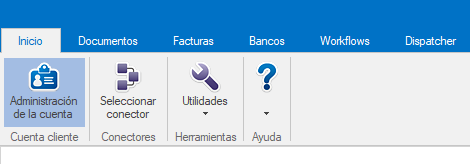
- Select the "Mis datos" (My details) option and click "Cambiar contraseña" (Change password).
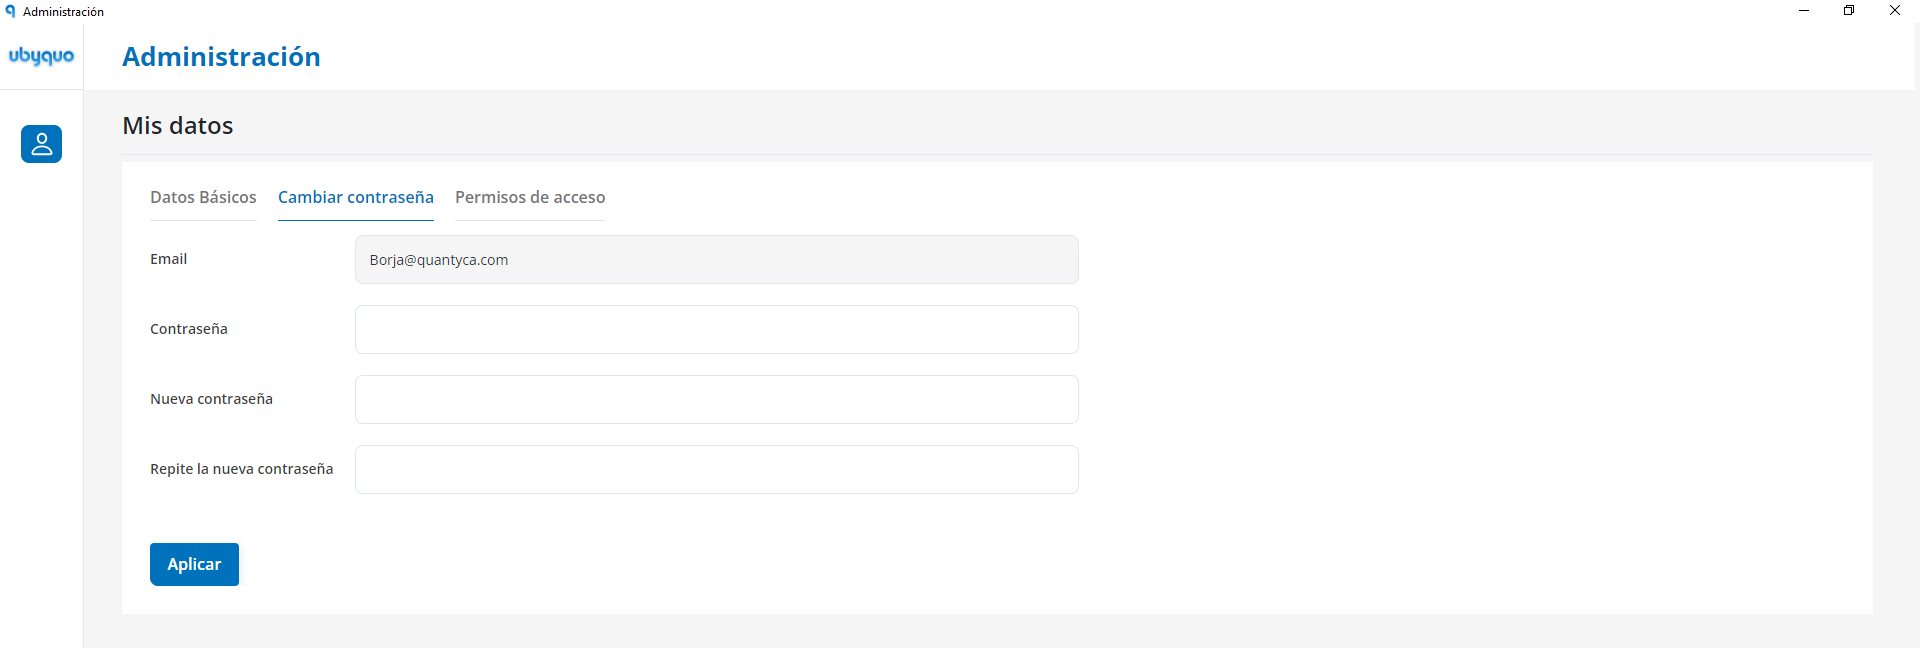
- The new password must be:
- — Alphanumeric.
- — At least 8 characters.
- — A mix of uppercase and lowercase letters.
We recommend updating your password regularly for security reasons.
Accessing the Help Center

To get familiar with the options of the documents module, go to the Help Center (Centro de Ayuda) from the module icon.
There you will find detailed articles and guides that will help you resolve common questions and get the most out of the tool.
Banks settings
Make general settings and settings specific to each fiscal year, and manage views within the Bancos tab.
From this option, you can change the company's main details and set general parameters for invoice management.
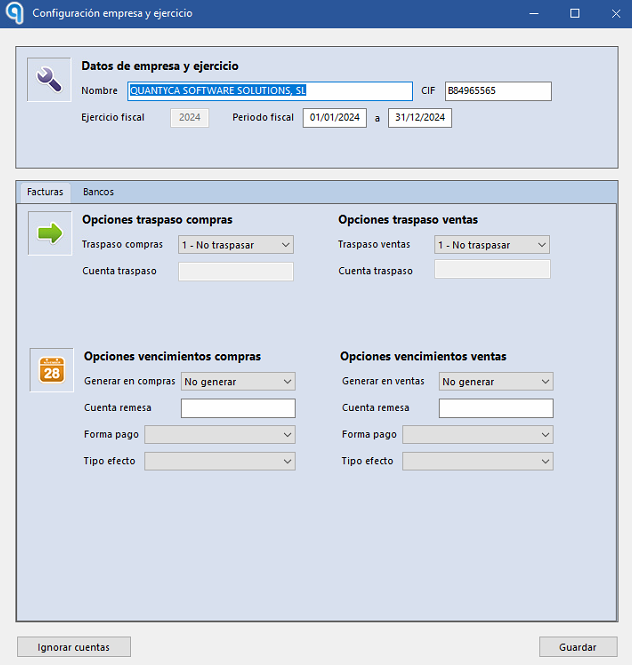
- Nombre (Name), CIF and Periodo Fiscal (Fiscal period) can be changed from this section.
From this tab you configure:
- Traspaso de compras o ventas (Transfer of purchases or sales): lets you define the rules for transferring documents.
- Generación de vencimientos (Generation of due items): the option to turn on the automatic generation of due items for purchases or sales globally.
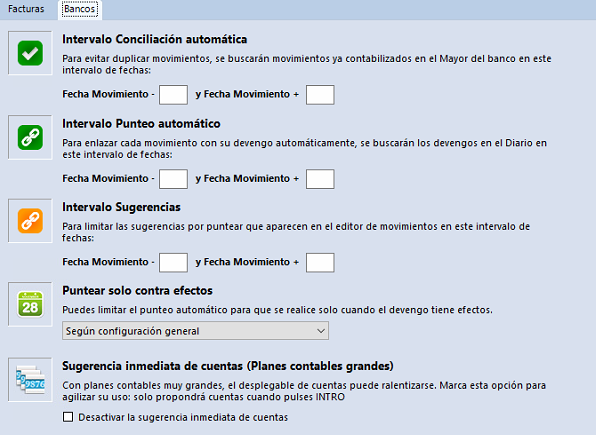
Options related to bank reconciliation:
- Set the day range for reconciliation, matching and suggestions.
- Enable “Puntear automáticamente solo contra efectos” (Match automatically only against receivables/payables).
- Optimize performance for large charts of accounts by turning on “Desactivar la sugerencia inmediata” (Disable immediate suggestions), which reduces resource usage.
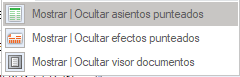
Managing views in the Bancos tab.
Manage folders - Creating companies and fiscal years
There are two ways to create companies and fiscal years in the system: bulk creation and manual creation.
Note: If you use Sage Seos, see the specific guide in SAGE - CSV Connector.
If you want to create several companies and fiscal years, follow these steps:
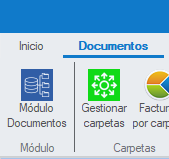
- Go to the "Documentos" (Documents) tab and select "Gestionar Carpetas" (Manage Folders).
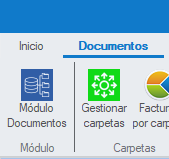
- Click "Creación masiva" (Bulk creation).
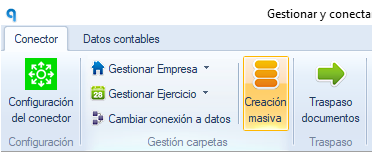
- In the pop-up window, the companies and fiscal years available in the ERP or accounting software will be shown.
- — Select the ones you want and click "Generar carpetas seleccionadas" (Generate selected folders).
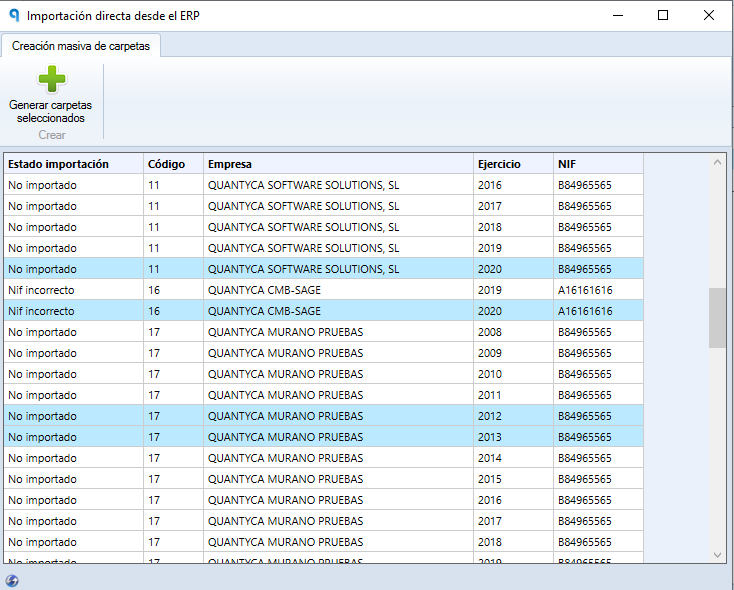
- Check that the "Estado importación" (Import status) column shows the message "Importación correcta" (Import successful), which means they were created successfully.
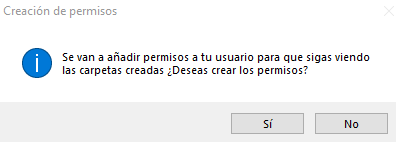
- A window will open to grant permissions to your user if you do not have the administrator profile.
- — Select "Sí" (Yes) and close the windows to return to the main Documents view.
To create companies and fiscal years manually, follow these steps:
- Go to the "Documentos" tab and select "Gestionar Carpetas".
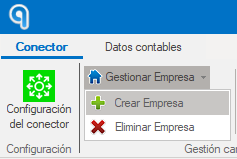
- Click "Gestionar Empresa" (Manage Company) and select "Crear Empresa" (Create Company).
- Fill in the required details (company name and CIF) and click "Guardar" (Save).
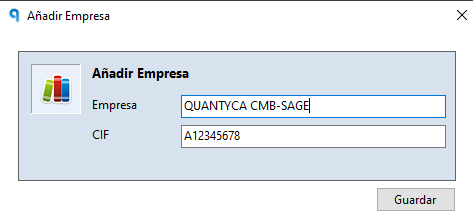
- Then select "Gestionar Ejercicio" (Manage Fiscal Year) and click "Crear Ejercicio" (Create Fiscal Year).
- Enter the corresponding year and click "Guardar".
- Finally, sync the chart of accounts (Plan Contable) to complete the process.
You can see how to do it here.
Deleting a fiscal year or company
This process should only be carried out by administrator users.
Before deleting, make sure the company or fiscal year contains no documents or bank transactions in posted status.
- Go to the "Bancos" tab in Ubyquo.
- Select the transactions of the fiscal year.
- At the top, click "Cambiar de estado" (Change status).
- Choose "Marcar como no contabilizado" (Mark as not posted).
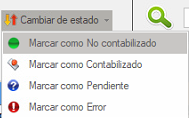
- Delete the transactions from "Gestionar cuentas y tarjetas" (Manage accounts and cards)

- Select the bank and click "Borrar movimientos" (Delete transactions)
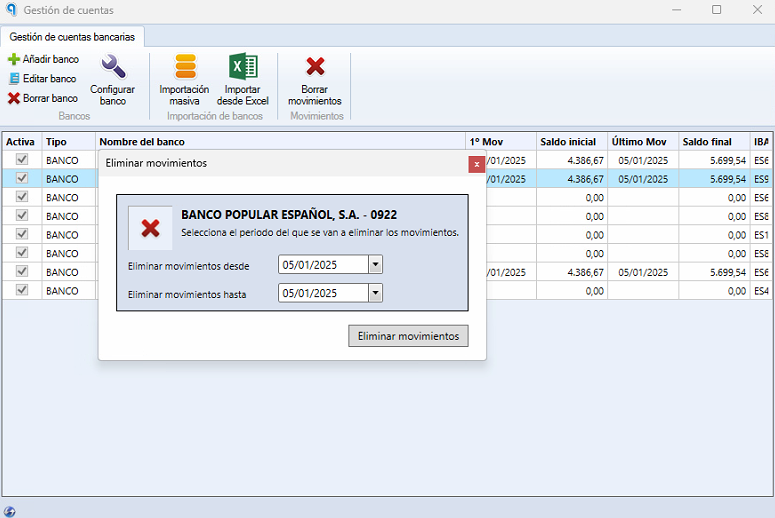
- Go to the "Documentos" tab in Ubyquo.
- Select the fiscal year.
- Right-click with the mouse.
- Choose "Eliminar ejercicio" (Delete fiscal year).
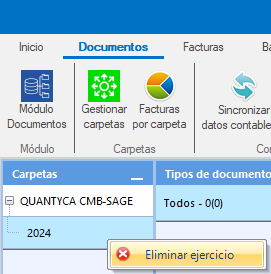
- Go to the "Documentos" tab in Ubyquo.
- Select the company.
- Right-click with the mouse.
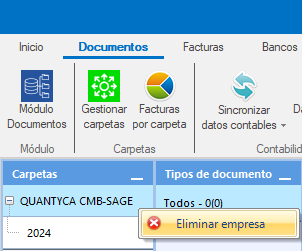
- Select "Eliminar empresa" (Delete company).
Managing accounts and cards
Add or delete bank accounts, cash accounts and cards, as long as they have no associated transactions.
Note: You cannot create banks with an IBAN that is already registered.
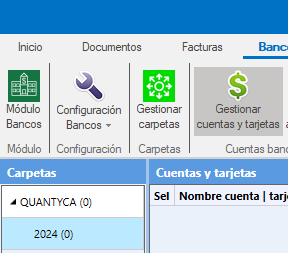
- Bancos > Gestionar cuentas y tarjetas
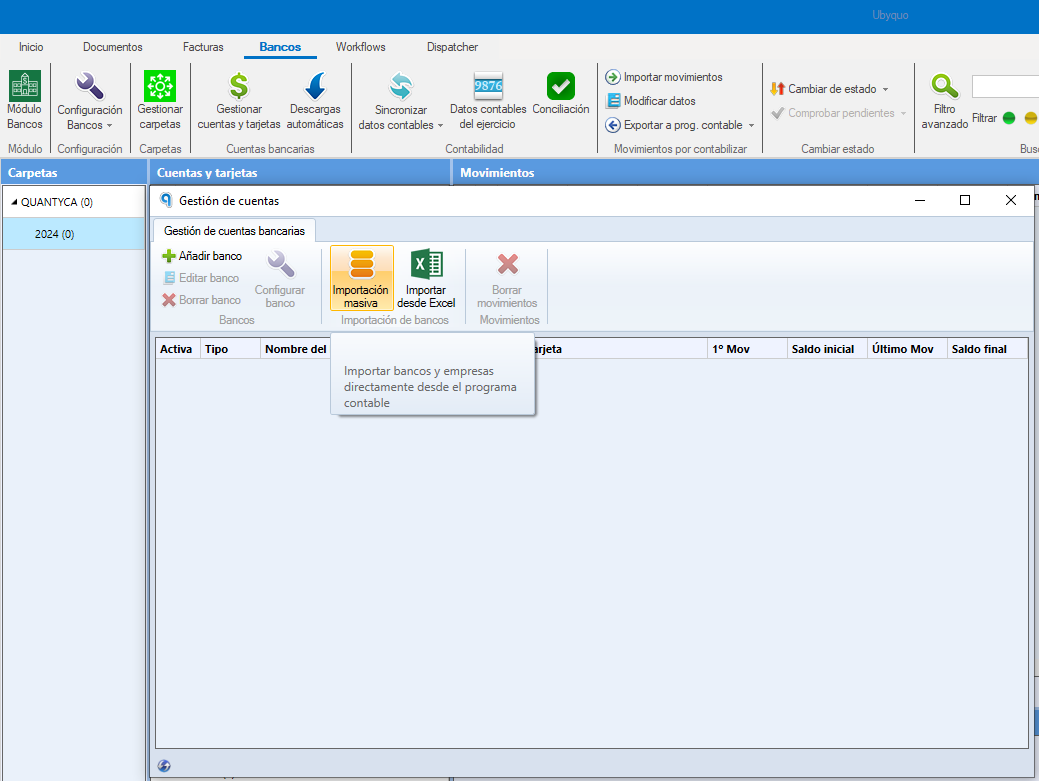
- Bulk import (Importación masiva).
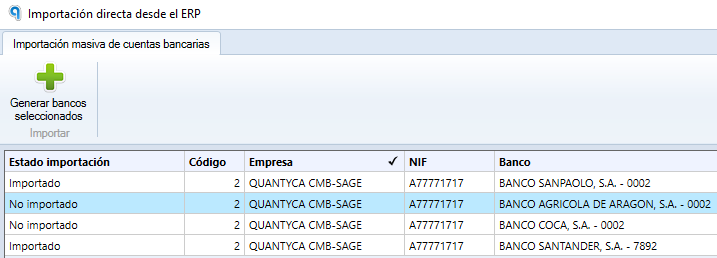
- Select and click Generar bancos seleccionados (Generate selected banks).
- Go to the "Bancos" tab.
- Select the relevant company and fiscal year.
- Click "Gestionar cuentas y tarjetas".
- Select the "Añadir banco" (Add bank) option.
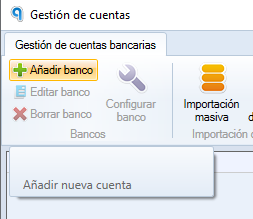
- On the next screen, fill in the required information, including:
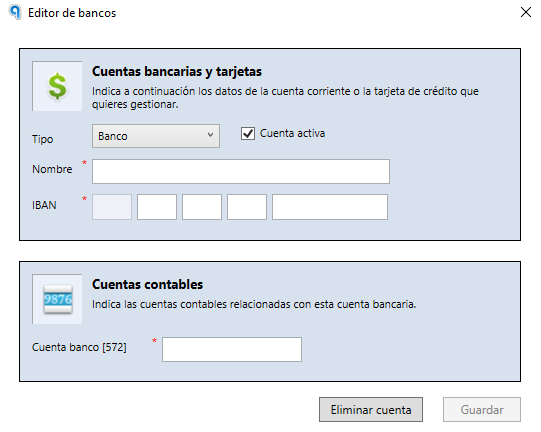
- — The IBAN of the bank account.
- — The name of the account.
- — The related account (572) in the chart of accounts.
- Go to the "Bancos" tab.
- Select the relevant company and fiscal year.
- Click "Gestionar cuentas y tarjetas".
- Select the "Importar desde Excel" (Import from Excel) option.
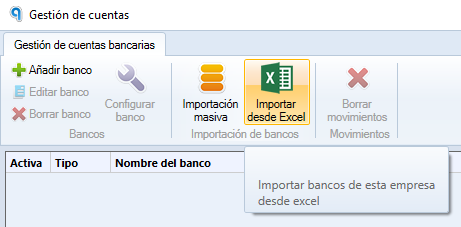
- A Windows window will open so you can select the Excel file with the bank accounts.
- Click "Abrir" (Open) to import the bank accounts from the Excel file.
- Go to the "Bancos" tab.
- Select the relevant company and fiscal year.
- Click "Importar movimientos" (Import transactions).
- A Windows window will open so you can select the bank account's Norma 43 file.
- Click "Abrir".
- A notice will appear saying the account is not registered and asking whether you want to add it.
- Click "Sí".
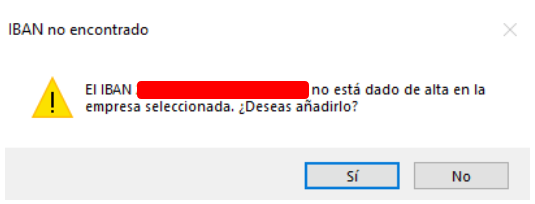
- The registration window will open with the IBAN filled in and will ask for the corresponding account in the chart of accounts (572).
- Enter the name of the Cash account or Card.
- Fill in the corresponding Cash account or Card account.
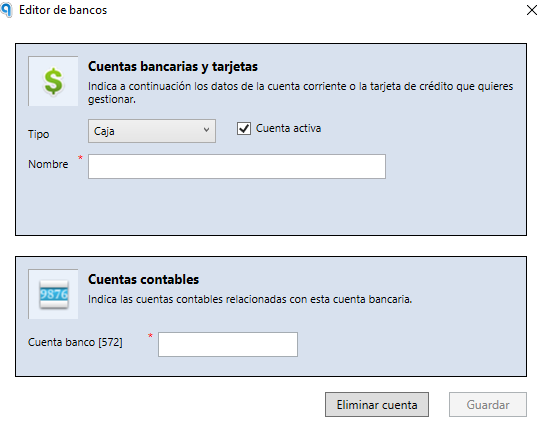
You can also edit banks, cash accounts or cards as needed.
- Edit: We can edit the name, IBAN or account number.
- — Click edit bank.
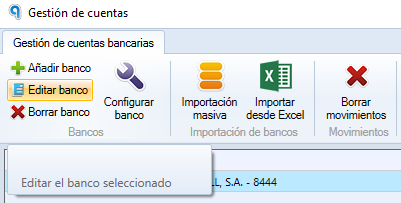
- — The following window will open, where we can make the edits.
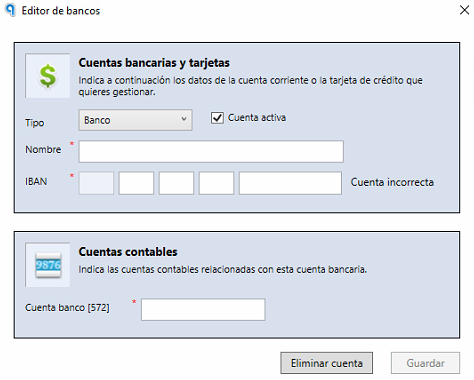
- Delete a Bank, Cash account or Card: To delete a bank, cash account or card, there must be no associated transactions. Once all the transactions have been deleted, you can delete the bank and create it again whenever needed.
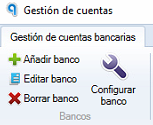
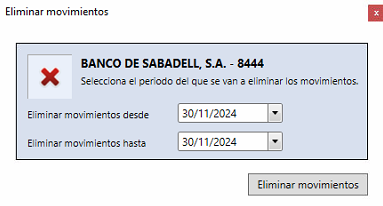
- Delete transactions:

- — Transactions can only be deleted by full dates.
- — You cannot delete intermediate transactions within a date range, as Ubyquo does not allow mismatches in the accounting.
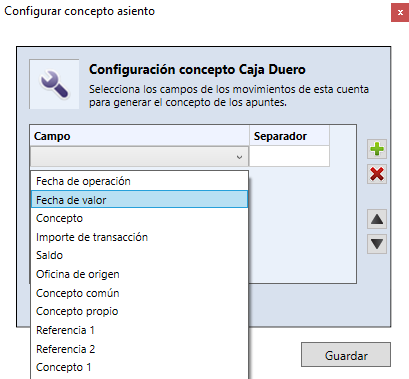
Customize the Concepto del Movimiento (Transaction description) field with Norma 43 or Excel fields, using "+" to add and "x" to remove.
Automatic downloads
- Click Descargas Automáticas (Automatic downloads).
- Select the bank and click Datos del firmante (Signatory details).
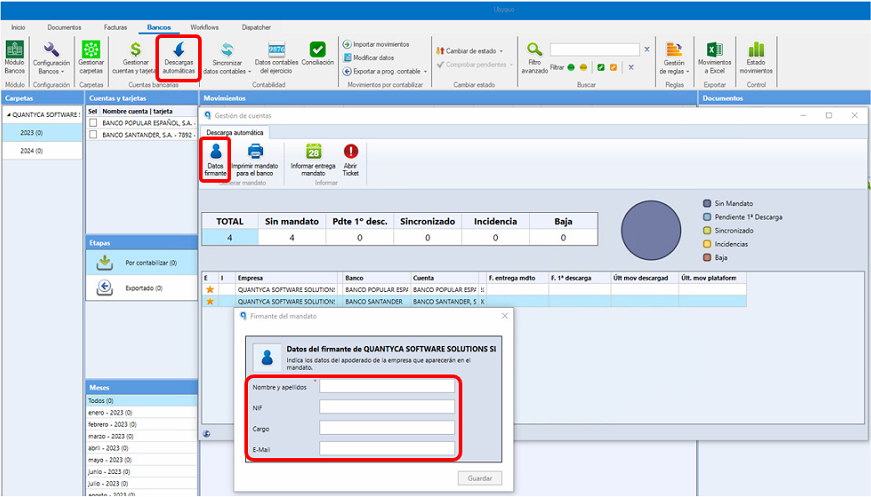
- Fill in the attorney's details.
- Print the mandate.
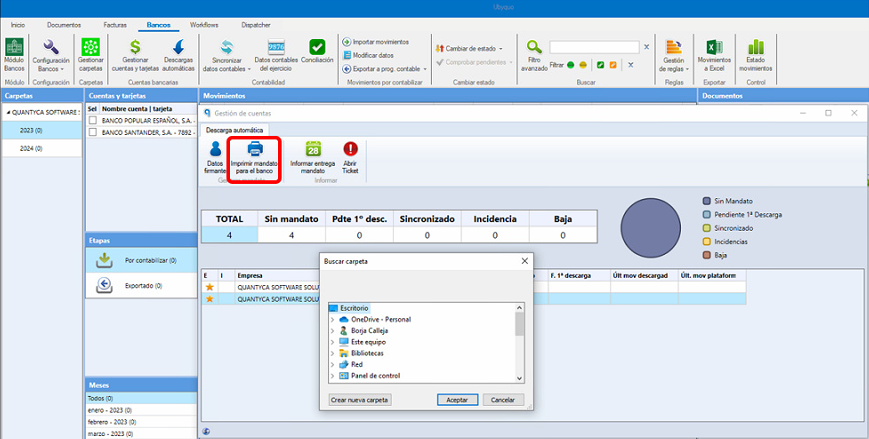
- Ask the branch for written confirmation.
- Activation takes between 15 and 30 days.
- Check the first download date.
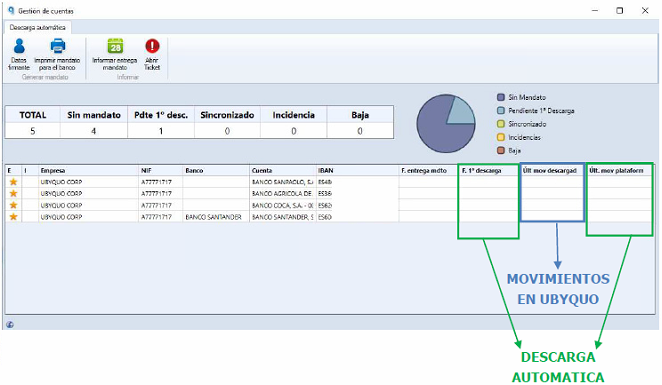
- Tracking fields:
- — Mandate delivery date.
- — First download date.
- — Last transaction downloaded.
- — Last transaction on the platform.
Syncing accounting data
Note: If you use Sage Seos, see the specific guide in SAGE - CSV Connector.
There are two ways to sync the accounting data:
- Lets you sync only the fiscal year you are currently on.

- Makes it easy to sync all the fiscal years you select.
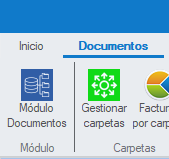
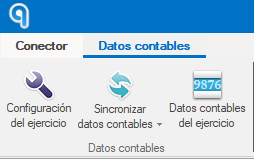
Both options let you keep the data up to date according to your needs. The available sync types are described below:
- Click "Sincro Rápida (solo nuevos)" (Quick sync, new only) or "Smart Sync (nuevos y cambios desde la última sincro)" (new items and changes since the last sync).
- Downloads only new or modified accounts since the last sync.
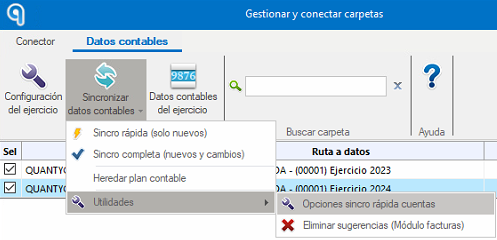
- Go to the "Documentos" tab and select "Gestionar Carpetas".
- Go to the "Datos Contables" (Accounting Data) tab.
- Click "Sincro Rápida (solo nuevos)" to download the new accounts since the last sync.
- Go to "Opciones sincro rápida cuentas" (Quick account sync options).
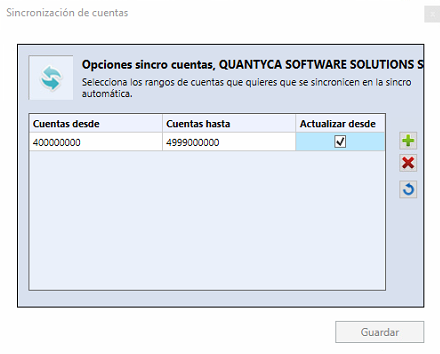
- Add account ranges.
- Delete accounts if necessary.
Ideal for frequent syncs or one-off reviews.
- Click "Sincro Completa (nuevos y cambios)" (Full sync, new items and changes) to download:
- — The full chart of accounts
- — The journal (Diario)
- — The receivables/payables portfolio (Cartera de Efectos)
Recommended for new companies or when starting a fiscal year.
Lets you specify a value or range (accounts, journal entries, receivables/payables) to sync. It is available in all the options above.
To carry over the Chart of Accounts, Journal and Receivables/Payables Portfolio from one year to the next:
- Only available in "Gestionar Carpetas" > "Datos Contables" tab.
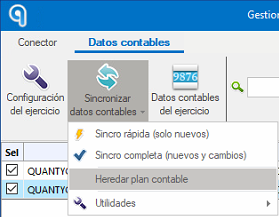
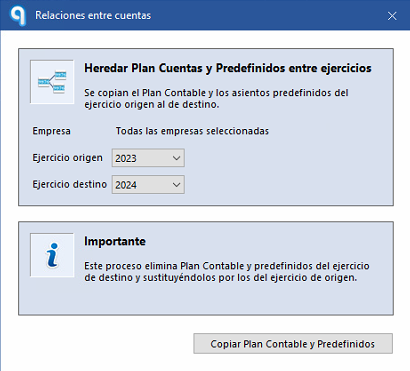
- Makes it easier to keep the accounting continuous between fiscal years.
Fiscal year accounting data
In the Documentos, Facturas and Bancos tabs, you will find the "Datos contables del ejercicio" (Fiscal year accounting data) button.
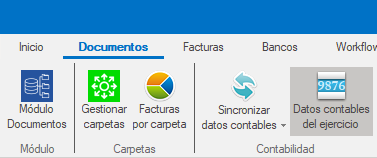
From here you can access several options:
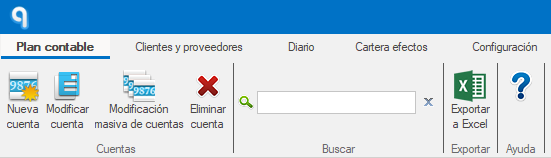
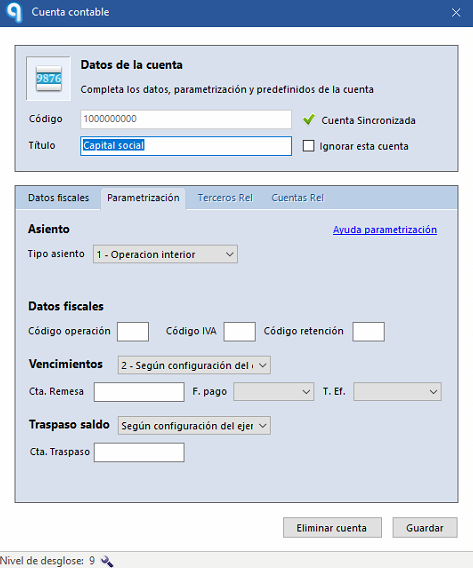
- Edit account (Modificar cuenta):
- — Journal entry type
- — Tax bases with 0% VAT
- — Codes: operation, VAT, withholding (mandatory if applicable)
- — Due items
- — Balance transfers
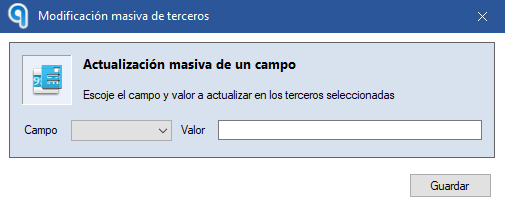
- Bulk edit (Modificación masiva):
- — Lets you set the same fields on several accounts.
- — Only one field at a time can be changed.
- Edit third party (Modificar tercero):
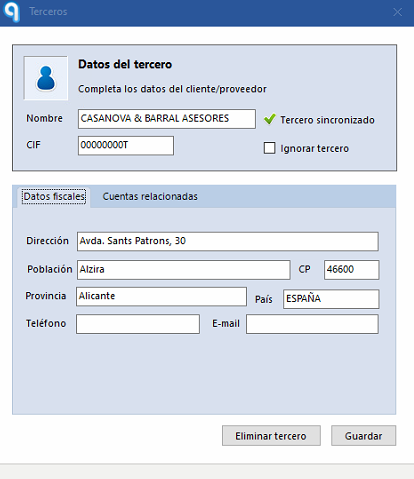
- — Name, CIF, tax details
- — Option to ignore unused accounts
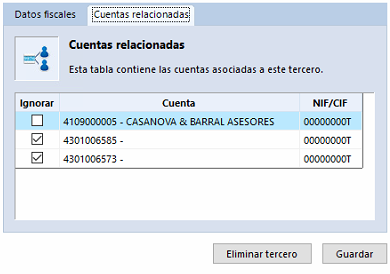
- — Ubyquo will choose the account automatically if only one is related
- Bulk edit of third parties (Modificación masiva de terceros):
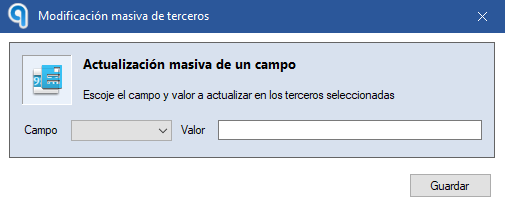
- — Lets you apply changes to several records at once.
- Shows all synced journal entries.
- Does not allow changes from this section.
- Shows all synced receivables/payables.
- When you right-click a receivable/payable item, you can:
- — Sync selected values
- — Remove from suggestions
- — Recalculate amount by matching
- — Change the item status
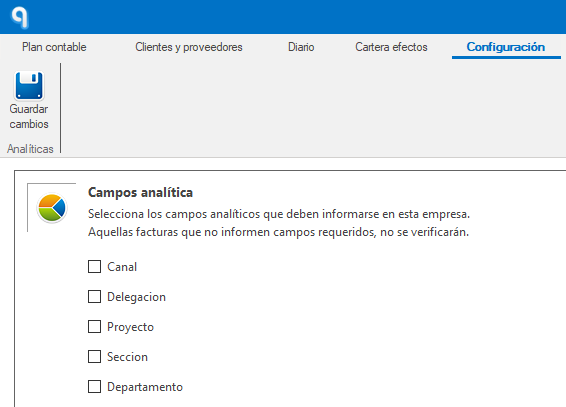
- Lets you define the mandatory analytical fields.
- If they are marked as mandatory and are empty, the document will not be allowed to be verified.
Bank reconciliation
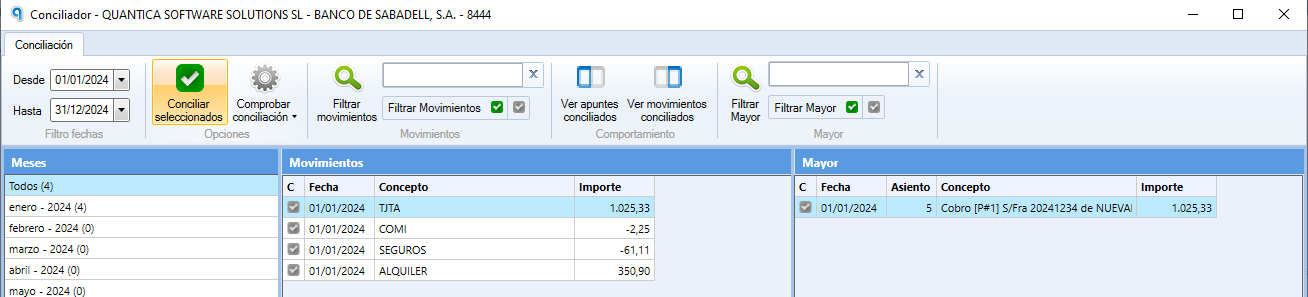
Prevents duplication of bank transactions that are already posted.
- Reconcile transactions:
- — Go to Conciliación (Reconciliation) from the Bancos tab.
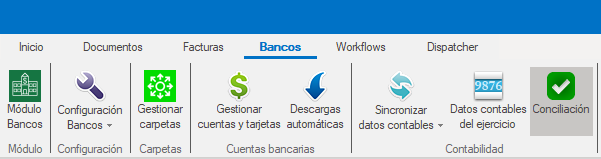
- — Find the transaction and click Conciliar (Reconcile).
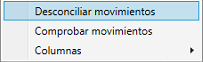
- Undo reconciliation:
- — From Conciliación.
- Right-click a reconciled transaction and select Desconciliar (Unreconcile).
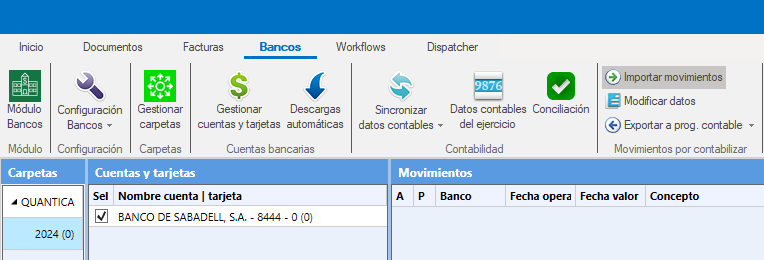
Importing transactions
- Select the company and fiscal year and click Importar movimientos (Import transactions).
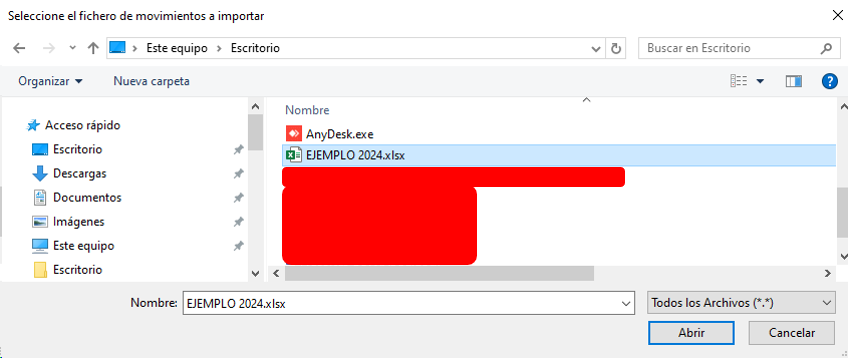
- A Windows file explorer appears so you can select a Norma 43 or Excel file with transactions.
- Click Abrir (Open).
- Choose the destination bank and fill in the mandatory fields (date, description, amount, balance).
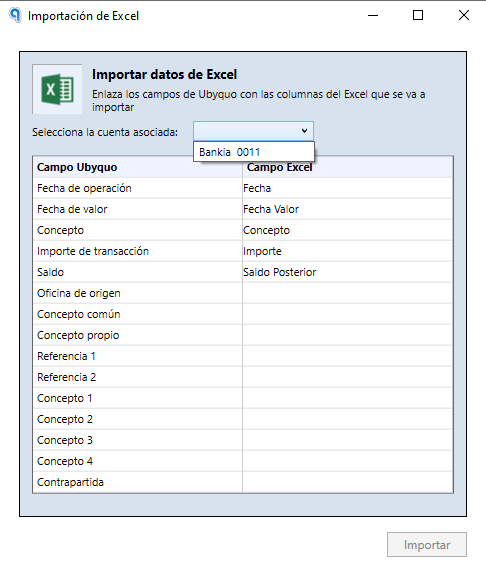
- Click Aceptar y procesar (Accept and process).
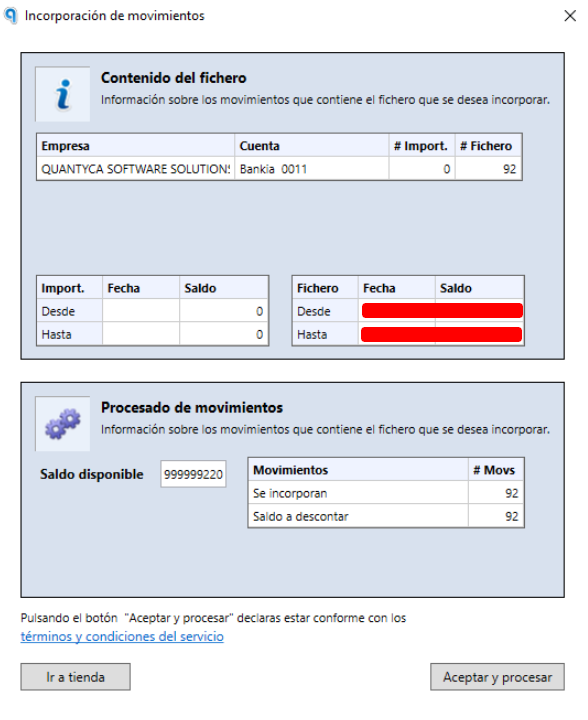
- A confirmation appears that the process was successful.
Posting the transactions
- Prepare transactions:
- From the transactions editor (double-click a transaction).
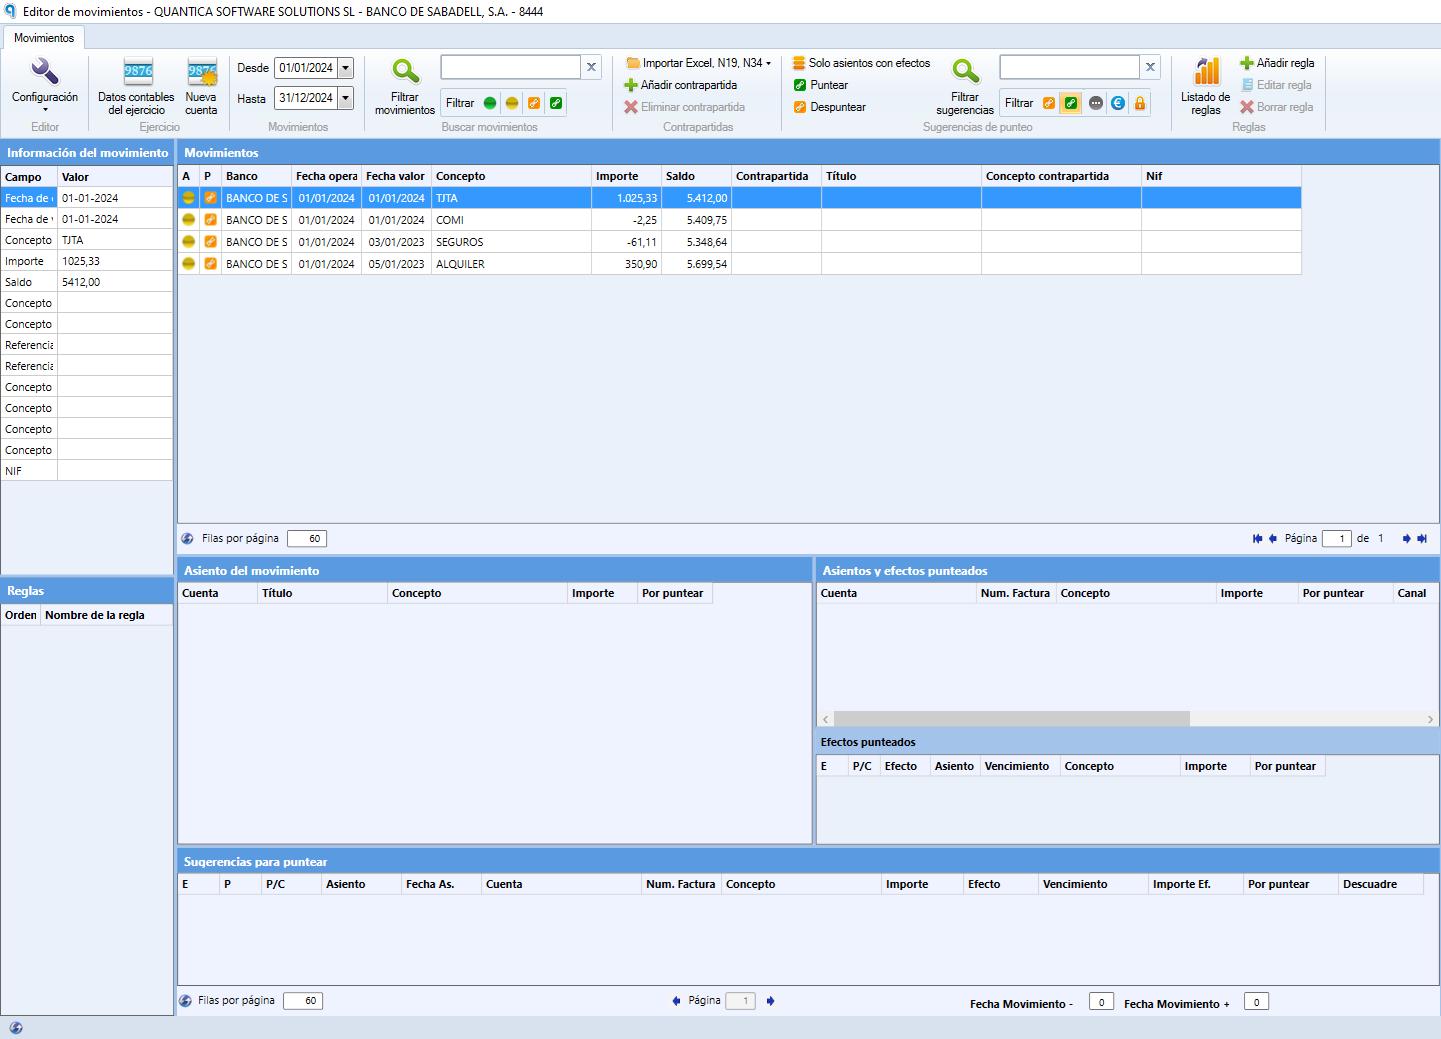
- Edit data

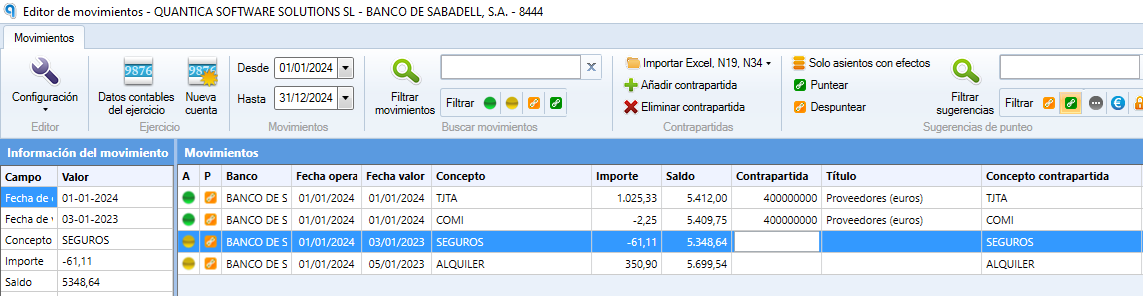
- Manual: Double-click the "Contrapartida" (Contra account) field and enter the contra account manually. The "A" column will change from yellow to green when the transaction is ready.
- Creating rules: Set up rules to autocomplete future transactions.
- — Fill in the following fields:
- — Nombre de la regla (Rule name): Give it an identifying name.
- — Dejar de evaluar si se cumple (Stop evaluating if met): Check this option to stop the search through the remaining rules if the current one is met.
- — Cuando (When): Check one or more conditions. Keep in mind that if you check more than one, all of them must be met. You can change the "Condición" (Condition) and "Valor" (Value) fields.
- — Contrapartida principal (Main contra account): Enter the contra account and, optionally, the description. If you leave the description blank, the one in the Chart of Accounts for this contra account will be used.
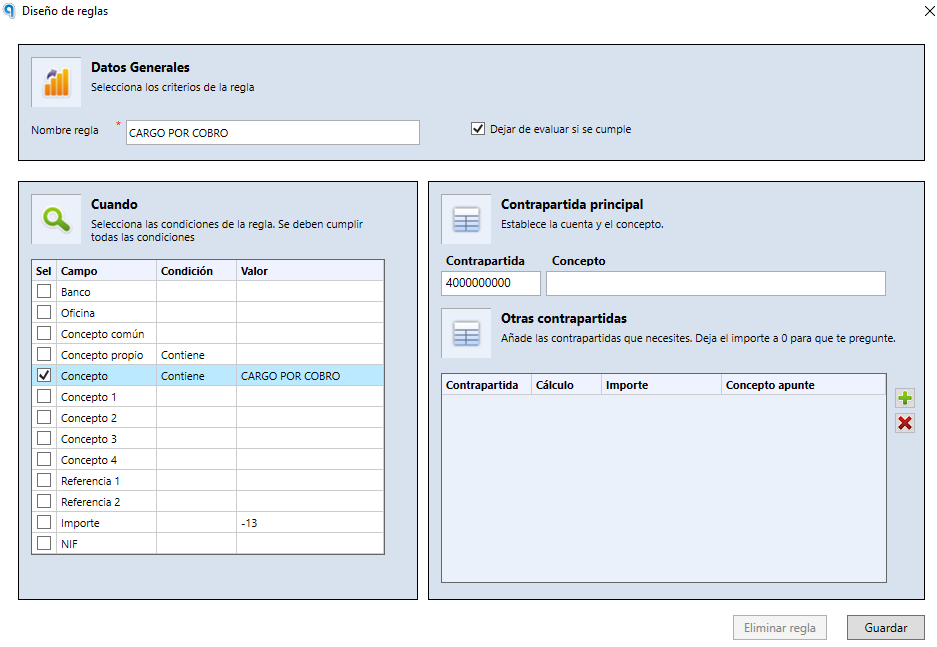
- — After filling in the fields, click "Guardar" (Save).
- — To apply a rule to several transactions, select them, right-click and choose "Recalcular asientos" (Recalculate journal entries).
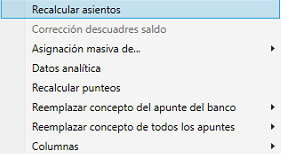
- — All the selected transactions will be autocompleted automatically.
- — Now we will proceed to post them.
- Export transactions:
- Click Exportar a prog. contable (Export to accounting software).
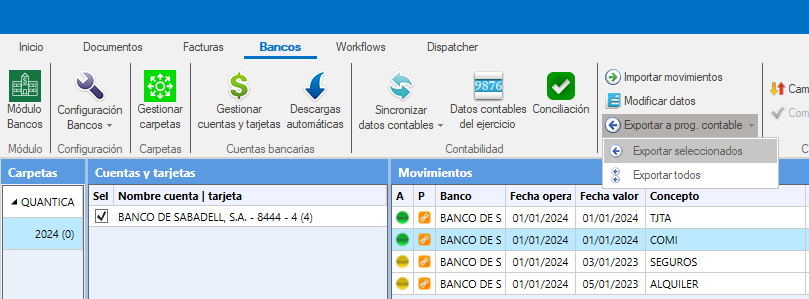
- — Exportar seleccionados (Export selected): Exports only the selected transactions.
- — Exportar todos (Export all): Exports all the transactions with the "A" column in green.
- Confirm in the export window and click Exportar.
Specific exports
- SAGE: Direct export or Export using the import manager
- A3ECO & A3CON: A3ECO & A3CON - Export using SUENLACE
- Altai: Export using Excel
- CONTASOL: Direct export
For export/import details, see your ERP's manual.
Changing status
We can change transactions to different statuses as needed:
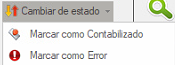
- Marcar como Contabilizado (Mark as Posted): When you select this option, the transactions are moved from the Por contabilizar (To post) tab to the Exportados (Exported) tab.
- Marcar como Error (Mark as Error): This option is used if the transaction is not found in our accounting.
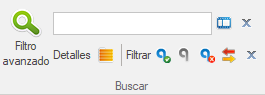
Advanced filter
This section offers different filters to use when searching for bank transactions.
Rule management
Rule management has two main options:
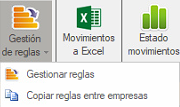
- Gestionar reglas (Manage rules): Access the rules created for the company you are working on.
- Copiar reglas entre empresas (Copy rules between companies): Lets you copy the existing rules from one company to another.
Transactions to Excel
This option will export all the selected transactions, together with the columns configured in the Movimientos (Transactions) section, to an Excel file for analysis or reporting.
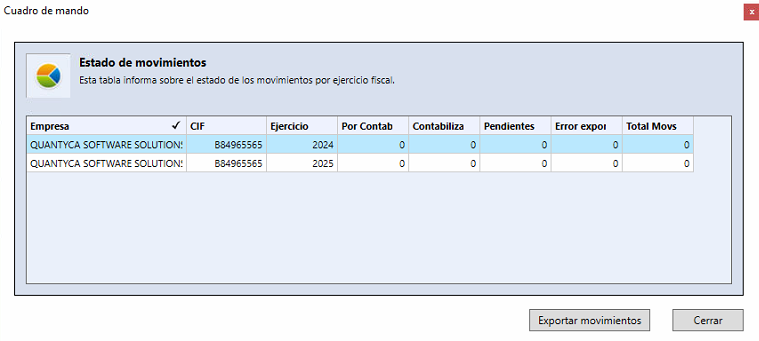
Transaction status
Shows a table with the transaction statuses by company and fiscal year.
Help
To get familiar with the options of the documents module, go to the Help Center from the Help icon. There you will find detailed articles and guides.
